
The air brake endorsement is a non-negotiable step on your journey to becoming a professional truck driver, and the knowledge test can be intimidating. It's filled with technical details, specific pressure readings, and critical safety procedures that you must know cold. Feeling unprepared can lead to test-day anxiety and costly re-takes, delaying your career on the road.
This guide cuts through the complexity and gets straight to the point. We've compiled a comprehensive list of the seven most critical types of air brake test practice questions you are guaranteed to encounter on your CDL exam. Each section breaks down a key system test, covering everything from the pre-trip inspection and air pressure build-up to leakage rate tests and spring brake operation.
Instead of just memorizing answers, you will learn the practical 'why' behind each procedure. By working through these detailed scenarios and explanations, you'll build the confidence and deep understanding needed to not only pass your exam but to operate a commercial vehicle safely and professionally. Let's get you ready for success.
1. Pre-Trip Air Brake System Inspection
The pre-trip air brake system inspection is the cornerstone of commercial vehicle safety. It's a systematic, hands-on check of all components, ensuring they are secure, free from damage, and functioning correctly before you even start the engine. This is one of the most fundamental sets of air brake test practice questions because it mirrors the exact process you'll perform daily as a professional driver and during your CDL skills test.
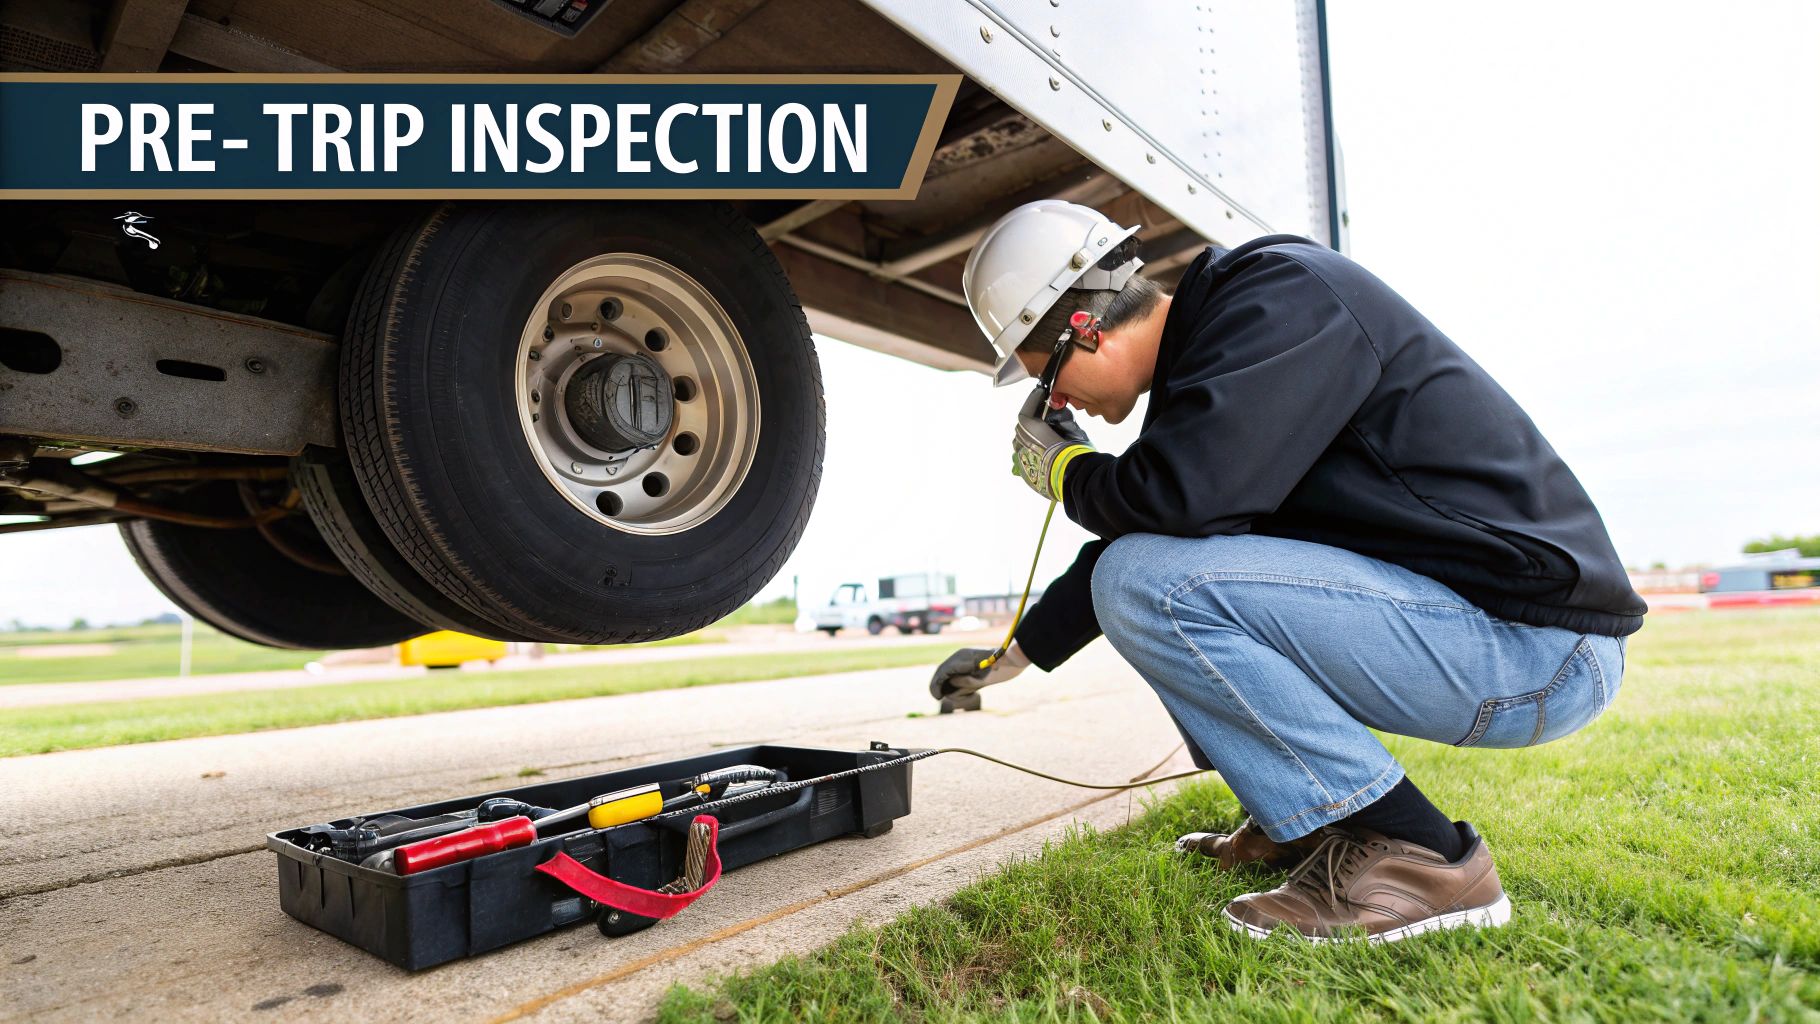
This inspection tests your ability to identify and verbalize the condition of critical parts. You must demonstrate knowledge of everything from the air compressor's security and belt condition to the integrity of air lines, tanks, brake chambers, and slack adjusters.
Why It's a Crucial Skill
Mastering this inspection is non-negotiable for any aspiring CDL holder. It's a core component of the CDL road test in every state and a daily requirement for professional drivers. DOT enforcement officers frequently perform these same checks during roadside inspections, and failure to identify a defect can result in fines or out-of-service orders. A thorough pre-trip check is your first line of defense against brake failure on the road.
Actionable Tips for a Flawless Inspection
To ensure you pass this section of your test and stay safe on the job, incorporate these habits into your routine:
- Follow a Sequence: Always inspect components in the same order. This builds muscle memory and minimizes the chance of forgetting a critical part.
- Use Proper Tools: A flashlight is essential for clearly seeing components under the vehicle. Keeping a spray bottle with soapy water can also help you quickly identify hard-to-hear air leaks.
- Verbalize Everything: During your test, clearly state what you are checking and what you are looking for. For example, "I am checking this air line for abrasions, bulges, and cuts, and ensuring the fittings are secure and not leaking."
- Document Defects: In a real-world scenario, always document any issues you find. This creates a record for maintenance and ensures problems are addressed before the vehicle is operated.
2. Air Pressure Build-Up and Cut-In/Cut-Out Test
This test assesses the heart of the air brake system: the air compressor and its governor. It's a critical set of air brake test practice questions because it verifies that the system can build air pressure efficiently and maintain it within the correct operating range. You are demonstrating that the compressor can supply enough air for braking and that the governor correctly tells it when to start and stop pumping.
This two-part test involves checking how quickly the air pressure builds from 85 to 100 PSI and then confirming the pressure at which the governor "cuts out" (stops pumping) and "cuts in" (starts pumping again). This ensures the system isn't over-pressurized or under-pressurized, both of which can lead to serious brake malfunctions.
Why It's a Crucial Skill
Performing this test correctly is fundamental to safe vehicle operation and is a mandatory part of the CDL air brake examination. A system that builds pressure too slowly could leave you without adequate braking power in a critical situation. Likewise, an improperly functioning governor can lead to excessive wear on the compressor or, worse, insufficient pressure for repeated brake applications. This check is a key component of both daily pre-trip inspections and required annual DOT vehicle inspections.
Actionable Tips for a Flawless Inspection
To accurately perform and pass this portion of your test, focus on these specific actions:
- Set the Right RPM: For the build-up test, ensure the engine is at a fast idle, typically between 1200 and 1500 RPM, to get an accurate time reading.
- Time it Correctly: The pressure must build from 85 to 100 PSI in 45 seconds or less. Use a watch or the timer on your phone to be precise.
- Listen and Watch: When checking the governor, slowly pump the brakes to bleed air down. Listen for the distinct sound of the air compressor kicking on (cut-in) and watch the gauge to note the exact PSI. Then, let the system build pressure and note the PSI when the air dryer purges, which indicates the compressor has cut-out.
- Know the Ranges: The governor must cut-out at or before 130 PSI and cut-in at or above 85 PSI. These are standard ranges, but it's important to verbalize them during your test.
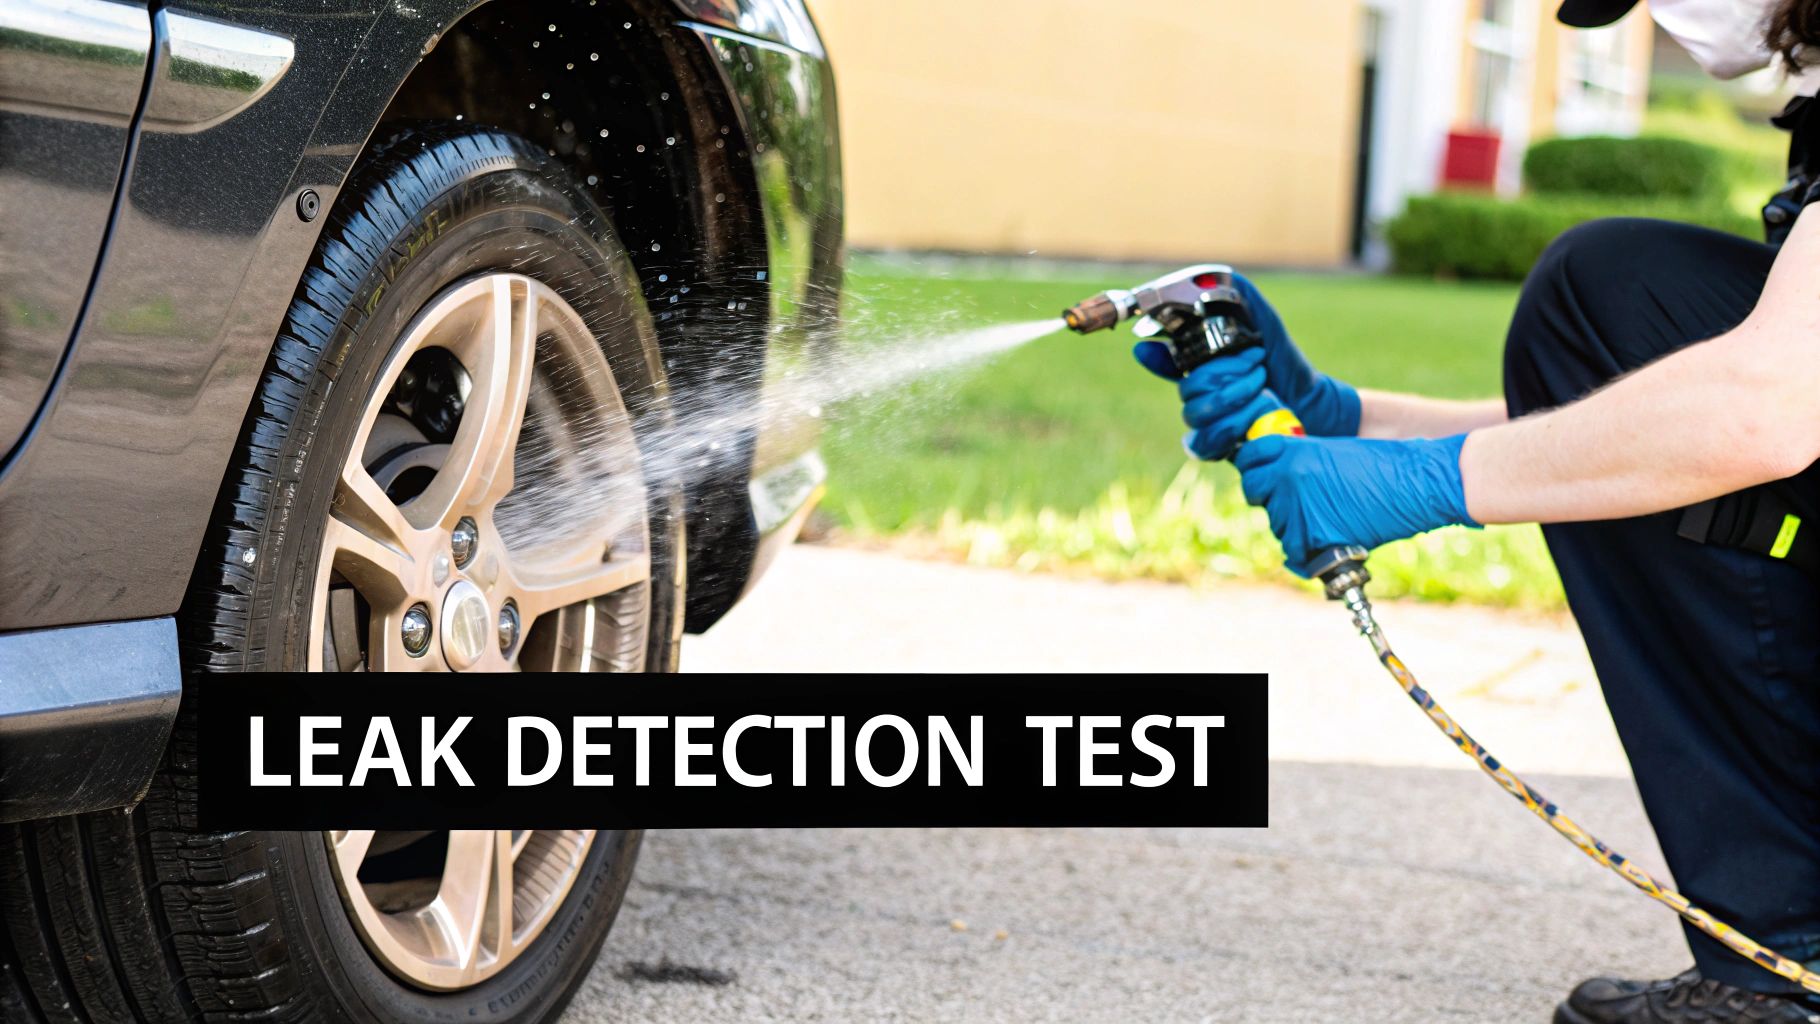
3. Air Leak Detection and Leakage Rate Test
The air leak detection and leakage rate test is a critical procedure that quantifies the integrity of your entire air brake system. This test involves pressurizing the system, then carefully monitoring the air pressure drop over a one-minute period, both with the service brakes released and applied. It's a foundational part of air brake test practice questions because it provides a clear pass/fail metric for system air-tightness, which is essential for maintaining braking power.
This test directly measures your vehicle's ability to hold air pressure, which is stored energy used to apply the brakes. A system that leaks excessively cannot be trusted to provide consistent, reliable stopping power, especially during prolonged brake applications or in emergency situations. You must be able to perform this test flawlessly and recall the specific PSI loss limits from memory.
Why It's a Crucial Skill
Knowing how to accurately perform the leakage rate test is a fundamental safety requirement. It is a mandatory component of the CDL skills test and a daily pre-trip inspection task for all professional drivers. An excessive leak can lead to a dangerously low air supply, potentially causing the spring brakes to engage unexpectedly or leaving you with insufficient pressure to stop the vehicle. Roadside DOT inspections frequently include this test, and exceeding the legal leakage limits will immediately place your vehicle out of service.
Actionable Tips for a Flawless Inspection
To pass this portion of your CDL exam and ensure your vehicle is safe, you must execute the test with precision and know the numbers by heart:
- Know the Limits: For a straight truck or tractor, the maximum allowable leakage is 3 PSI per minute with the brakes released. With the brakes fully applied, the maximum is 4 PSI per minute. Combination vehicles have slightly higher allowances.
- Time it Correctly: Use a watch or the clock in your cab to time the test for exactly one minute. Don't estimate the time, as this can lead to an inaccurate reading and a failed test.
- Listen and Look: While the pressure is stabilizing and during the one-minute test, listen carefully for the sound of hissing air. If you hear a leak, try to pinpoint its source. Using soapy water in a spray bottle can help you find small, hard-to-hear leaks by showing bubbles.
- Verbalize the Steps: During your exam, state each step clearly. For example, say, "I am now applying firm pressure to the brake pedal and will hold it for one minute, monitoring the gauges to ensure the pressure drop does not exceed four PSI."
4. Low Air Pressure Warning Systems Test
The low air pressure warning systems test is a critical safety check that ensures the driver is alerted immediately if the air brake system's pressure falls to a dangerously low level. This is one of the most important air brake test practice questions because it confirms the functionality of the primary safety alert system. The test involves checking both the audible alarm (a buzzer) and the visual warning (a light on the dashboard) to confirm they activate when the pressure drops below a specific threshold.
This test verifies that if you ever have a rapid air loss while driving, you will receive an immediate warning, giving you time to safely pull over before the spring brakes automatically engage. It’s a mandatory part of the in-cab inspection for the CDL skills test and a daily habit for every professional driver.
Why It's a Crucial Skill
A functioning low air pressure warning system is a driver's first and only alert to a potentially catastrophic failure in the air brake system. Ignoring or being unaware of this warning could lead to a complete loss of braking ability. Mastering this test is essential for passing the CDL exam, as examiners must see you perform it correctly. Furthermore, it's a fundamental part of daily pre-trip inspections that can prevent on-road emergencies and ensure compliance with DOT regulations during roadside checks. This simple check provides the peace of mind that your vehicle's most vital safety alert is working. For additional practice questions related to brake systems, you can explore this comprehensive air brake test.
Actionable Tips for a Flawless Inspection
To perform this test accurately every time, both during your CDL exam and on the job, follow these precise steps:
- Know the Threshold: The warning light and buzzer must activate at or before the air pressure drops to 60 PSI. During your test, state this value clearly to the examiner.
- Perform the Test Safely: With the engine off and the key turned to the "on" position, release the parking brakes and pump the brake pedal to lower the air pressure. Watch the gauges and listen carefully.
- Don't Ignore Warnings: If the warning system activates while you are driving, it is a critical emergency. You must pull over safely and as soon as possible to diagnose the problem. Continuing to drive is extremely dangerous.
- Understand the Next Step: Remember that if air pressure continues to drop after the warning activates (typically between 20-45 PSI), the spring brakes will automatically engage, stopping the vehicle abruptly. This is a final safety measure.
5. Spring Brake (Parking Brake) Operation Test
The spring brake operation test is a critical procedure that verifies the functionality of your vehicle's parking and emergency brake systems. These powerful, spring-actuated brakes are held off by air pressure, meaning they automatically engage if air pressure drops to a dangerously low level, acting as a fail-safe. This set of air brake test practice questions is designed to ensure you know how to confirm that this essential safety feature is working correctly.
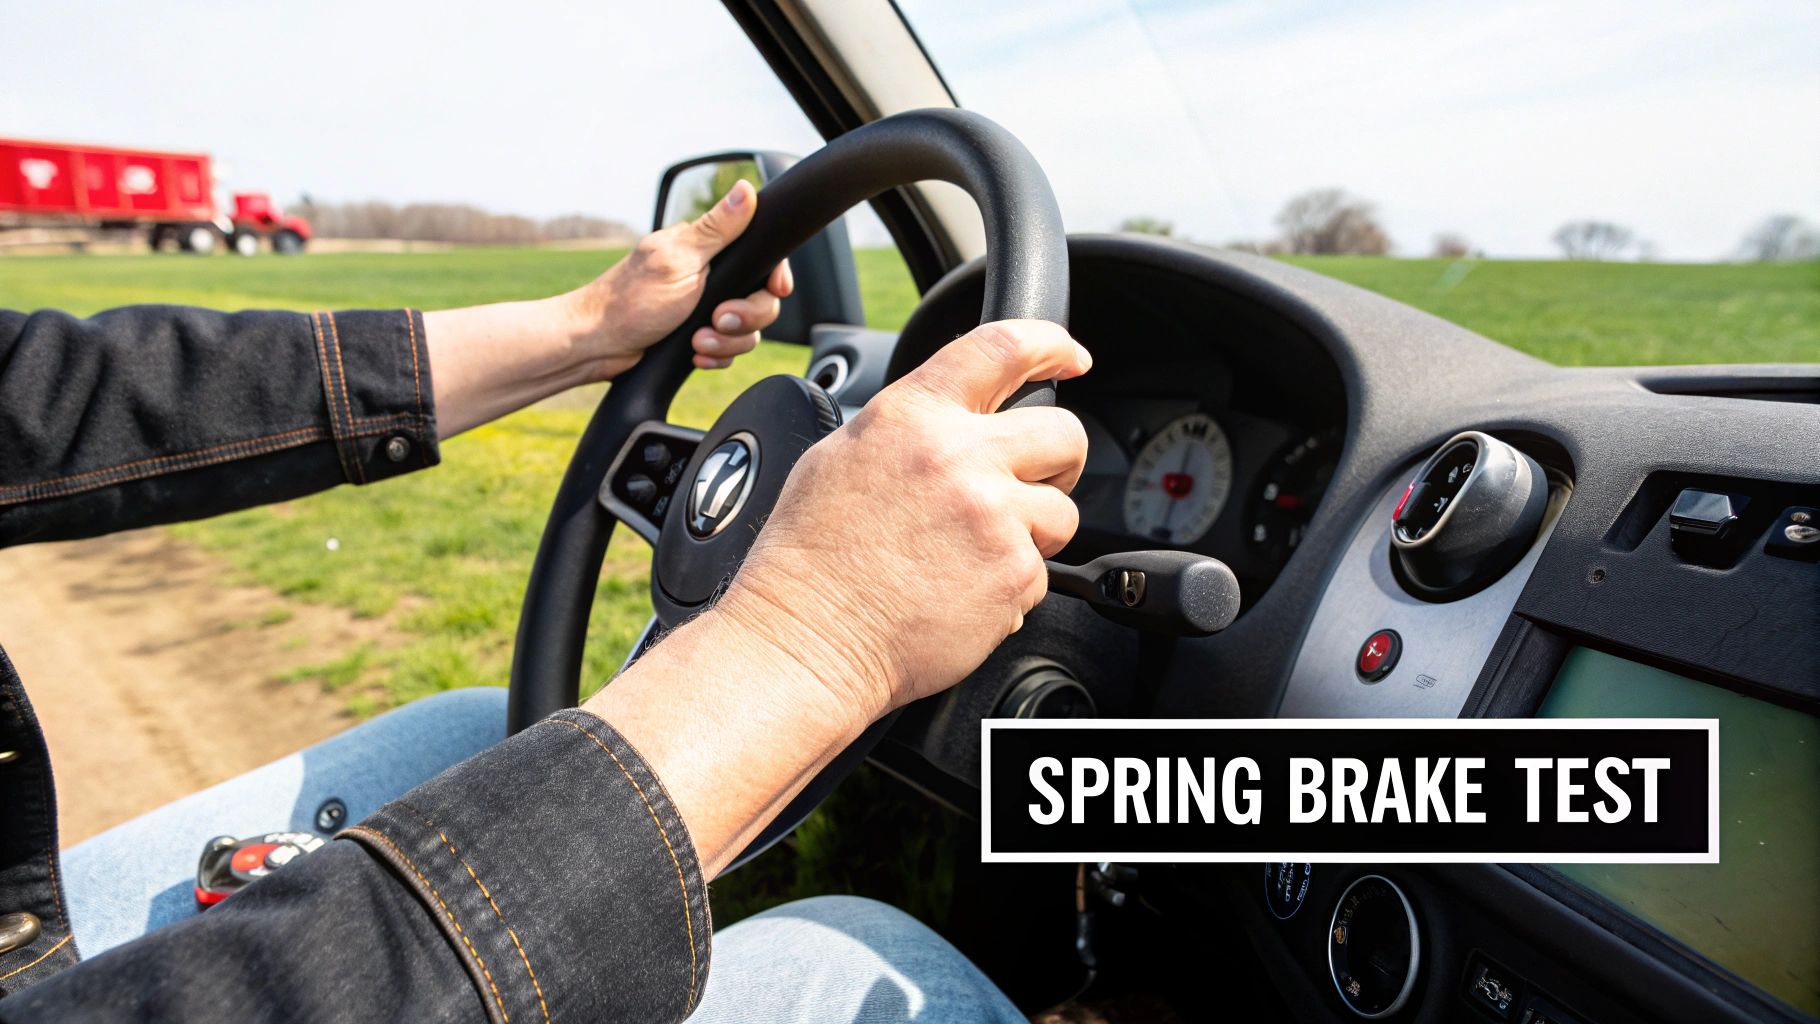
This test involves checking that the parking brake valve (often a yellow diamond-shaped knob for the tractor/truck and a red octagon for the trailer) functions properly and that the spring brakes automatically apply when system air pressure falls between 20 and 45 PSI. It’s a core component of the in-cab inspection portion of the CDL skills test.
Why It's a Crucial Skill
Understanding how to test your spring brakes is fundamental to safe commercial vehicle operation. These brakes are your last line of defense in the event of catastrophic air loss and are the primary means of securing your vehicle when parked. Failure of the spring brakes could lead to a runaway vehicle, a severe accident, or an automatic out-of-service violation during a roadside inspection. A properly functioning system ensures you can park securely, even on an incline, and that the emergency brake will activate if needed.
Actionable Tips for a Flawless Test
To master this test for your CDL exam and for daily safety checks, follow these precise steps and tips:
- Know Your Knobs: Remember that the yellow diamond-shaped knob typically controls the tractor/truck parking brakes, while the red octagonal knob controls the trailer parking brakes. You must test them both independently and together.
- Monitor the Gauges: The key to this test is watching your air pressure gauges. You must verbalize that the spring brakes automatically engage (the knobs pop out) when the pressure drops to the required range, which is typically between 20 and 45 PSI.
- Test the Holding Power: After setting the parking brakes, gently tug against them by placing the vehicle in a low gear and lightly applying power. The vehicle should not move. This confirms the brakes have the strength to hold the vehicle.
- Never Manually Cage Brakes: Do not attempt to manually release (or "cage") a spring brake to move a vehicle with low air pressure. This is extremely dangerous and bypasses a critical safety system.
6. Brake Adjustment and Pushrod Travel Measurement
Proper brake adjustment is a critical safety function, directly impacting a vehicle's stopping power. This section of the CDL test evaluates your ability to measure the pushrod travel on a brake chamber to determine if the brakes are within the legal adjustment limits. These air brake test practice questions are designed to ensure you can identify a potentially dangerous out-of-adjustment brake before it leads to failure.
This check involves securing the vehicle, releasing the parking brakes with the system charged to normal pressure (90-100 PSI), and then having a helper fully apply the service brakes. You must then measure how far the pushrod moves out of the brake chamber. This measurement is compared against the maximum allowable travel for that specific type and size of brake chamber.
Why It's a Crucial Skill
An out-of-adjustment brake is a leading cause of brake-related citations and out-of-service orders during DOT roadside inspections. More importantly, it significantly reduces braking efficiency. If the pushrod has to travel too far before the brake shoes make contact with the drum, it creates a dangerous delay in braking and can lead to overheating and brake fade. Knowing how to perform this check is fundamental to maintaining a safe commercial vehicle and is a required skill for passing your CDL exam.
Actionable Tips for a Flawless Inspection
To accurately measure pushrod travel and master this skill for your test and your career, follow these precise steps:
- Know Your Limits: Understand that maximum pushrod travel varies by brake chamber type and size. For example, a common Type 30 standard stroke chamber has a maximum travel limit of 2 inches. Always know the correct specification for the equipment you are inspecting.
- Mark for Accuracy: Before the brakes are applied, use chalk or a marker to make a mark on the pushrod where it exits the brake chamber. When the brakes are applied, you can then measure from the chamber to your mark for a precise reading.
- Use Proper Pressure: Ensure the air system is charged to between 90 and 100 PSI before having your helper apply the brakes. This simulates normal operating pressure and provides an accurate measurement.
- Hands Off Automatics: If the vehicle is equipped with automatic slack adjusters, never manually adjust them to bring the pushrod travel back into specification. Manual adjustment can mask a deeper mechanical problem and may damage the adjuster. An out-of-adjustment automatic slack adjuster requires professional service.
7. Tractor-Trailer Air System Connection and Glad Hand Test
For drivers operating combination vehicles, mastering the tractor-trailer air connection is just as critical as understanding the brakes on a single unit. This procedure involves properly connecting the air lines between the tractor and trailer using glad hands, charging the trailer's air system, and verifying its functionality. These specific air brake test practice questions are a key part of the combination vehicle endorsement test and a daily, non-negotiable safety check.
This test ensures you can safely and correctly supply air to the trailer's brake system and confirm that both the service and emergency brakes are operational. You must demonstrate the correct sequence for connecting lines, opening valves, and checking for leaks or malfunctions before moving the vehicle, which is a fundamental skill for any combination vehicle driver.
Why It's a Crucial Skill
An improper connection can lead to catastrophic brake failure. If the trailer's air tanks are not charged correctly, the trailer's spring brakes may not release, or worse, the service brakes may not apply when needed. A secure and leak-free connection is your only link to the trailer's braking power. DOT officers will scrutinize these connections during roadside inspections, and any defect can immediately place your vehicle out of service. This skill is essential not only for passing your CDL test but for ensuring the safety of every mile you drive.
The following infographic illustrates the essential three-step process for connecting and testing the tractor-trailer air system.
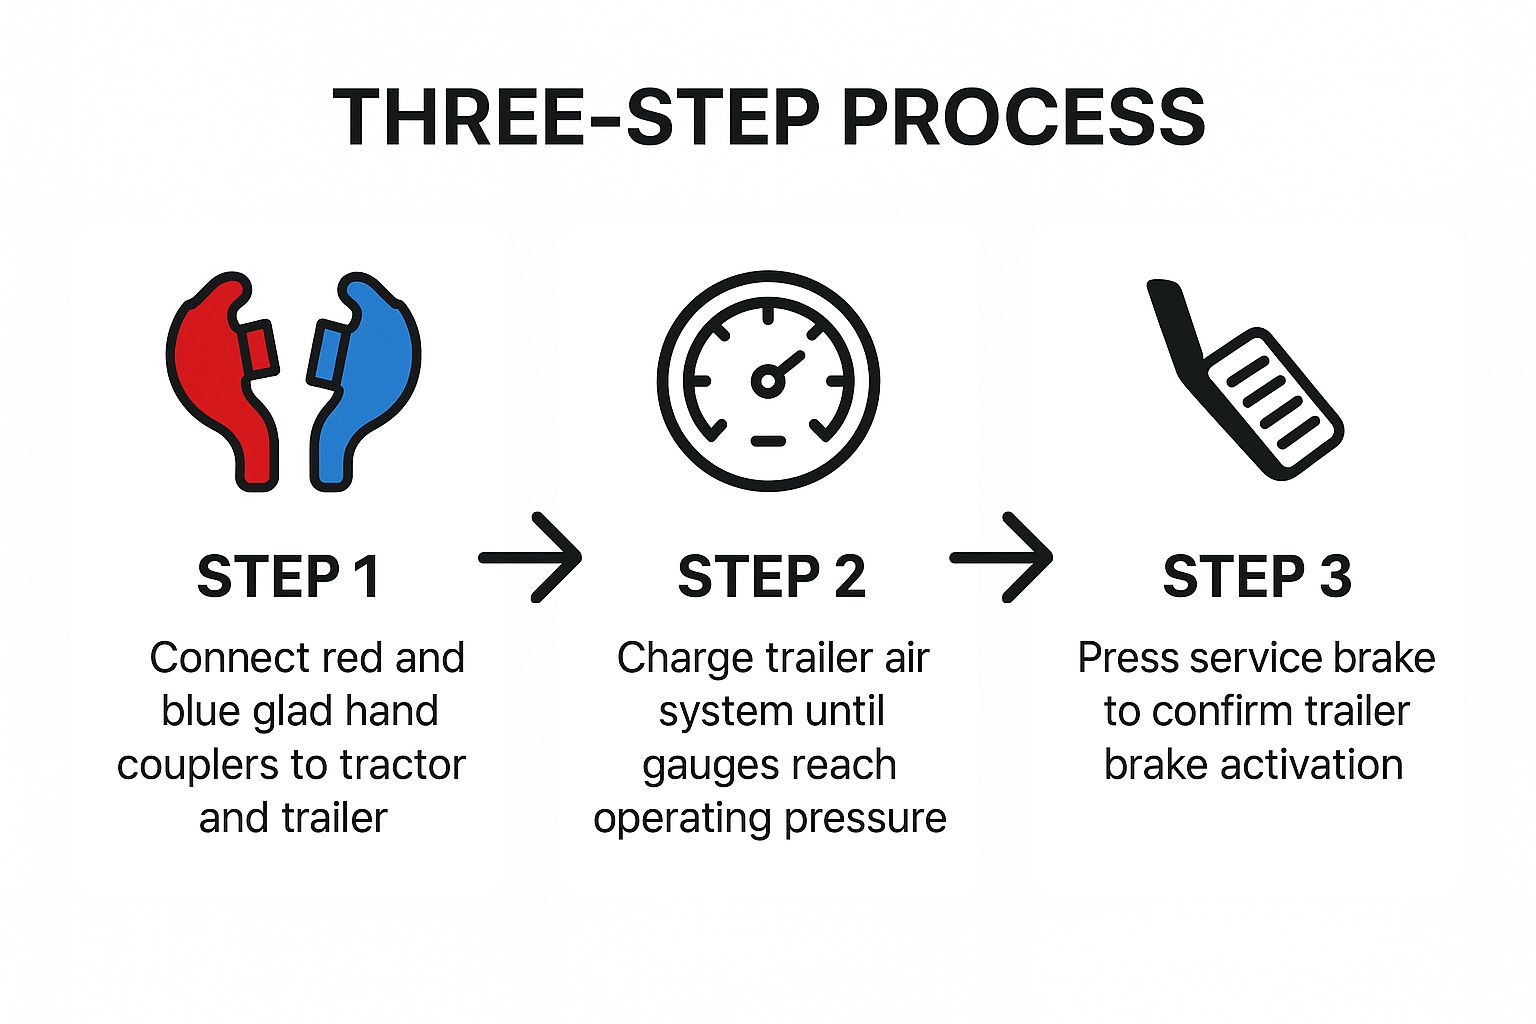
This sequence ensures a safe and systematic activation of the trailer's air brake system, preventing errors that could lead to brake failure.
Actionable Tips for a Flawless Connection
To perform a perfect glad hand connection and test every time, follow these proven tips:
- Clean Before Connecting: Always wipe both the tractor and trailer glad hand seals before coupling them. Dirt and debris can damage the rubber seals and cause significant air leaks.
- Color Code is Law: Always connect red to red (emergency/supply line) and blue to blue (service line). This is a universal standard you must never deviate from.
- Listen and Feel: After connecting the glad hands and pushing in the trailer air supply valve (red button), listen for the sound of air flowing into the trailer. You can also walk back and feel the air lines to ensure they are firming up with pressure.
- Perform a Tug Test: Once the system is charged, perform a gentle tug test by releasing the tractor parking brake and lightly pulling against the still-applied trailer brakes. This confirms the trailer brakes are holding securely.
7-Point Air Brake Test Comparison
| Item | Implementation Complexity 🔄 | Resource Requirements ⚡ | Expected Outcomes 📊 | Ideal Use Cases 💡 | Key Advantages ⭐ |
|---|---|---|---|---|---|
| Pre-Trip Air Brake System Inspection | Moderate: Detailed visual and hands-on inspection of multiple components | Moderate: Tools, cleaning supplies, flashlight | High: Early brake failure detection, legal compliance | Commercial vehicle pre-trip checks, CDL tests | Prevents brake failure, ensures safety, reduces costs |
| Air Pressure Build-Up and Cut-In/Cut-Out Test | Moderate: Requires engine operation and timed measurements | Low: Engine running, pressure gauges | Medium: Verifies compressor and governor function | CDL certification, fleet maintenance checks | Identifies compressor issues, ensures brake power |
| Air Leak Detection and Leakage Rate Test | Moderate: Precise timing and pressure monitoring needed | Low: Soapy water, pressure gauges | High: Detects leaks, prevents brake failure | Pre-trip inspections, roadside enforcement | Maintains system integrity, improves fuel efficiency |
| Low Air Pressure Warning Systems Test | Low: Simple activation test of warning devices | Low: Pressure tester, vehicle controls | High: Early warning of brake system problems | All air brake vehicles, CDL skills tests | Provides early alerts, enhances accident prevention |
| Spring Brake (Parking Brake) Operation Test | Moderate: Functional and safety operation testing | Low: Vehicle controls and pressure gauges | High: Ensures fail-safe emergency and parking brake | Emergency braking, parking procedures, CDL tests | Fail-safe braking, dual function, mechanical reliability |
| Brake Adjustment and Pushrod Travel Measurement | High: Requires tools and skill to measure and adjust brakes | Moderate: Measuring tools, expertise | High: Optimal brake performance, DOT compliance | Fleet maintenance, roadside inspections | Maximizes brake effectiveness, prevents wear |
| Tractor-Trailer Air System Connection and Glad Hand Test | Moderate: Physical connection and operational testing | Low-Moderate: Physical effort, inspection tools | High: Ensures trailer brake operation and safety | Combination vehicle pre-trip and CDL tests | Prevents air leaks, ensures brake coordination |
Your Next Turn: From Practice to Professional
You've now navigated through a comprehensive roundup of the most critical air brake test practice questions, covering everything from the initial pre-trip inspection to the crucial tractor-trailer glad hand connection. Each question and detailed explanation was designed not just for memorization, but for genuine comprehension. Mastering these concepts is the first major step toward passing your CDL air brake endorsement test and, more importantly, operating a commercial vehicle with the safety and professionalism the industry demands.
Think of this article as your roadmap. The practice questions serve as landmarks, guiding you through the essential knowledge needed for your journey. The true value, however, lies in understanding the why behind each procedure. Why must the governor cut out by 130 PSI? Why is the static leakage rate test so critical? Answering these questions builds the foundation of a safe, long-lasting career.
Key Takeaways for Your CDL Journey
To solidify your learning, let's recap the most important takeaways from our review of air brake test procedures:
- Systematic Inspection is Non-Negotiable: A thorough pre-trip inspection isn't just a test requirement; it's a daily professional habit. Catching a potential issue like a worn hose or a loose connection before you start your trip is the ultimate form of preventative safety.
- Know Your Numbers: The CDL air brake test is precise. You must know the specific PSI ranges for governor cut-in/cut-out, the maximum allowable air leakage rates (3 PSI for a straight truck, 4 PSI for a combination vehicle), and the PSI at which low air warning systems activate (typically between 55 and 75 PSI).
- Function Over Form: Beyond the numbers, you must understand what each test proves. The spring brake test confirms that your emergency braking system will function in a catastrophic air loss scenario. The service brake check ensures the vehicle pulls straight and stops effectively under normal conditions.
Your Actionable Next Steps
Knowledge without application is just theory. To turn these air brake test practice questions into real-world skills, you need to take deliberate action.
- Verbalize the Procedures: Stand outside by a truck (if possible) and walk through each test out loud. Describe what you're doing, what you're looking for, and what the results should be. This active recall method is far more effective than passive reading.
- Practice Against the Clock: The official test has time constraints. Simulate this pressure by timing yourself as you run through the full in-cab air brake inspection sequence. This builds both speed and accuracy.
- Seek Hands-On Training: Reading is essential, but there is no substitute for hands-on instruction from an experienced professional. An instructor can provide immediate feedback, correct your technique, and answer nuanced questions that articles can't.
Mastering the air brake system is a cornerstone of becoming a proficient and reliable commercial driver. It demonstrates a commitment to safety that employers value and the public expects. By consistently practicing and truly understanding these systems, you are not just preparing for an exam; you are preparing for a successful and safe career on the road ahead.
Ready to move from practice questions to professional, hands-on training? Patriot CDL offers accelerated, comprehensive courses designed to get you from the classroom to your career with confidence. Our experienced instructors guide you through every component of the air brake system, ensuring you have the skills and knowledge to pass your test and excel in your new profession.