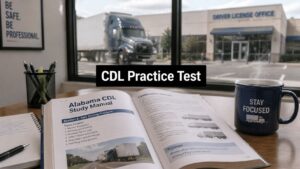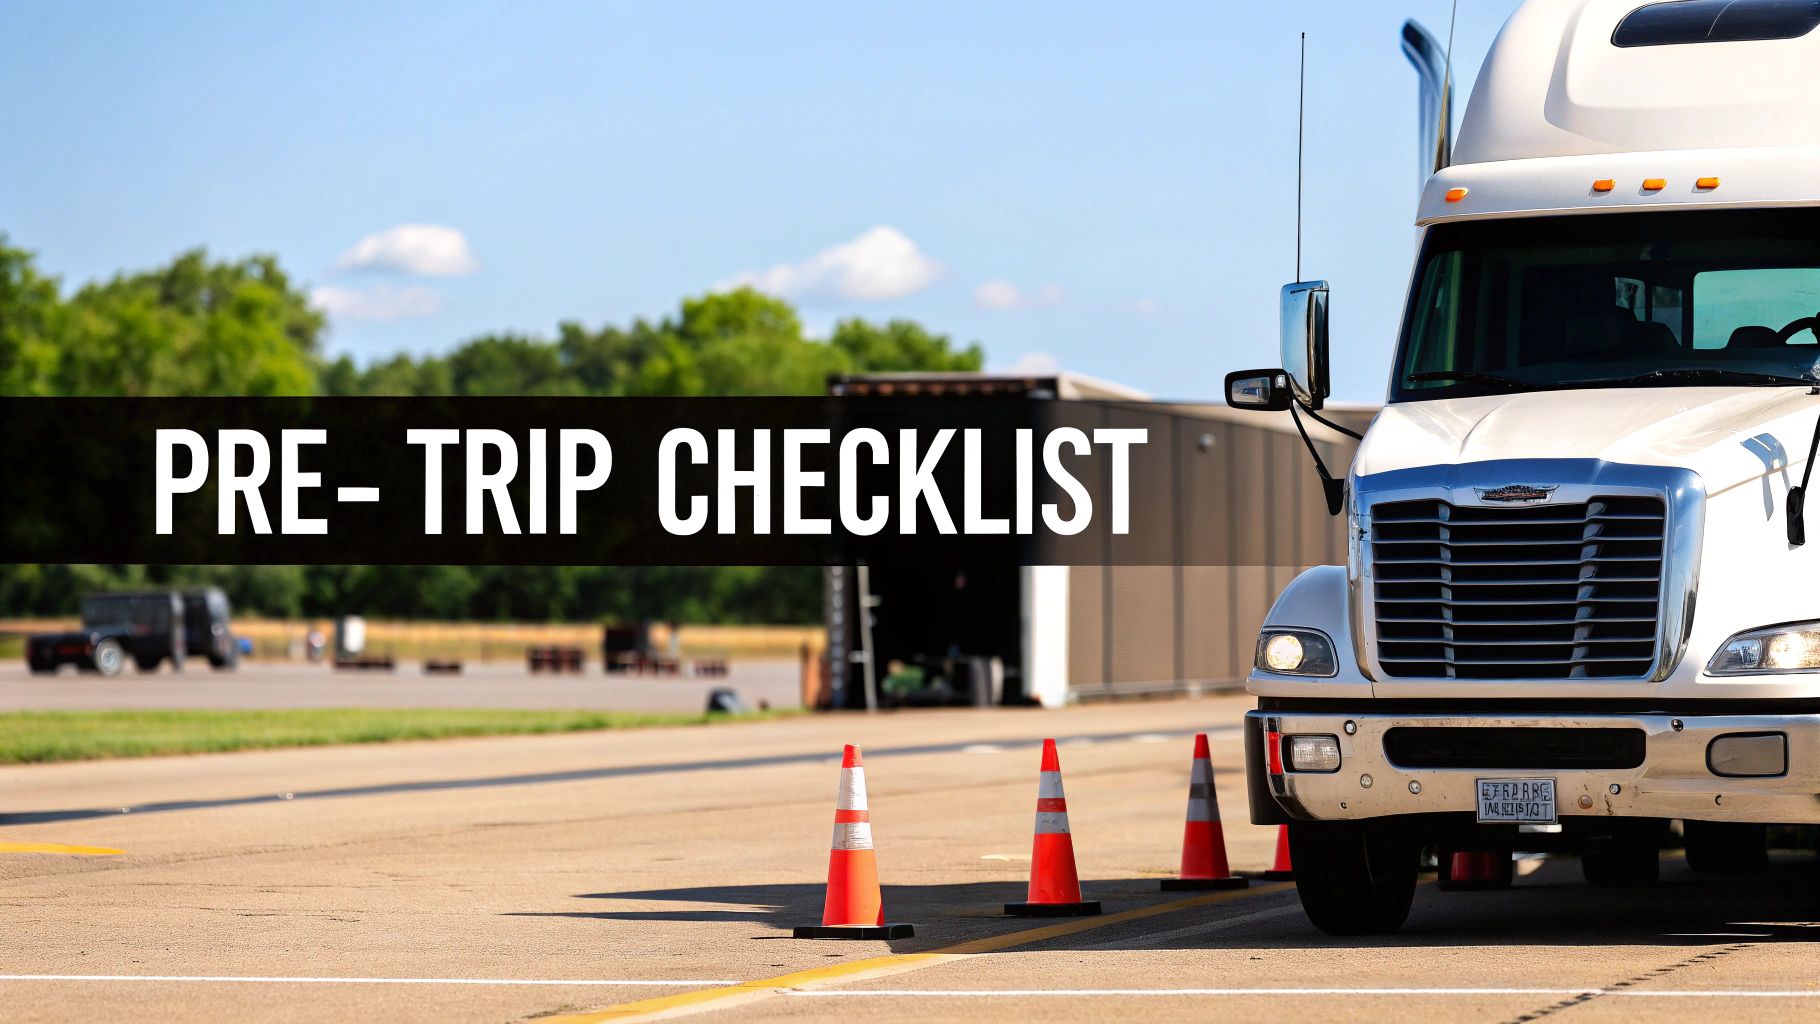
The pre-trip inspection isn't just a regulatory hurdle; it's the foundation of a safe and successful trip for every commercial driver. A thorough walk-around can be the difference between a smooth haul and a costly, dangerous roadside breakdown. This comprehensive cdl pre trip inspection checklist breaks down the most critical areas, providing detailed steps, pro tips, and the 'why' behind each check.
Whether you're a student driver preparing for your exam or a seasoned veteran refining your routine, this guide will equip you with the knowledge to inspect your vehicle with confidence and precision. We will systematically cover every essential inspection point, from the engine compartment and brake systems to the coupling mechanism and lighting. By following this guide, you'll be ready to identify potential issues before they become major problems, ensuring the safety of yourself, your cargo, and everyone else on the road. This isn't just about passing a test; it's about mastering a skill that defines a professional driver. Our goal is to make you proficient in spotting hazards, ensuring every journey you take is both compliant and secure.
1. Engine Compartment Inspection
The engine compartment inspection is the foundational first step of any thorough CDL pre-trip inspection checklist. This is where you verify the heart of your truck is ready for the demands of the road. A systematic check here prevents unexpected breakdowns, ensures operational safety, and avoids costly on-road repairs. It involves a detailed review of all essential fluids, belts, hoses, and wiring under the hood.
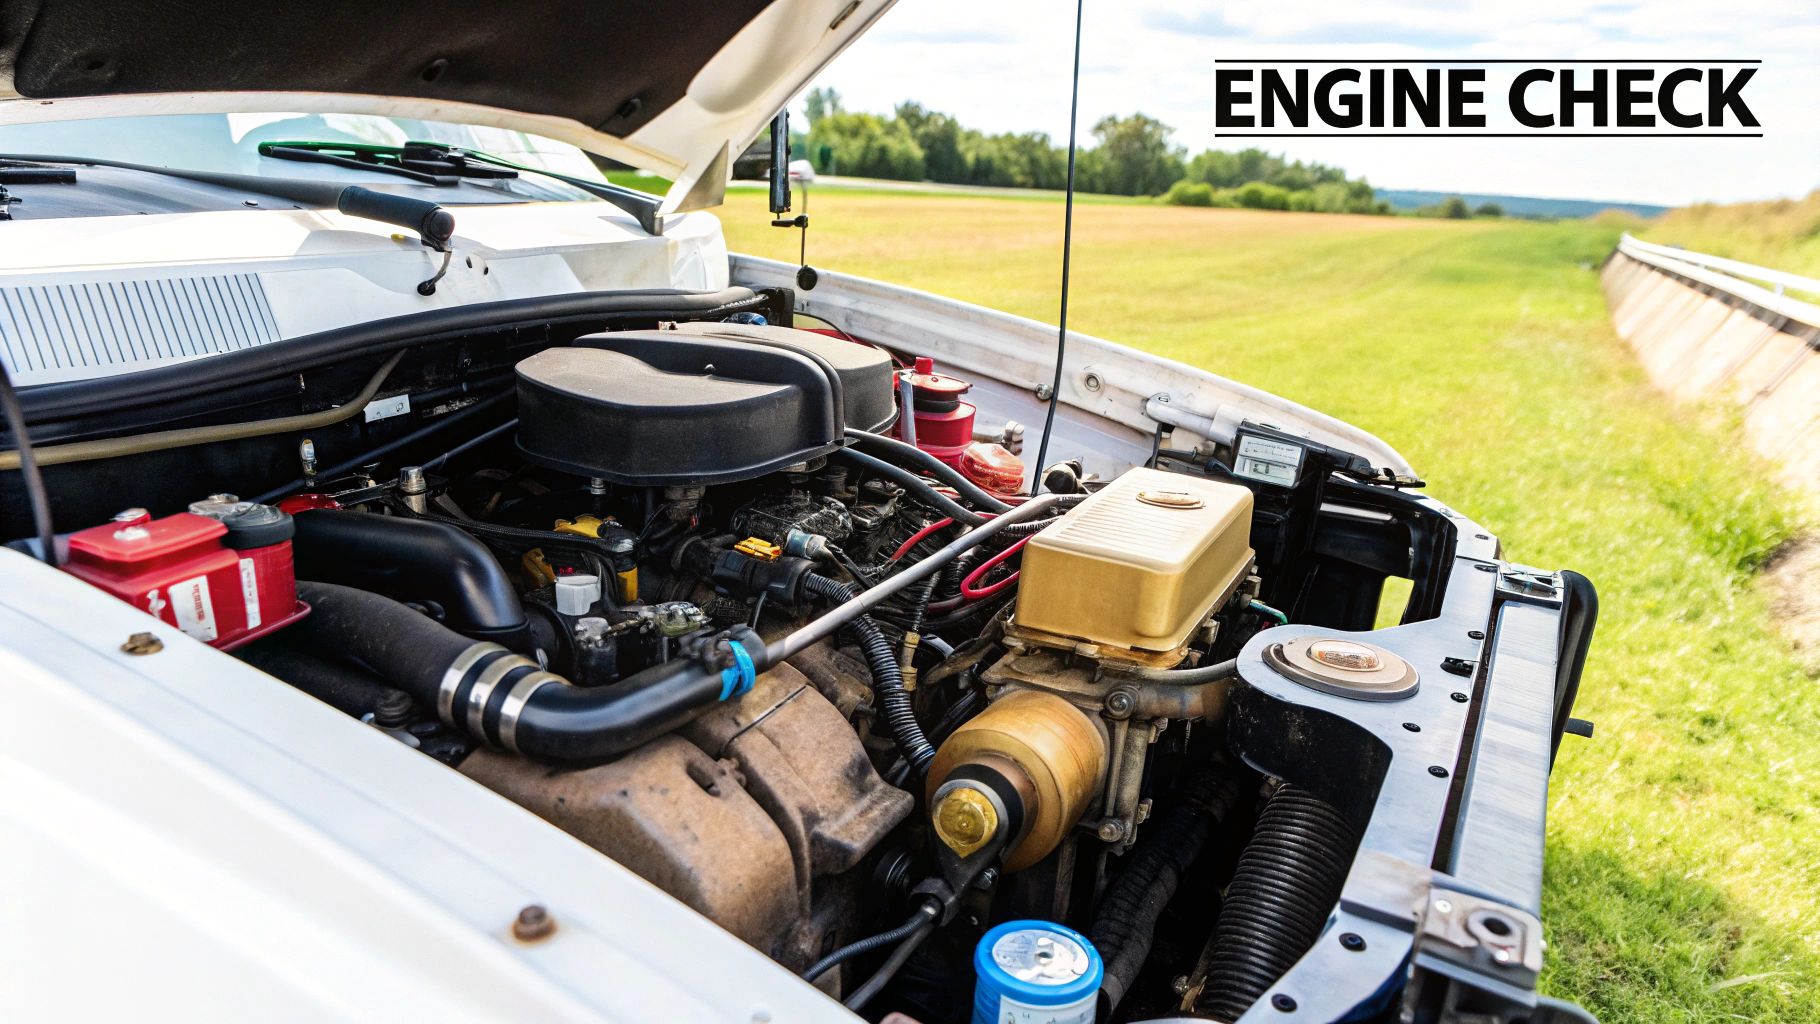
Key Components to Check
When you open the hood, you are looking for specific conditions. Your inspection must be methodical to ensure nothing is missed.
- Fluid Levels: Check the engine oil, coolant, and power steering fluid. Each should be within the safe operating range indicated on their respective dipsticks or reservoirs. Low fluid levels can lead to catastrophic engine failure.
- Belts: Inspect all belts, including the alternator, water pump, and air compressor belts. Look for cracks, fraying, or excessive looseness. A belt should typically have no more than 1/2 to 3/4 of an inch of play.
- Hoses: Examine all hoses for leaks, bulges, cracks, or loose connections. Pay close attention to coolant and air hoses, as a failure in either can quickly disable the vehicle.
- General Condition: Look for any loose or hanging wires, signs of fluid leaks on the engine block or on the ground beneath, and check for any other obvious damage.
Pro Tip: Always perform your fluid checks when the truck is on level ground and the engine has had time to cool down. This ensures accurate readings, especially for the engine oil.
Why It's a Critical First Step
Starting with the engine compartment sets the tone for a safe trip. Major carriers have stringent protocols for these checks because they understand the financial and safety implications of an engine-related failure. A small coolant leak spotted in the yard is a minor inconvenience; on a mountain pass, it becomes a major safety hazard. This proactive check is a core component of the daily vehicle inspection report (DVIR) and a fundamental skill you'll learn as you work to meet your CDL requirements.
Practical Tips for an Effective Inspection
- Use a Flashlight: Even in daylight, a flashlight is essential for illuminating dark corners and properly inspecting belts and hoses.
- Listen and Look: Before you even start the engine, look for puddles or fresh drips underneath. After the engine check, during the in-cab portion of the inspection, listen for unusual sounds like squealing belts or hissing air leaks.
- Keep Rags Handy: A clean rag is crucial for wiping dipsticks to get a clear and accurate fluid level reading.
For a visual walkthrough of a complete engine compartment check, see the video below.
2. Tire and Wheel Assembly Inspection
Following the engine check, the tire and wheel assembly inspection is one of the most critical safety elements in your CDL pre-trip inspection checklist. Your tires are the only part of the truck that contacts the road, making their condition paramount for vehicle stability, braking performance, and preventing catastrophic failures. A thorough check here prevents blowouts, improves fuel efficiency, and is a non-negotiable step for ensuring a safe journey.
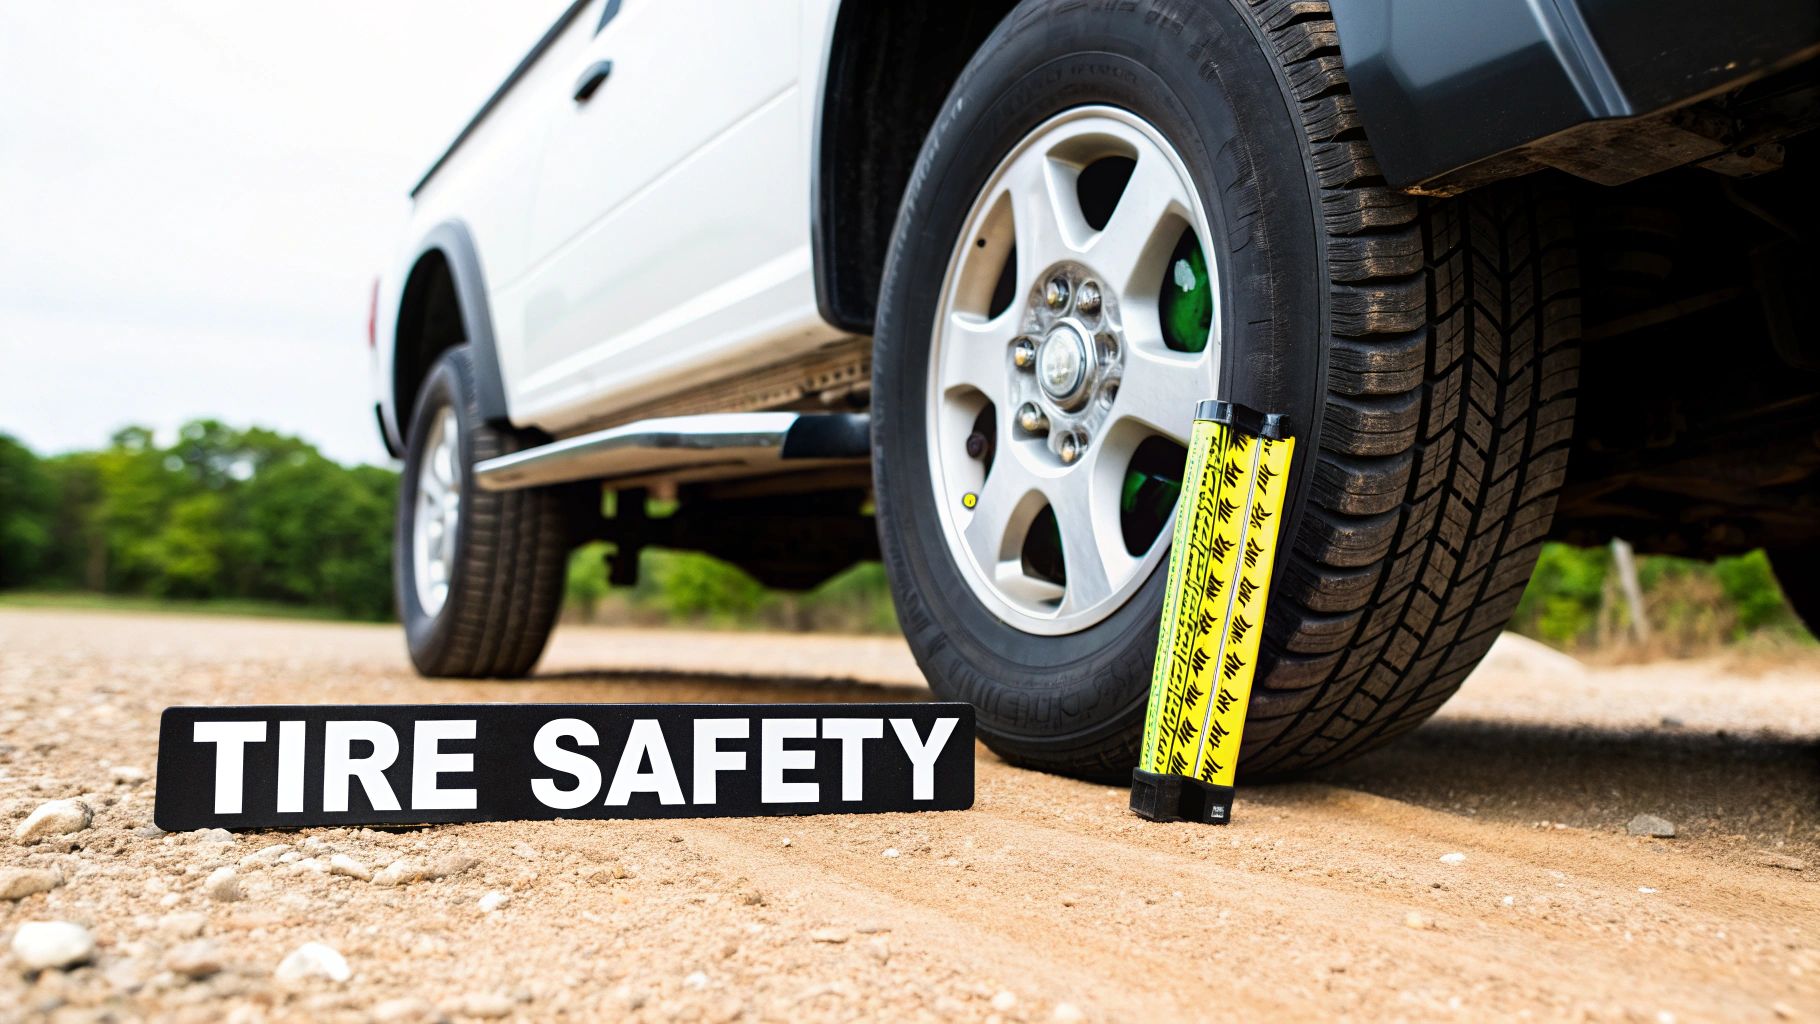
Key Components to Check
A systematic approach is essential to cover every tire and wheel on the rig, including the trailer. You are looking for any signs of damage or improper condition that could compromise safety.
- Tire Condition: Visually inspect each tire for cuts, bulges, cracks, or embedded objects in the tread and sidewalls. Pay special attention to the space between dual tires, ensuring it's clear of debris.
- Tread Depth: Steer tires must have a minimum tread depth of 4/32 of an inch, while all other tires require at least 2/32 of an inch. Insufficient tread drastically reduces traction, especially in wet conditions.
- Inflation: Check every tire's pressure using a reliable gauge. Tires must be inflated to the manufacturer's specification, which can be found on the vehicle's data plate or the tire sidewall.
- Wheel and Rim Integrity: Examine rims for cracks, bends, or damage. Check that all lug nuts are present and tight, looking for rust trails that might indicate looseness. Also, inspect hub oil seals for any leaks.
Pro Tip: Always check tire pressure when the tires are cold. Driving heats up the air inside, which increases the pressure and can give you an inaccurate, falsely high reading.
Why It's a Critical Safety Step
The Federal Motor Carrier Safety Administration (FMCSA) and the Commercial Vehicle Safety Alliance (CVSA) place immense emphasis on tire safety because tire failures are a leading cause of serious accidents. Major carriers complement manual checks with advanced tire pressure monitoring systems, highlighting the industry's focus on this area. Likewise, owner-operators who follow rigorous tire inspection protocols report significantly fewer costly and dangerous roadside incidents, reinforcing the value of this daily habit.
Practical Tips for an Effective Inspection
- Use the Right Tools: Always carry a reliable tire pressure gauge and a tread depth tool. For a quick check, the "penny test" works: if you can see all of Lincoln's head when a penny is inserted into the tread, it's time to replace the tire.
- Check Between the Duals: Use a flashlight and your hand (carefully) to feel between the dual tires for any lodged rocks, debris, or damage you can't easily see.
- Look for Wear Patterns: Uneven wear can indicate bigger problems like misalignment or suspension issues that need to be addressed by a mechanic.
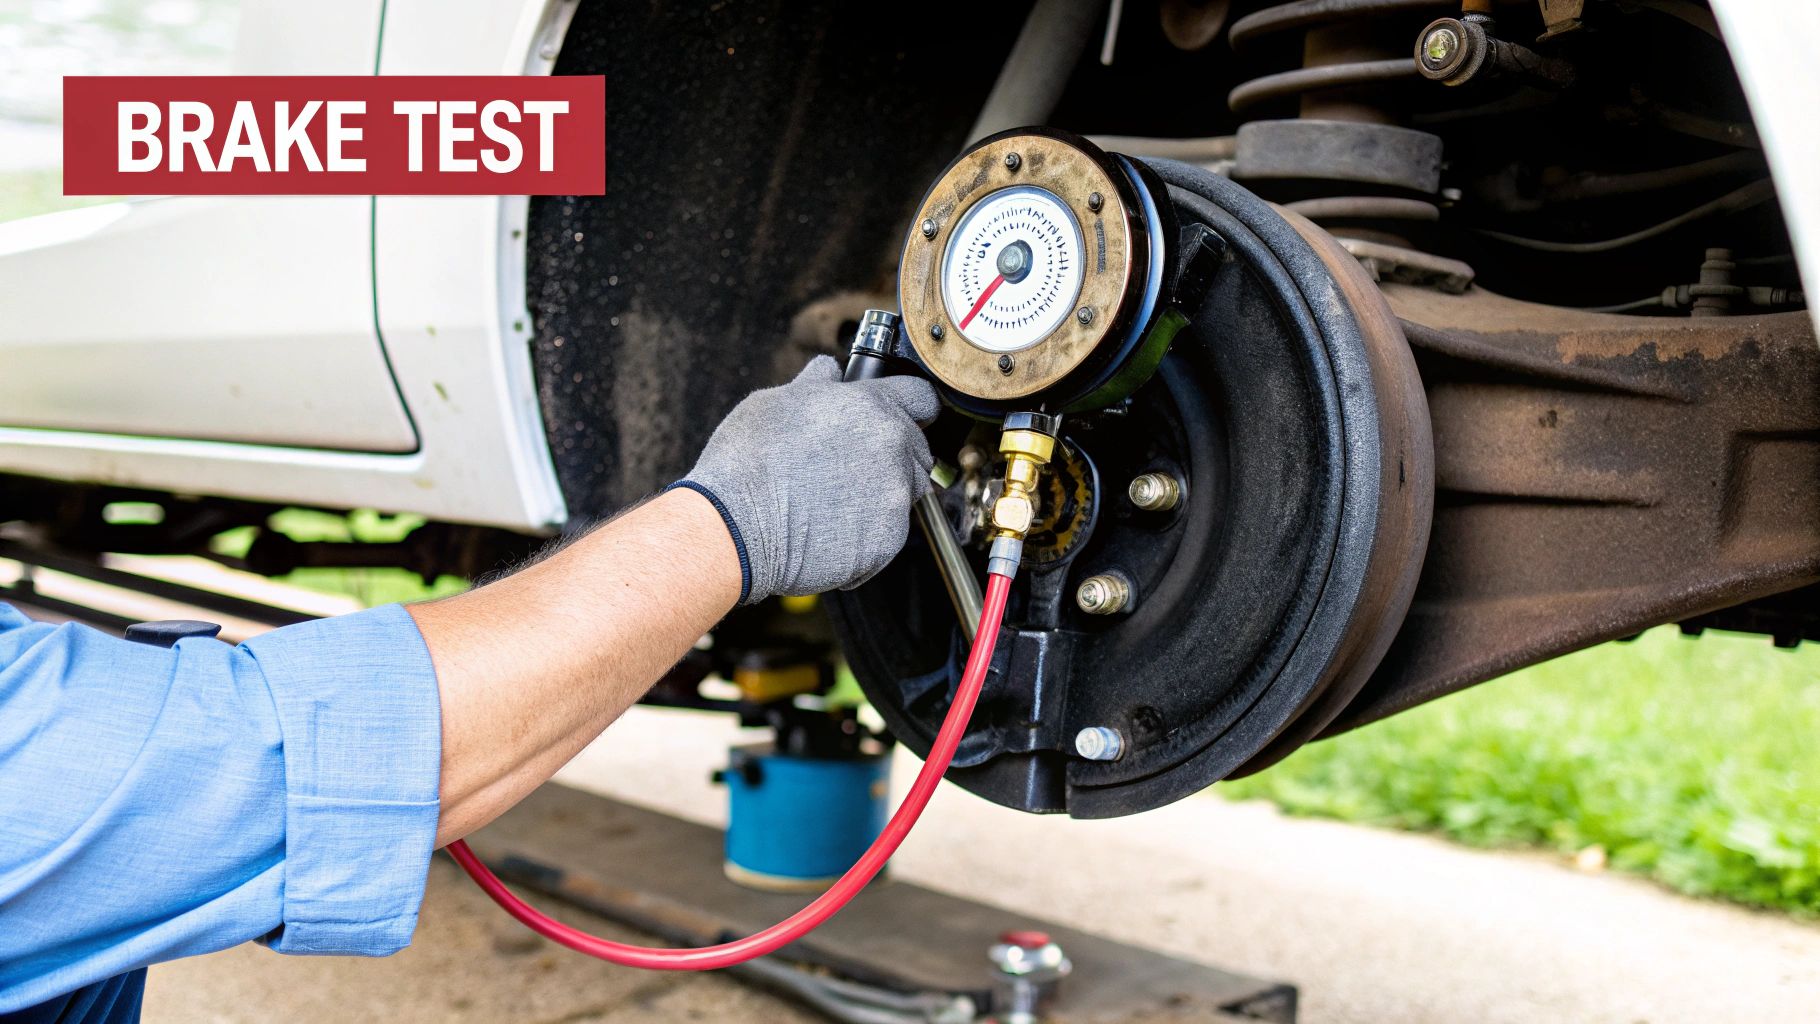
3. Brake System Inspection
The brake system inspection is arguably the most critical safety component of the entire CDL pre-trip inspection checklist. This is a non-negotiable, meticulous process where you confirm your vehicle's ability to stop safely under any load or weather condition. A failure in the braking system can have catastrophic consequences, making this check a top priority before every single trip.
Key Components to Check
A comprehensive brake inspection involves both a physical walk-around and an in-cab air brake test. You are verifying the integrity and functionality of the entire system.
- Air System: Ensure the air compressor builds pressure to the optimal range, typically between 100-125 PSI. Listen for the governor cut-out. Then, perform a leak-down test to ensure the system isn't losing air pressure too rapidly.
- Brake Components: Visually inspect brake chambers, ensuring they are not cracked, dented, or leaking. Check that slack adjusters and pushrods are secure and have no more than about one inch of play when the brakes are released.
- Drums and Linings: Examine brake drums (or rotors) for cracks or illegal welds. Brake linings (pads) must not be worn dangerously thin, and you should check for any contamination from oil or grease.
- Hoses and Lines: Look at all air lines connected to the brake chambers, making sure they are not cracked, chafing, or leaking.
Pro Tip: Always chock your wheels before conducting any brake tests where you need to release the parking brakes. This is a fundamental safety practice that prevents unintended vehicle movement.
Why It's a Critical Safety Step
The importance of this check cannot be overstated. Major carriers understand this well; for instance, some companies have stringent daily brake checks that have been instrumental in preventing brake-related incidents. Similarly, other freight companies have comprehensive programs that significantly reduce stopping distance violations. A properly functioning brake system is the ultimate defense against accidents and is a focal point for any DOT roadside inspection. Ensuring your brakes are in perfect working order is a core responsibility that protects you and everyone else on the road.
Practical Tips for an Effective Inspection
- Listen Carefully: After the air system is fully charged, shut off the engine and listen for the sound of hissing air leaks. Your ears are one of your best tools.
- Test the Brakes: Perform the complete three-part air brake test: the applied pressure test, the low-pressure warning signal test, and the emergency brake pop-out test.
- Check Adjustment: If you have manual slack adjusters, physically check the pushrod travel to ensure brakes are properly adjusted.
- Test the Park Brake: If conditions permit, gently tug against the applied parking brake to confirm it will hold the truck and trailer securely.
For more detailed guidance on the complete air brake test procedure, you can find comprehensive guides online.
4. Lighting and Electrical Systems Check
A comprehensive check of all lighting and electrical systems is a non-negotiable part of the CDL pre-trip inspection checklist. This step ensures your vehicle is visible to others and that you can clearly communicate your intentions, like turning or stopping. Functioning lights are your primary safety tool during night driving, fog, rain, and other adverse weather conditions, making this check critical for preventing accidents.

Key Components to Check
Your inspection must cover every light and reflector on the tractor and trailer. A systematic approach ensures you don't miss anything that could lead to a violation or a hazardous situation.
- Headlights: Check both high and low beams for proper operation and aim.
- Turn Signals & Flashers: Verify that all four-way emergency flashers and individual turn signals (front, side, and rear) work correctly.
- Brake Lights: Confirm that brake lights illuminate when you press the pedal. This often requires help from another person or using a reflective surface or a brake pedal depressor tool.
- Clearance & Marker Lights: Inspect all amber lights at the front and top, and all red lights at the rear and top. These outline your vehicle's size.
- Reflectors and Tape: Ensure all reflective tape and reflectors are clean, present, and not damaged.
Pro Tip: When checking lights alone, park near a wall or another vehicle at night. The reflection will allow you to see if your lights, including brake lights, are working as you activate them from the cab.
Why It's a Critical Step
Properly functioning lights are a primary focus during roadside DOT inspections by organizations like the Commercial Vehicle Safety Alliance (CVSA). Some companies have seen significant safety improvements, with some reporting a large reduction in night-time incidents after implementing rigorous lighting inspection programs. A burnt-out clearance light might seem minor, but it can easily lead to a "fix-it" ticket or a costly fine, impacting your CSA score.
Practical Tips for an Effective Inspection
- Walk Systematically: Start at one corner of the truck and walk around it, activating and checking each light system in sequence to ensure none are missed.
- Clean Lenses: Dirty or mud-caked lenses and reflectors can reduce visibility by over 50%. Keep them clean for maximum effectiveness.
- Carry Spares: Keep spare bulbs and fuses for common lighting components. This allows for a quick fix in the yard rather than a service call on the road.
- Test Trailer Connections: Before fully coupling, test the electrical connection to the trailer to ensure all trailer lights respond correctly to the tractor's controls.
5. Steering System and Suspension Inspection
A proper steering and suspension inspection is non-negotiable for vehicle control and safety. This part of the cdl pre trip inspection checklist focuses on the components that allow you to direct the truck and absorb road imperfections. A failure in either system can lead to a loss of control, making this check critical for preventing accidents and ensuring the vehicle responds predictably to your inputs.
Key Components to Check
Your inspection of the steering and suspension systems requires a close look at several interconnected parts. Methodically check each component for signs of wear, damage, or malfunction.
- Steering Play: With the engine running to power the steering system, check the steering wheel for excessive play. For a 20-inch wheel, more than 10 degrees of play, or about two inches of movement before the wheels begin to turn, is typically considered excessive.
- Steering Linkage: Inspect the steering box, pitman arm, drag link, and tie rods. Ensure all components are securely mounted and not bent or cracked. Check that all castle nuts and cotter pins are present and secure.
- Suspension Components: Examine the springs (leaf or coil) and air bags. Look for cracked, broken, or missing leaf springs. For air suspension, check that the air bags are properly inflated and show no signs of cuts, bulges, or leaks.
- Shock Absorbers: Check that shock absorbers are securely mounted and not leaking hydraulic fluid. Leaking shocks can compromise vehicle stability and control.
Pro Tip: When checking suspension, pay close attention to tire wear patterns. Uneven wear, such as cupping or scalloping, is often a direct indicator of underlying suspension problems that need immediate attention.
Why It's a Critical Step
The integrity of your steering and suspension is directly tied to your ability to safely maneuver a multi-ton vehicle. Regional freight companies that enforce detailed steering inspections document significantly fewer alignment-related tire failures, saving money and reducing roadside breakdowns. Similarly, owner-operators who are diligent with these checks report better handling and even improved fuel economy due to proper alignment and reduced rolling resistance. This step is a cornerstone of a safe and efficient trip.
Practical Tips for an Effective Inspection
- Listen Carefully: When turning the wheel lock to lock (with the engine on), listen for any unusual popping, clunking, or grinding sounds that could indicate worn steering components.
- Check for Leaks: Use a flashlight to thoroughly inspect the power steering box and all associated hoses for any signs of fluid leaks.
- Get a Good View: Safely look under the vehicle to inspect U-bolts, spring hangers, and other mounting hardware to ensure they are not cracked, broken, or loose.
- Rock the Vehicle: If safe to do so, gently rocking the vehicle can sometimes reveal loose or worn suspension bushings and mounts.
6. Exhaust System and Emissions Inspection
A thorough exhaust system and emissions inspection is a critical component of any CDL pre-trip inspection checklist. This check ensures your truck operates cleanly, complies with environmental regulations, and protects you from dangerous fumes. A compromised exhaust can lead to poor engine performance, costly fines, and severe safety risks, such as carbon monoxide entering the cab. This inspection involves a visual and auditory check of all parts from the engine manifold to the tailpipe.
Key Components to Check
Your review of the exhaust and emissions system must be comprehensive, looking for signs of damage, leaks, and insecure mounting.
- Pipes, Muffler, and Stack: Inspect the entire length of the exhaust system. Look for cracks, holes, severe rust, or dents that could restrict airflow. Check that all components are securely mounted and not in danger of making contact with other vehicle parts, wires, or brake lines.
- Leak Indicators: Look for black soot stains around joints, clamps, and connections. These soot trails are a clear sign of an exhaust leak that must be addressed.
- Emissions Components: Visually inspect the Diesel Particulate Filter (DPF) and Selective Catalytic Reduction (SCR) systems for any obvious damage or leaks. Ensure the Diesel Exhaust Fluid (DEF) tank is secure and has an adequate fluid level.
- Security: Vigorously check all brackets, clamps, and hangers to ensure they are tight and the system is not loose or dragging.
Pro Tip: Listen carefully when the engine is running. Hissing, popping, or excessively loud roaring sounds often point directly to an exhaust leak or a damaged muffler, which might not be visible at first glance.
Why It's a Critical Check
A properly functioning exhaust system is non-negotiable for safety and compliance. For example, trucking companies based in California face stringent emissions standards and rely on daily inspections to avoid violations. Similarly, clean diesel fleets must conduct comprehensive emission system checks to meet EPA Tier 4 standards. A small crack in an exhaust pipe found during your pre-trip inspection prevents a dangerous situation where deadly carbon monoxide could seep into your sleeper berth overnight. This check is a fundamental part of your professional responsibility.
Practical Tips for an Effective Inspection
- Inspect When Cold: Whenever possible, check the exhaust system before starting the engine. The components get extremely hot and can cause severe burns.
- Look for Soot: Black soot is the tell-tale sign of a pinhole leak or a bad gasket. Pay close attention to any connection points.
- Monitor DEF Levels: Keep an eye on your DEF consumption. An unusually high or low usage rate can indicate a problem with the SCR emissions system.
- Use Your Senses: Look for damage, listen for unusual noises, and even be aware of strange smells that could indicate an exhaust or fluid leak.
For a visual walkthrough of a complete exhaust system check, see the video below.
7. Coupling System and Fifth Wheel Inspection
The coupling system inspection is a non-negotiable part of any CDL pre trip inspection checklist for combination vehicles. This is the critical link between your tractor and trailer, and a failure here can lead to catastrophic trailer separation. A secure connection is paramount for controlling the vehicle and ensuring public safety. This check involves a hands-on review of the fifth wheel, kingpin, locking jaws, and all air and electrical lines.
Key Components to Check
A systematic approach to the coupling system ensures that nothing is overlooked. You must verify both the physical and operational integrity of the connection.
- Fifth Wheel and Kingpin: Check that the fifth wheel is securely mounted to the frame and that the pivot pins are locked in place. Ensure there is no gap between the fifth wheel plate and the trailer apron. Verify that the locking jaws are fully closed around the shank of the kingpin. The kingpin itself should not be bent or damaged.
- Release Arm and Safety Latch: The release arm must be in the fully locked position, and the safety latch should be engaged to prevent accidental release.
- Air and Electrical Lines: Inspect all glad hands and electrical cords. Look for cracks, cuts, or signs of wear. Ensure they are securely connected to the trailer, with no audible air leaks, and that they have enough slack for turns without being so low that they drag on the ground.
- Mounting Bolts and Sliding Fifth Wheel: Check that all mounting bolts are tight and present. If you have a sliding fifth wheel, ensure the locking pins are fully engaged and locked.
Pro Tip: Perform a "tug test" after coupling. With the trailer brakes applied, gently try to pull forward with the tractor. If the connection is secure, the truck will not move. This simple test confirms your visual inspection and ensures the kingpin is properly seated.
Why It's a Critical Safety Step
Proper coupling procedures are a cornerstone of safe truck operation. Large private fleets have a zero-tolerance policy for improper coupling inspections to prevent dangerous trailer separation incidents. Similarly, other carriers have found that implementing standardized coupling procedures and checks significantly reduced equipment damage and improved safety outcomes. An insecure connection doesn't just risk equipment; it directly endangers every person on the road. For more details, you can prepare for your combination vehicles test.
Practical Tips for an Effective Inspection
- Use a Flashlight: The space around the fifth wheel and kingpin is often dark. A flashlight is essential to properly see the locking jaws and check for any gaps or damage.
- Check from All Angles: Look at the connection from both sides of the truck. Verify the platform is level and that the trailer is sitting properly on the fifth wheel.
- Listen for Leaks: With the air lines charged, listen carefully for the hiss of escaping air from the glad hand connections. A proper seal is vital for brake operation.
- Confirm Lights: After connecting the electrical pigtail, perform a light check to confirm that your brake lights, turn signals, and marker lights are all functioning correctly. This is often done during the in-cab portion of the inspection.
8. Windshield and Mirror Systems Inspection
A clear and unobstructed view is non-negotiable for a professional driver. The windshield and mirror systems inspection is a critical part of the CDL pre-trip inspection checklist, directly impacting your situational awareness and ability to operate safely. This check ensures your line of sight is free from defects and that you can monitor the areas around your entire vehicle, preventing accidents caused by impaired vision or blind spots.
Key Components to Check
Your inspection of the glass and mirrors must be comprehensive. You are looking for anything that could compromise your ability to see the road and surrounding traffic clearly.
- Windshield Condition: Inspect the windshield for any cracks, chips, or other damage. Illegal cracks or damage in the driver's viewing area can result in an out-of-service violation. Ensure it is clean.
- Wipers and Washer Fluid: Check the wiper arms for proper tension against the glass and inspect the blades for signs of drying, cracking, or tearing. Test the windshield washer system to confirm it sprays fluid effectively.
- Mirrors: Verify that all mirrors, including flat, convex, and fender-mounted mirrors, are clean, securely mounted, and free of cracks. Ensure they are properly adjusted for your seating position.
- Heaters and Defrosters: Test the mirror heaters and windshield defrosters to ensure they are operational, a crucial step before driving in cold or wet weather.
Pro Tip: Before you start your trip, sit in the driver's seat and adjust all mirrors to minimize blind spots. Your goal is to see a small sliver of the side of your trailer in your flat mirrors and have a wide-angle view in your convex mirrors.
Why It's a Critical Step
Uncompromised visibility is a cornerstone of defensive driving. Major carriers have implemented visibility inspection programs that have been shown to reduce backing accidents by a significant margin. Similarly, regional delivery companies report fewer side-swipe incidents when drivers perform comprehensive mirror checks. Properly maintaining these systems is not just about compliance; it's about actively preventing accidents before they happen. For an in-depth guide, you can review details on pre-trip inspections for an even clearer understanding.
Practical Tips for an Effective Inspection
- Clean Daily: Make cleaning your windshield, windows, and mirrors part of your daily routine. A clean microfiber cloth works best.
- Replace Wipers Regularly: Don't wait for a downpour to discover your wipers are bad. Replace blades every 6-12 months or as soon as they start streaking.
- Check for Security: Physically check that mirrors are not loose. The vibration from the road can loosen mounts over time, changing your view when you least expect it.
- Test All Functions: Don't just look; test. Activate the wipers, washer fluid, and defrosters to confirm they work correctly before you need them.
8-Point CDL Pre-Trip Inspection Comparison
| Inspection Type | Implementation Complexity 🔄 | Resource Requirements ⚡ | Expected Outcomes 📊 | Ideal Use Cases 💡 | Key Advantages ⭐ |
|---|---|---|---|---|---|
| Engine Compartment Inspection | Moderate – requires tools and cooldown | Medium – tools, light source, time (5-8 mins) | Prevents breakdowns, improves fuel efficiency | Daily/Pre-trip checks for engine safety and maintenance | Extends engine lifespan, reduces roadside failures |
| Tire and Wheel Assembly Inspection | Moderate – requires gauges, physical effort | Medium – tread depth tool, pressure gauge, time | Prevents blowouts, improves vehicle handling | Safety-critical for all commercial vehicles | Enhances fuel economy, reduces tire replacement costs |
| Brake System Inspection | High – complex system, requires engine on | High – air pressure gauge, specialized knowledge | Ensures reliable stopping, reduces accident risk | Mandatory pre-trip and annual DOT inspections | Maintains brake standards, prevents brake failures |
| Lighting and Electrical Systems | Low to Moderate – needs assistant sometimes | Low – spare bulbs, basic tools | Ensures visibility, prevents citations | Night or poor visibility driving, regulatory compliance | Reduces accidents, maintains DOT compliance |
| Steering and Suspension Inspection | High – sometimes requires vehicle lifting | Medium to High – mechanical knowledge, inspection tools | Ensures vehicle control, ride comfort | Long-haul routes, rough terrain or frequent driving | Reduces tire wear, driver fatigue |
| Exhaust System and Emissions | Moderate to High – requires specialized knowledge | Medium – inspection tools, access to emission data | Ensures compliance, reduces emissions | Environmental compliance, noise control | Maintains engine performance, reduces pollution |
| Coupling System and Fifth Wheel | Moderate – physical labor, detailed checks | Medium – time, safety training | Prevents trailer separation, ensures connectivity | Tractor-trailer operations, pre-trip coupling checks | Reduces jackknife risk, compliance with DOT rules |
| Windshield and Mirror Systems | Low – visual checks, minor maintenance | Low – cleaning supplies, replacement wipers | Improves visibility, reduces blind spot accidents | All conditions requiring clear visibility | Enhances safety, prevents visibility violations |
Turning Your Checklist into a Career-Defining Habit
Moving from a detailed listicle to the driver's seat requires transforming knowledge into an ingrained, instinctual habit. The comprehensive CDL pre trip inspection checklist we've explored is far more than a regulatory hurdle or a box-ticking exercise before you hit the road. It represents the foundational skill of a professional driver, a daily ritual that separates the amateurs from the career-focused experts. Mastering this process is your first line of defense against unexpected breakdowns, costly roadside repairs, and, most importantly, preventable accidents. It is the bedrock of a safe, profitable, and long-lasting career in the trucking industry.
Think of each item we've covered, from the engine compartment to the coupling system, as a critical chapter in your daily safety story. A seemingly minor issue like a soft tire, a cracked airline, or a dim turn signal can escalate into a major problem at 65 miles per hour. Your diligent inspection is what catches these issues when they are small, manageable, and inexpensive to fix. This consistent attention to detail doesn't just keep you compliant with FMCSA standards; it builds a powerful reputation for reliability and professionalism with employers and shippers alike.
From Checklist to Career-Long Commitment
The ultimate goal is to internalize this process so thoroughly that it becomes second nature. Instead of just memorizing steps, strive to understand the why behind each check.
- Engine Compartment: You aren't just looking at hoses; you're ensuring the heart of your operation is ready for the immense stress of hauling tens of thousands of pounds.
- Brake System: You aren't just listening for air leaks; you are confirming that your most critical safety system has the power and integrity to protect you and others.
- Tires and Wheels: You aren't just checking tread depth; you are verifying that the only points of contact between your massive vehicle and the pavement are secure and sound.
This deeper understanding elevates the pre-trip inspection from a rote task to an active engagement with your equipment. You will begin to notice subtle changes, a new sound, or a slight difference in feel that signals a potential issue long before it appears on a diagnostic report. This proactive mindset minimizes downtime, maximizes your earning potential, and solidifies your status as a top-tier driver.
A flawless pre-trip inspection isn't an obstacle to starting your day; it's the most important step in ensuring you have a safe and successful one. Your commitment to this process is a direct investment in your career and your safety.
Embrace this checklist as your daily empowerment tool. Adapt it, make it your own, and never cut corners. Your dedication to a thorough and consistent pre-trip inspection is the single greatest factor you can control for a safe journey, every single time you turn the key.
Ready to turn your ambition into a career? Mastering the pre-trip inspection is a core component of the hands-on training at Patriot CDL. Our expert instructors provide the practical, real-world skills you need to not just pass your test, but to excel as a professional driver from day one. Enroll at Patriot CDL and start building the foundation for a successful future on the road.