Passing the driving test for cdl isn't just one test—it's actually a three-part exam that covers everything from knowing your rig inside and out to handling it safely on the open road. To earn that pass, you’ll need to master each phase: the Pre-Trip Vehicle Inspection, the Basic Control Skills test, and the final On-Road Driving test.
This guide will walk you through exactly what the examiners are looking for at every step, giving you the playbook you need to prepare, stay confident, and pass on your first try.
Understanding the Three Phases of the CDL Driving Test
Staring down the final hurdle for your commercial driver’s license can feel intimidating, but the whole process is much more manageable when you break it down. It’s not just one big, stressful event. Instead, think of it as a comprehensive evaluation designed to confirm you have what it takes to be a safe, competent professional out on the road.
The test is structured logically. It starts with your detailed knowledge of the vehicle itself, then moves on to your ability to handle it in a controlled setting, and finally tests your skills in real-world traffic. Each part builds on the last, proving to the examiner that you have the complete skill set needed for a career behind the wheel.
What to Expect on Test Day
Your CDL skills test follows a clear, three-stage path. You have to pass each one to move on to the next.
- Pre-Trip Vehicle Inspection: This is where you start. You'll verbally walk the examiner through a complete, systematic check of your rig's critical safety and operational components. It’s your chance to prove you know the truck like the back of your hand.
- Basic Control Skills: After the inspection, you'll head to a closed course or lot, away from traffic. Here, you'll be asked to perform specific backing and maneuvering exercises—like straight-line backing, offset backing, or parallel parking—to demonstrate your precision and control.
- On-Road Driving: The final piece of the puzzle takes you onto public roads. The examiner will be watching how you handle the truck in live traffic, evaluating your turns, lane changes, speed control, and how you interact with other drivers.
Solid preparation makes all the difference. Nationally, the average first-time pass rate for the CDL skills test is between 70% and 80% for students coming from well-run training programs. To put that in perspective, one major national trucking school reported that 78% of its graduates passed on their first attempt in 2022, and some elite programs even boast pass rates as high as 85–90%.
This structured test isn't meant to trip you up. It’s designed to ensure every driver who gets a CDL has a rock-solid foundation in safety, vehicle mechanics, and operational skill. See it as your final check-off before launching a great career.
Once you know what’s required for the driving test for CDL, you can focus your practice sessions on each specific area. And before you even get to test day, make sure you’ve met all the necessary state and federal prerequisites. You can find out more by checking our detailed guide on CDL requirements. Consider this your road map for turning a daunting exam into a series of achievable goals.
How to Master the Pre-Trip Vehicle Inspection
The CDL skills test doesn't start when you turn the key—it starts the second you walk up to the truck. Think of the Pre-Trip Vehicle Inspection as the first, and arguably most important, part of your exam. This isn't just about kicking the tires; it's your first chance to prove to the examiner that you have the meticulous, safety-first mindset of a true professional.
You’ll be asked to walk the examiner around the vehicle, verbally explaining every single check. This means you need to physically point to or touch each part, name it, and then clearly state what you’re looking for. Doing this shows you've moved beyond just memorizing a list and actually understand how these components work together to keep the truck safe on the road.
Breaking Down the Inspection Process
Staring at a big rig and trying to remember every single bolt and hose can feel impossible at first. The secret isn't to memorize a random list, but to develop a repeatable system. You need a flow, a routine you can execute flawlessly every time, whether you're in the practice yard or standing in front of the examiner.
A lot of drivers have success with an "engine-to-axle" approach. You start at the very front, pop the hood and cover the engine compartment, then work your way down one entire side of the rig—tractor and trailer—before looping around to check the other side. This logical path ensures you don't forget something major, like the coupling system or an entire set of brakes.
Most importantly, you have to talk your way through it. You are the guide, and the examiner is your student. Speak clearly and with confidence. Long, awkward silences can make it seem like you're lost or don't know what comes next. It’s not enough to glance at a part; you have to say what you’re checking and why it matters.
Key Areas That Trip People Up
Every component is critical, but over the years, we've seen a few specific areas that consistently give new drivers trouble. If you can nail these down in practice, you'll be way ahead of the curve on test day.
- Brakes and Slack Adjusters: This is a big one. You have to be able to demonstrate that the slack adjusters have no more than about one inch of play when you pull on them by hand (make sure the brakes are released!). You also need to walk through the complete in-cab air brake test.
- Tires and Rims: "The tires look good" is an instant failure. Get specific. You’re checking for proper inflation, inspecting the sidewalls for cuts or bulges, and confirming legal tread depth. Remember the numbers: at least 4/32-inch on steers and 2/32-inch on all other tires.
- Fluid Levels: It’s not just about opening the hood. You must be able to point out the reservoirs for engine oil, coolant, and power steering fluid. Then, you need to show the examiner how you'd verify each is at a safe level, either with a dipstick or by reading the tank's markings.
Don't underestimate this part of the test. The Pre-Trip Inspection is where a huge number of people fail—some schools report that as many as 8 out of 10 failures happen before the truck even moves. It’s not physically hard, but it demands absolute precision and clear communication.
For a much deeper look, check out our complete pre-trip inspection guide. It's packed with detailed checklists that will help you build the solid routine you need to pass this first critical hurdle.
To help you get started, here’s a quick overview of the major areas you'll cover. Think of this as the high-level outline for your own personal inspection flow.
CDL Pre-Trip Inspection Key Areas Checklist
| Vehicle Section | Key Components to Check (Examples) | What to Say and Look For |
|---|---|---|
| Engine Compartment | Hoses, Belts, Fluid Levels, Alternator, Air Compressor | State you're checking for cracks, leaks, or fraying. Mention that belts should have no more than 1/2 to 3/4 inch of play. Verbally confirm fluid levels. |
| Cab and Safety Equipment | Seatbelt, Mirrors, Horns, Windshield, Safety Triangles | Announce that the seatbelt latches securely, mirrors are clean and adjusted, and both city and air horns work. Check for illegal stickers on the windshield. |
| Wheels and Tires | Rims, Lug Nuts, Hub Oil Seal, Tire Inflation, Tread Depth | Check for bent rims or rust streaks from lug nuts (indicating looseness). Verify the hub oil seal isn't leaking. State the minimum tread depth requirements. |
| Coupling System | Fifth Wheel, Apron, Kingpin, Sliding Tandems, Airlines | Ensure the fifth wheel is securely mounted and the locking jaws are closed around the kingpin. Check that airlines and electrical cords are not dragging. |
| Trailer | Frame, Landing Gear, Lights, Doors, DOT Tape | Inspect the trailer frame for cracks or damage. Check that the landing gear is fully raised. Verify that all lights are working and reflective tape is clean. |
Using a structured checklist like this to build your routine is the best way to walk into your exam feeling prepared and confident.
Nailing Your Basic Control and Backing Skills
Once you've walked the examiner through the pre-trip inspection, it's time to show them what you can do behind the wheel. The driving test for CDL shifts from what you know to how well you can handle the rig. This is the Basic Control Skills test, and it's all about finesse.
You'll be in a closed course, away from traffic, so the focus is purely on your ability to maneuver a huge vehicle in tight spaces. Think of it as a test of pure precision and your gut-level understanding of how the truck and trailer bend and pivot.
Most states will test you on a few core maneuvers you'll use daily out on the road. You can pretty much count on doing a straight-line back, an offset back (where you move the rig one lane over in reverse), and some form of parallel parking. The goal isn’t speed; it’s about smooth, deliberate control within a space marked by cones or lines. Examiners want to see that you’re thinking ahead of the trailer, not reacting to it.
How the Scoring Really Works
To pass this part, you have to know how you’re being graded. It's not a simple pass/fail like hitting a curb on the road test might be. Instead, you start with a perfect score, and the examiner subtracts points for mistakes. Knowing what costs you points is the key to practicing smart.
Here’s what they’ll be watching for:
- Pull-Ups: Every time you stop, shift into a forward gear, and pull up to straighten out, you lose points. A pull-up is always better than hitting a cone, but the goal is to need as few as possible. Ideally, none.
- Encroachments: This is just a fancy word for touching a cone or crossing a boundary line. Any part of your truck or trailer goes over the line, and you lose points.
- Final Position: Where you end up is just as important as how you got there. If your rig isn't straight inside the designated box or you’re too far from the "dock," it’s going to cost you.
So, how do you avoid these? The single best piece of advice is to get friendly with your mirrors. You need to be constantly scanning from your left mirror to your right and back again. Never fixate on one. This constant back-and-forth gives you the full picture of where your trailer is tracking.
The rookie mistake I see all the time is oversteering. Remember, a small turn of the steering wheel right now will cause a big change at the back of that trailer a few seconds from now. Make tiny, slow corrections and give the trailer a moment to respond before you turn the wheel more.
This diagram shows how different systems connect, which is a great way to think about your skills test. One maneuver flows right into the next.
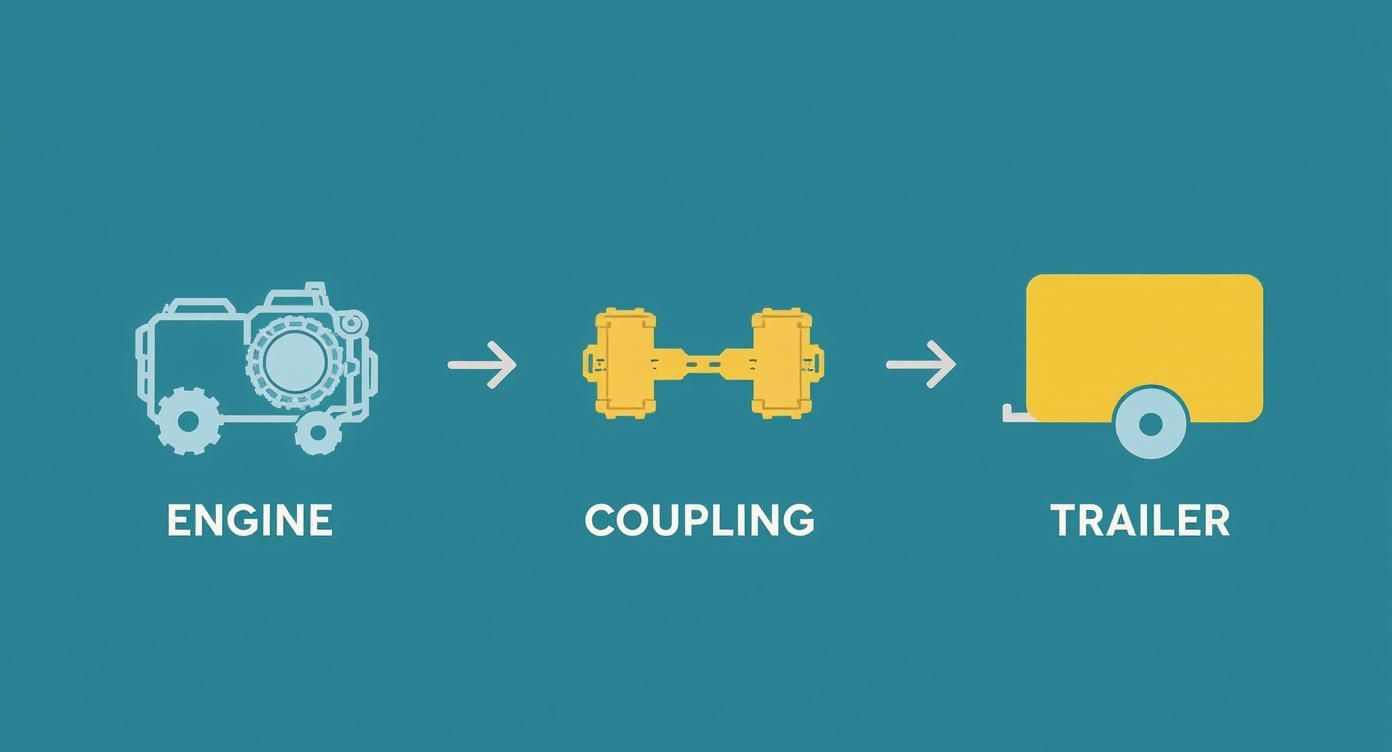
Just like the engine's power has to go through the coupling to get to the trailer, your knowledge has to flow into precise action during these backing tests.
The Smartest Move You Can Make: G.O.A.L.
You have a secret weapon that examiners actually want you to use: G.O.A.L. It stands for Get Out And Look.
If you're ever in doubt about how much space you have, you are absolutely allowed to stop, put the truck in neutral, set your brakes, and hop out to get a firsthand look. Using G.O.A.L. isn't a sign of failure—it shows you’re a safe, professional driver who doesn’t take chances. You usually get a couple of "free" looks before they start costing you points, so use them wisely. It is far, far better to take a look than to guess and take out a cone.
Breaking Down Each Maneuver
The exact skills test can vary a bit from state to state, but they all boil down to the same principles. Let's walk through the big three.
Straight-Line Backing
It sounds easy, but keeping a 53-foot trailer dead straight while backing is tricky. The secret is to catch any drift the second it starts. The moment you see more of the trailer in one mirror, make a tiny turn of the steering wheel toward that same mirror. As soon as it straightens out in your mirrors, bring your steering wheel back to center. That's it.
Offset Backing (Left or Right)
This is where you back your rig from your lane into the one next to it. Success here is all about the setup. Pull forward until your tractor-trailer is perfectly straight and parallel to the lanes. As you reverse, you want the trailer to pivot cleanly into the target lane. I tell my students to back straight until the very back of the trailer is about to enter the new lane, then make your turn. Once the trailer starts moving into the lane, you have to "follow it in" with your tractor.
Parallel Parking
This is the one that gets most people's heart rates up. You’re backing into a spot that isn't much bigger than your rig. It’s all about knowing your pivot points. You’ll pull up alongside the parking spot, then start backing. When your trailer's rear axles line up with the front cone of the parking space, that’s your cue. Crank the wheel hard to get the trailer angling in. Once it’s about 45 degrees into the spot, you have to crank the wheel hard the other way to swing the tractor in behind it.
There's no substitute for practice. You need hours in the seat, so finding a big, empty lot to set up some cones is a must. If you're struggling to find a spot, especially in a busy area, our guide to truck parking resources can point you in the right direction. It’s all about repetition until the moves become pure muscle memory.
Navigating the On-Road Driving Test with Confidence
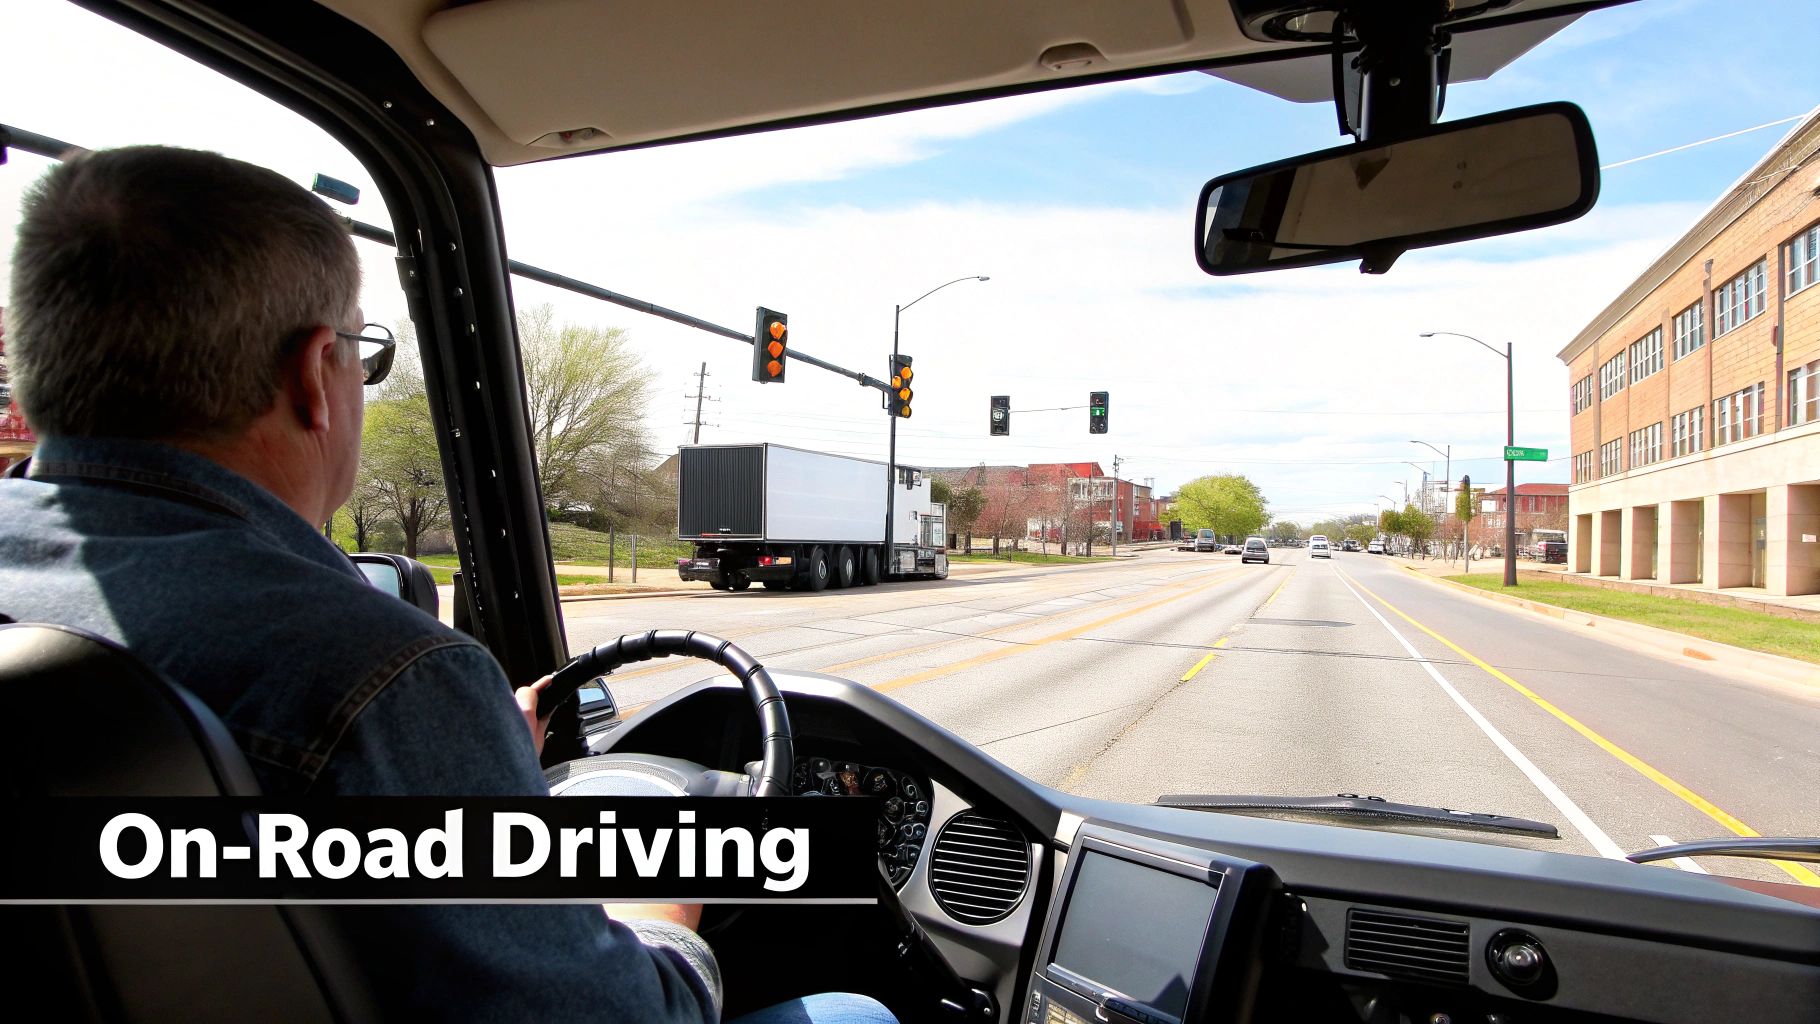
You’ve nailed the pre-trip inspection and conquered the backing maneuvers. Now it's time for the final piece of the puzzle: driving the rig on public roads. This is where your training truly comes to life.
The examiner isn’t just looking for someone who can steer a truck. They’re evaluating whether you can think and act like a professional driver in the middle of real-world traffic. It’s less about hitting every shift perfectly and more about your decision-making, safety awareness, and defensive driving habits. You’ll be guided along a route with a mix of traffic situations to see how you manage the vehicle’s sheer size and weight while sharing the road.
Mastering Turns and Lane Management
Poor turns are one of the biggest red flags for an inexperienced driver. A big rig demands a completely different approach than a car, especially when making a right turn. You’ll need to show you can execute a proper "button-hook" or jug-handle turn to keep your trailer tires from climbing the curb—a common and very serious mistake.
To pull it off, you have to drive further into the intersection than you’d think, giving the trailer enough room to follow without hitting anything. It feels strange at first, but it's absolutely crucial. The examiner will also be watching your lane positioning like a hawk. Keep your vehicle centered, giving yourself a safe buffer from both the shoulder and the centerline.
Critical Skills for On-Road Success
Beyond just staying between the lines, the road test is a live assessment of a few key skills. Consistently demonstrating these habits proves to the examiner that you're a low-risk, professional driver ready for the road.
- Proper Following Distance: Leave at least a seven-second gap between you and the vehicle ahead. This is non-negotiable for having enough time to stop a loaded truck safely.
- Constant Mirror Checks: Your head needs to be on a swivel. Examiners want to see you checking your mirrors every 5-8 seconds, and always before you brake, change lanes, or make a turn.
- Smooth Speed Control: No jerky movements. You should be anticipating slowdowns and traffic lights well in advance to manage your speed without any sudden braking or acceleration.
The on-road portion is your final performance. The examiner is looking for a driver who is in complete control, not just reacting to traffic but actively anticipating what might happen next. A calm, confident, and defensive driving style is exactly what they want to see.
This focus on high standards isn't just a U.S. thing. Globally, practical tests demand advanced vehicle control. For instance, Germany’s HGV practical test pass rate hovers around 65-70%, while in the UK, it’s about 62-65%. These numbers show just how tough the on-road expectations are everywhere.
Handling Specific Traffic Situations
Don't expect an easy cruise. Your test route is designed to challenge you with intersections, railroad crossings, and probably some highway driving.
Intersections and Crossings
As you approach an intersection, your scanning goes into overdrive. Look left, right, and then left again before you pull out from a stop. At railroad crossings, you must slow down, look both ways, and listen for trains. Critically, make sure you have enough space to clear the tracks completely before you even start to cross. If you're testing for a bus or hazmat endorsement, a full stop is mandatory.
Highway Driving
If your route hits the highway, the examiner will be zeroed in on your merging and exiting skills. Use the on-ramp to get your truck up to traffic speed before you attempt to merge. Signal early, pick your gap in traffic, and ease into the lane smoothly. Never force another driver to hit their brakes for you.
Avoiding Automatic Fails
While most of the test is scored on points, some mistakes are so serious they’ll end your test on the spot. These are automatic fails. Knowing what they are is just as important as knowing what to do right.
These actions will immediately fail your driving test for a CDL:
- Causing any accident, no matter who was at fault.
- Breaking any traffic law (speeding, running a red light, rolling a stop sign).
- Failing to yield the right-of-way.
- Running your truck’s wheels over a curb or sidewalk.
- Showing a serious lack of control over the vehicle.
The examiner’s number one priority is safety. Any move that puts you, them, or the public at risk is grounds for an instant disqualification. Drive cautiously, follow every rule, and you'll prove you're ready to join the ranks of professional drivers.
Common Mistakes That Cause People to Fail the CDL Test
One of the best ways to set yourself up for success is to learn from the mistakes of others. Trust me, most people don't fail their CDL driving test because they're terrible drivers. It's usually the simple, completely avoidable errors that trip them up.
If you know what these common pitfalls are ahead of time, you can build the right habits from your very first day of training. These little blunders can happen during any part of the exam, from the pre-trip inspection to the skills maneuvers and the final road test.
Pre-Trip Inspection Errors
It might sound crazy, but a shocking number of tests are over before the engine even turns on. The pre-trip inspection isn't just about knowing the truck; it's a test of memory and your ability to communicate what you know. This is where a lot of people stumble.
The single biggest mistake? Being too quiet. You have to be your own narrator. Pointing at a part won’t cut it. You must say the component's name out loud, explain what you’re checking for, and tell the examiner why it's important for safety.
Another classic error is completely skipping a section of the truck. I've seen it happen—a student will nail the engine compartment and the driver's side, then nerves kick in and they totally forget the coupling system or the rear of the trailer. The only way to beat this is with a rock-solid routine. Practice walking around the truck the exact same way, every single time, until it's pure muscle memory.
It's no exaggeration to say that a huge number of test failures happen right here. Some insiders estimate as high as 80% of all failures occur during the pre-trip inspection. That should tell you everything you need to know about practicing your verbal walkthrough until you can do it in your sleep.
Missteps in Backing and Basic Skills
When it comes to the backing maneuvers, most failures can be traced back to one thing: a bad setup. If you don’t pull your truck up into the correct starting position—perfectly straight and at the right distance—you're making the whole exercise ten times harder on yourself before you even put it in reverse.
Oversteering is another dream-killer. New drivers have a tendency to crank the steering wheel, making big, jerky movements that cause the trailer to swing way too fast. The secret is to make small, smooth adjustments. Turn the wheel a little, then wait a second to see how the trailer reacts before you correct again. And don't ever forget G.O.A.L.—Get Out And Look. It's always better to hop out and check your position than to hit a cone or cross a line, which can be an instant fail.
On-Road Driving Blunders
Once you're out on the road, the test is all about handling the truck's size and being aware of everything around you.
- Bad Turns: This is a big one. Making a right turn too tightly and hopping the curb with your trailer tires is an automatic fail in most states. You have to learn how to swing wide and use that "button-hook" turning method.
- Forgetting Your Mirrors: Examiners are watching your head, not just the truck. They want to see you constantly scanning your mirrors every 5 to 8 seconds. If your head isn't moving, they assume you're not aware of your surroundings.
- Poor Speed and Space Management: Following the car ahead too closely or constantly slamming on the brakes because you didn't anticipate traffic are major red flags. This shows the examiner you can't manage the vehicle's weight and momentum.
To help you get a clear picture of what to watch out for, here’s a quick breakdown of the most common reasons people don't pass.
Top 5 Reasons for Failing the CDL Driving Test
This table highlights the most frequent mistakes that can derail your test day. Think of it as a checklist of "what not to do."
| Common Mistake | Test Section | Preventative Strategy |
|---|---|---|
| Forgetting Inspection Items | Pre-Trip Inspection | Develop a consistent, repeatable walk-around path. Practice your verbal script daily until it becomes second nature. |
| Hitting Cones/Boundaries | Backing Maneuvers | Always use "G.O.A.L." (Get Out and Look). Focus on a proper initial setup and make small, incremental steering corrections. |
| Improper Turns (Hitting Curbs) | On-Road Driving | Practice "button-hook" turns in a large, empty lot. Exaggerate swinging wide until you understand your trailer's off-tracking. |
| Lack of Mirror Checks | On-Road Driving | Make a conscious effort to move your head every 5-8 seconds. Say your checks out loud softly to build the habit: "Checking left, checking right…" |
| Poor Space Management | On-Road Driving | Always maintain a safe following distance of at least 7 seconds. Look far down the road to anticipate traffic changes and brake smoothly. |
Ultimately, these errors all come down to a lack of respect for the sheer size and physics of a commercial vehicle. Really understanding how the truck's systems work, especially things like the air brakes, is non-negotiable for safe driving. To sharpen your knowledge, our guide on the air brakes test is a great place to start.
Answering Your Top CDL Test Questions
Even after hours of practice, a few nagging questions can cause some serious pre-test jitters. Let's clear the air and tackle some of the most common things that are on every aspiring driver's mind before the big day. Getting these answers straight lets you walk in feeling confident and ready to perform.
A big question I always hear is, "Can I use my own truck for the test?" The short answer is maybe, but it's often more trouble than it's worth. If you bring your own rig, it has to be the exact class you're testing for, have perfect registration and insurance, and pass a full safety inspection by the examiner on the spot. If they find one little thing wrong, your test is over before it starts. This is exactly why most people test in a driving school's truck—they're kept in test-ready condition 24/7.
What If I Fail a Part of the Test?
Don't panic. Failing one section of the CDL skills test usually isn't a total reset. While every state has its own rules, you typically don't have to start the whole three-part exam over from scratch.
For example, say you ace the pre-trip inspection but get tripped up on the backing maneuvers. Your next try will likely start right where you left off. You’d just have to re-do the backing and road test portions, as long as you do it within a specific time window. Be aware, though, that states limit how many tries you get before you have to reapply and pay all the fees again. Your best bet is to check your local licensing agency's retesting policy.
An automatic fail is a deal-breaker. It's a serious safety violation that ends your test immediately. Things like causing a crash, running a red light, speeding, or hopping a curb are instant disqualifications because they show a critical lack of control.
Are There Automatic Fails on the Road Test?
You bet there are. Examiners are trained to watch for critical safety mistakes that will end your test on the spot. These aren't just point deductions; they're immediate, automatic failures.
Some of the most common automatic fails are:
- Causing an Accident: It doesn't matter who was at fault. Any collision, and your test is done.
- Violating Traffic Laws: This is a big one. Speeding, blowing through a stop sign, or not yielding are all surefire ways to fail.
- Hitting a Curb: Letting your tires climb a curb or sidewalk demonstrates a major lack of spatial awareness.
- Demonstrating Unsafe Control: If the examiner has to grab the wheel or feels you can't handle the truck safely, that's it.
Your mission is to drive defensively and with caution the entire time. Of course, you have to pass the written exam before any of this matters. For a deep dive on that, check out our guide to the CDL general knowledge test.
At Patriot CDL, we provide the hands-on training and expert guidance you need to pass every part of your CDL test with confidence. Learn more about our accelerated programs and start your journey on the open road at https://patriotcdl.com.