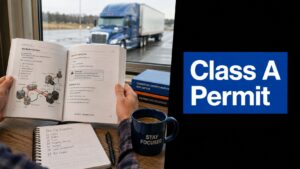
Getting your air brakes endorsement is a big deal. It’s more than just another test to check off the list—it's a critical step that proves you know how to handle one of the most important safety systems on a commercial vehicle. This is one part of the CDL process where you can't afford to cut corners, as a single mistake during the practical inspection can mean an instant fail.
Simply put, you have to be prepared.
Why Mastering the Air Brakes Test Is So Important
Passing the air brakes test is a major milestone on your way to getting a CDL. Unlike a lot of other tests, the air brakes inspection portion demands absolute precision. There’s no room for error. If you miss a step or perform a procedure incorrectly, your test day is over right then and there. That high-stakes reality is exactly why just memorizing facts won't work; you need a real, hands-on understanding of how the whole system operates.
This guide is here to walk you through it. We'll break down the complex parts into simple, manageable pieces, give you a hands-on checklist you can use over and over, and provide practice questions that are just like the ones you'll face on test day.
More Than Just a Checkbox
Think of the air brakes test as your first real chance to prove you can operate a heavy vehicle safely. It’s not about just naming the parts from a diagram. It’s about truly understanding what each component does and why it's so vital. Everything from the air compressor to the slack adjusters has a specific job in bringing tens of thousands of pounds to a safe stop.
When you really get it, you can:
- Spot potential problems during your pre-trip inspection before they turn into a disaster on the highway.
- Know how to react if a warning light comes on or you hear an air leak while you're driving.
- Clearly explain any issues to a mechanic, which saves time and ensures the right fix.
The Stakes Couldn't Be Higher
The air brake testing process in most states has become incredibly thorough. It’s a multi-stage, hands-on evaluation designed to make sure you know your stuff, inside and out. Since the air brake inspection is the only part of the pre-trip that can cause an automatic failure, your preparation needs to be flawless.
To give you a clear picture of what's involved, here’s a quick breakdown of what the test covers.
Air Brakes Test Components at a Glance
| Test Component | What It Covers | Why It's Important |
|---|---|---|
| Written Knowledge Test | Identifying parts, system operation, PSI ranges, and safe braking procedures. | Forms the foundation of your understanding before you touch the truck. |
| In-Cab Air Brake Check | A 7-step procedure testing for leaks, warning devices, and governor cut-in/cut-out. | This is the make-or-break practical portion. It confirms the system is safe to operate. |
| External Component Inspection | Visually inspecting air lines, brake chambers, slack adjusters, and brake drums/rotors. | Ensures the physical components that apply the braking force are in good working order. |
Knowing these components helps you focus your study time where it matters most—especially on that in-cab check.
For a lot of new drivers, the hands-on inspection is the most nerve-wracking part. The only way to beat the nerves is to practice the sequence until it's second nature. You want to get to the point where it becomes muscle memory.
Ultimately, getting this right is about more than just satisfying one of the many CDL requirements you need to meet. It’s about building the confidence you need to protect yourself, your truck, and everyone you share the road with. Treat your practice time as an investment in a long, safe career—and this guide will give you the roadmap to get there.
Understanding How Your Air Brake System Works
Before you can even think about passing the practical inspection, you need a solid mental picture of what’s happening every time your foot hits that brake pedal. It’s one thing to memorize the parts, but it’s another to truly understand how they all work together to stop an 80,000-pound rig. Once you get that, the tricky scenario questions on your air brakes test practice suddenly become a whole lot easier.
The best way I've found to explain it is to think of the air brake system like your truck's lungs. It breathes air in, stores it under massive pressure, and then uses that pressure to apply the brakes. The whole show starts with the air compressor.
The Heart of the System: The Compressor and Governor
The air compressor is a pump that’s hooked up to your engine. Its only job is to suck in outside air and cram it into the air tanks. Simple enough. But it doesn’t just run wild; it has a little boss called the governor. The governor is basically the brain of the operation, telling the compressor when to work and when to take a break.
When the pressure inside your air tanks hits its peak—usually somewhere between 120 and 140 PSI—the governor tells the compressor to "cut-out." It stops pumping. Then, as you drive and use your brakes, that pressure starts to drop. Once it dips down to around 100 PSI, the governor signals the compressor to "cut-in" and start pumping again. This constant cycle makes sure you’ve always got enough stopping power on tap.
Storing and Moving the Air
Once the compressor does its job, that pressurized air gets shoved into the air storage tanks. Most trucks have at least three. You’ll hear mechanics talk about a "wet tank" and "dry tanks." The wet tank is the first stop for the air, and it's designed to catch any moisture or oil that comes out of the compressor. From there, cleaner, drier air flows into the other tanks that feed your front and rear brakes.
Here's the key difference between air brakes and the brakes in your car: Air is the medium, not fluid. Hydraulic fluid can't be compressed, but air can. That's why air brake systems need such high pressure and a compressor that's always ready to top off the tanks.
Two Sides of the Same Coin: Service Brakes and Spring Brakes
This is where a lot of new drivers get tripped up, but it's pretty straightforward once you see how the two systems work hand-in-hand.
Service Brakes: Think of these as your everyday brakes. When you press the brake pedal, you're really just opening a valve. That valve lets compressed air shoot from the tanks, through the lines, and into the brake chambers at each wheel. The air pushes on a diaphragm, which shoves a pushrod, which cranks a slack adjuster, which twists an S-cam. That S-cam is what finally forces the brake shoes against the drum to slow you down. It’s an awesome chain reaction powered by nothing but air.
Spring Brakes: These are your parking brakes and your emergency brakes. They work completely opposite to the service brakes. Instead of using air to apply the brakes, they use massive, powerful springs to do the job. Air pressure is actually used to hold those springs back and keep the brakes off. So, when you pull that yellow knob on your dash, you're releasing the air pressure, allowing those springs to expand and lock the brakes.
This design is a brilliant safety feature. If you have a total air loss for some reason—like a busted line—the spring brakes will kick in automatically and bring you to a stop. Grasping this dual system is crucial, especially when you start hauling trailers. In fact, our guide on the combination vehicles test digs deeper into how these systems work together across the tractor and trailer, building on these core ideas.
Your Hands-On Air Brake Inspection Checklist
The written exam tests what you know, but the hands-on inspection is where you prove you can do it. This is, without a doubt, the most critical part of your practical test. One small mistake here? It can be an automatic fail. The real secret to acing this isn't just memorizing the steps; it’s about building the muscle memory to nail the inspection perfectly, every single time.
Think of this checklist as your playbook for the in-cab air brake check. We'll go through the exact sequence—what to do, what to listen for, and the specific numbers that mean pass or fail. Practice this until it becomes second nature.
This diagram shows you the journey the air takes, from the moment it's created by the compressor to when it actually stops the truck.
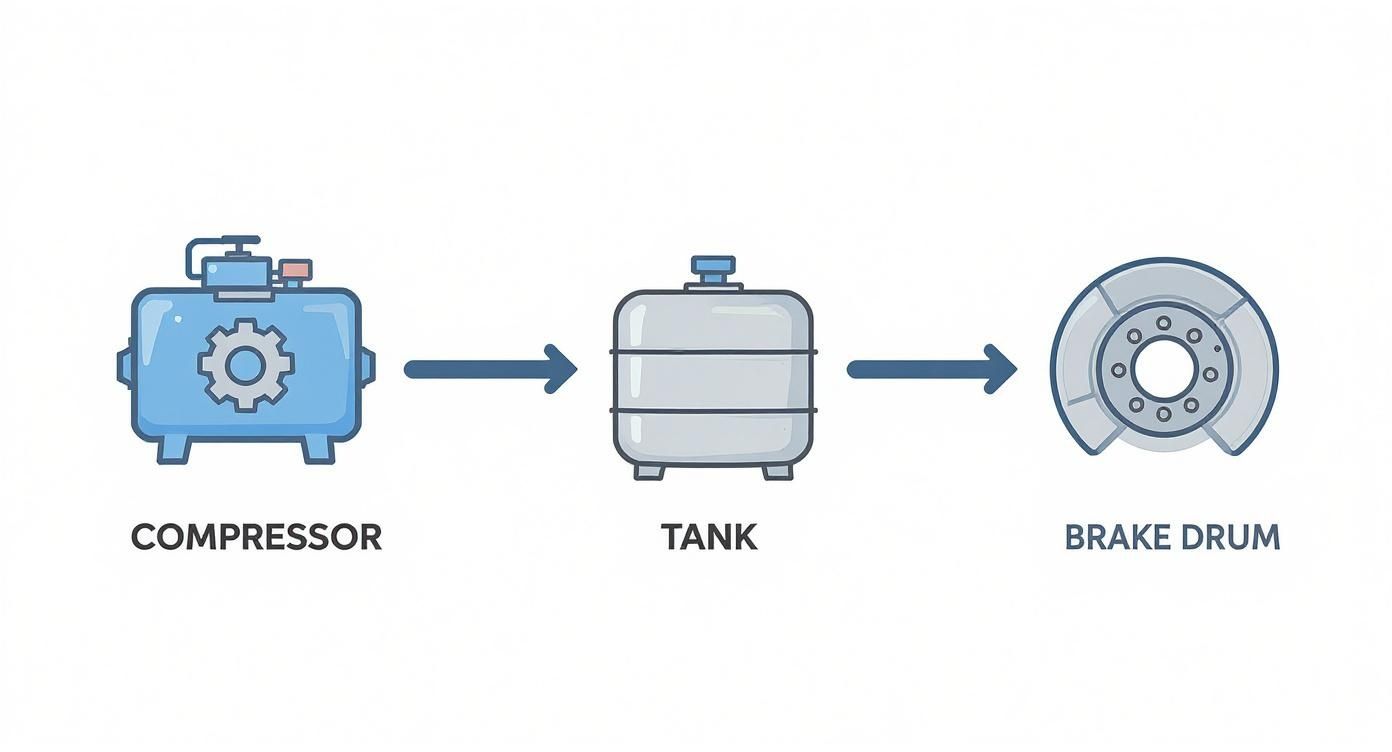
You can see how the engine-driven compressor fills the tanks, storing pressurized air that’s ready to activate the brakes the moment you need them.
Pre-Inspection Setup
Before you even think about touching the controls, you have to secure the vehicle. This is non-negotiable. It’s often the very first thing an examiner looks for, and skipping it is a rookie mistake that can end your test before it even starts.
- Chock the Wheels: Get those wheel chocks placed securely to keep the truck from rolling. You need to say it out loud to the examiner, too: "My wheels are chocked."
- Release Brakes: Make sure both the tractor parking brake (yellow knob) and the trailer supply brake (red knob) are released. That means pushing them both in.
- Key On, Engine Off: Turn the key to the "on" position. You want the gauges and warning lights lit up, but don't start the engine just yet.
Once the truck is secure and the power is on, you're set to begin the in-cab air brake test. This whole sequence is a massive part of any solid pre-trip inspection, so getting it right is vital.
Air System Build-Up and Governor Test
First up, you need to make sure the air compressor and governor are doing their jobs. This test confirms the system can build up the right amount of pressure and hold it there for safe operation.
Go ahead and start the engine. Now, just watch that air gauge climb.
The governor test is all about listening. You’re waiting for that distinct "pssh" sound when the governor cuts out, which tells you the compressor has stopped pumping air. Announce it clearly: "Governor cut-out at approximately 125 PSI."
You’re looking for a cut-out somewhere between 120 and 140 PSI. If it doesn't stop building pressure within that range, you’ve got a problem.
Static and Applied Leakage Tests
Alright, now it’s time to see if your system can hold its air. This is a direct test of the system's integrity. You'll be doing two separate checks for leaks.
Static Leakage Test:
With the engine off and the brakes still released, you’re going to stare at that air gauge for one full minute. For a straight truck, you can’t lose more than 2 PSI. For a combination vehicle, the limit is 3 PSI. Remember to tell the examiner when you're starting the minute, when it's over, and what the results are.
Applied Leakage Test:
Right after the static test, put your foot on the brake pedal and hold it down firmly. Time it for another minute. This time, the allowable air loss is no more than 3 PSI for a straight truck or 4 PSI for a combination vehicle. Again, announce everything you’re doing and seeing. If you lose more air than that, it points to a leak that could seriously impact your stopping power on the road.
Low Air Warning Alarm Test
This test is simple: you’re making sure the truck will scream at you if your air pressure drops to a dangerous level. It’s a safety feature you can’t afford to have fail.
Start fanning the brake pedal—just press and release it over and over to bleed air out of the system. Keep your eyes glued to that air gauge.
The low air pressure warning light, buzzer, or both must come on at or above 55 PSI. It's absolutely crucial to call out the exact PSI when the alarm kicks in. Say something like, "The low air warning activated at 60 PSI, which is in the safe range."
Parking Brake Pop-Out Test
This is the grand finale. You're confirming that the spring brakes will engage on their own if air pressure gets critically low. This is your ultimate emergency braking system.
Keep fanning that brake pedal after the low air alarm goes off. You're waiting for the parking brake knob (yellow) and the trailer supply knob (red) to pop out. This must happen somewhere between 20 and 45 PSI.
Once they pop out, you're done. You’ve successfully walked through the entire inspection. Each of these checks validates a different, critical component of the air brake system, making sure the whole network is safe for the road. The only way to get this down perfectly for test day is to get in the truck and practice it. A lot.
Realistic Air Brakes Practice Test Questions
https://www.youtube.com/embed/15M3caa2DAk
Knowing the theory is one thing, but can you apply it when it counts? The absolute best way to get ready for the real written exam is by tackling practice questions that feel just like the ones you'll see on test day. A solid air brakes test practice session will make you think, not just spit back memorized facts.
The questions you’ll face aren’t always simple definitions. Many are designed as real-world scenarios, forcing you to think through a situation and pick the safest, most logical option. This section gives you a handful of those types of questions, along with clear explanations, to really drive the concepts home.
Multiple-Choice and Scenario Questions
Let's walk through a few examples that hit on some of the most critical topics. As you go, don't just look for the right answer—figure out exactly why the other choices are wrong. That’s the secret to sniffing out the trick questions on the actual test.
Question 1:
You're driving a combination vehicle down a long, steep hill. What is the safest and most effective braking technique?
A) Apply light, steady pressure on the brake pedal all the way down.
B) Use only the trailer hand brake (trolley valve) to prevent the tractor from skidding.
C) Brake firmly to a safe speed, release the brakes for a few seconds, then repeat.
D) Shift into a higher gear to increase your speed and get down the hill faster.
Answer & Explanation:
The correct answer is C. This method, often called "snub braking," is crucial. It gives your brakes a chance to cool off between applications, which prevents them from overheating and failing—a dangerous situation called brake fade.
Light, steady pressure (A) is a fast track to overheated brakes. Using only the trailer hand brake (B) is incredibly risky and can easily cause a jackknife. And shifting to a higher gear (D)? That's the exact opposite of what you should do; you need engine braking in a lower gear to help control your speed.
Why It Matters: Understanding the 'why' behind each answer is what separates passing from failing. The official exam is built to test your gut-level understanding of safety, not just whether you can remember a definition.
Question 2:
During the applied air leakage test on a combination vehicle, what is the maximum air pressure loss you can have in one minute?
A) 2 PSI
B) 3 PSI
C) 4 PSI
D) 6 PSI
Answer & Explanation:
The correct answer is C. For a tractor-trailer rig, the system can't lose more than 4 PSI in one minute with the brakes fully applied. For a straight truck or bus, that number is 3 PSI. Any loss greater than this points to a leak that needs to be fixed immediately. This is one of those numbers you absolutely have to know cold.
Understanding Key System Functions
Beyond driving scenarios, the test will dig into your knowledge of how the air brake system actually works—what each component does and why it's there. Knowing the numbers and procedures is non-negotiable for passing the written exam and nailing your practical pre-trip inspection.
For anyone looking to round out their studying, our guide on the https://patriotcdl.com/general-knowledge-test/ dives into other essential topics you'll need to master.
Question 3:
The air compressor governor is designed to stop the compressor from pumping air when the pressure in the storage tanks hits what range?
A) 60-80 PSI
B) 80-100 PSI
C) 100-115 PSI
D) 120-140 PSI
Answer & Explanation:
The correct answer is D. The governor's "cut-out" pressure is set right around 120 to 140 PSI. Once the tanks are full, the governor tells the compressor to take a break. It will then "cut-in" and restart the compressor when the pressure drops back down to about 100 PSI.
Question 4:
What is the primary job of the spring brakes?
A) To assist the service brakes during normal stops.
B) For parking and for emergency braking.
C) To cool the service brakes on long downgrades.
D) To only be used on the trailer.
Answer & Explanation:
The correct answer is B. Think of spring brakes as your ultimate fail-safe. They engage automatically with powerful springs if your air pressure drops to a dangerously low level (usually between 20-45 PSI), stopping the vehicle. They're also what you use every single time you park, activated by that yellow knob on your dash.
These examples are just a warm-up. For those who create or use study materials, understanding the principles of crafting effective online multiple-choice tests is key to making sure the prep is as good as it can be. Quizzing yourself regularly with high-quality, realistic questions is the surest way to walk into that test with confidence.
Common Mistakes and Test Day Strategies

Knowing the material is one thing, but performing under pressure on test day is a completely different ballgame. I've seen plenty of sharp drivers who know their stuff inside and out stumble over small, avoidable errors that cost them their endorsement. It often comes down to simple procedural slip-ups or letting nerves get the best of them.
This section is all about getting your head in the right space for the exam. We'll walk through the most common pitfalls I see and share some proven strategies to help you stay calm, focused, and confident when it really counts. Think of your air brakes test practice as not just memorizing facts, but also preparing for the test environment itself.
The Costliest Practical Test Errors
During the hands-on inspection, the examiner isn't just listening to what you say; they're watching how you do it. They're looking for precision and a logical sequence. One tiny oversight can send the signal that you're not ready.
Here are the big ones that often lead to an automatic fail:
- Forgetting to Chock the Wheels: This is step one for a reason. Before you even think about touching a control, you have to secure the vehicle and tell the examiner you've done so. It's a non-negotiable safety step.
- Mixing Up the Inspection Sequence: The in-cab air brake check follows a very specific order. If you're jumping from the low air warning test back to checking the governor cut-out, it shows you haven't mastered the flow.
- Fumbling the Critical PSI Values: You absolutely have to know your numbers. Stating that the spring brakes should engage at 50 PSI when the correct range is 20-45 PSI is an instant red flag for the examiner.
- Botching the Air Loss Calculation: Getting the applied leakage test wrong is a massive safety error. For example, saying a combination vehicle can lose 5 PSI in a minute when the actual limit is 4 PSI shows you don't grasp the core safety standards.
The single biggest point of failure I see is rushing. Before you start the inspection, just take a deep breath. Announce each step clearly—both for the examiner and for yourself. It forces you to slow down and keeps your thoughts organized.
Navigating the Written Exam with Confidence
The written test is designed to see if you can apply your knowledge, not just spit back facts. How you approach the questions and manage your time is just as important as what you’ve memorized.
- Read. Every. Single. Word. Some questions are deliberately tricky. Be on the lookout for keywords like "except," "not," or "always." Misreading one word can send you down the wrong path, even if you know the concept cold.
- Don't Get Bogged Down. If a question completely stumps you, don't burn the clock staring at it. Mark it, move on, and come back later. Sometimes, a later question will trigger something in your memory that helps you solve the one you skipped.
- Use Process of Elimination. With multiple-choice questions, you can almost always rule out one or two answers right away. Doing this dramatically increases your odds of picking the right one, even if you’re not 100% certain.
The entire CDL process is built on a foundation of safety. There's a reason the tests are so rigorous—brake system failures are a major cause of commercial vehicle accidents. The knowledge and skills you're being tested on, from identifying air leaks to understanding stopping distances, are what keep everyone safe on the road.
Mental Game Plan for Test Day
Your mindset when you walk into that testing center can be your greatest asset or your biggest liability. You’ve put in the hours studying; now it's time to prepare mentally.
- Get a Good Night's Sleep: Showing up tired is a recipe for disaster. You'll make simple mistakes you wouldn't otherwise. Make sure you're well-rested and your mind is sharp.
- Eat a Solid Breakfast: Your brain needs fuel to focus. Skip the heavy, greasy food that will make you feel sluggish, but don't show up on an empty stomach.
- Arrive Early, Not Just on Time: Rushing into the test center will send your anxiety through the roof before you even start. Give yourself a buffer to check in, find the restroom, and just breathe for a minute.
By dodging these common mistakes and walking in with a calm, strategic mindset, you're putting yourself in the absolute best position to pass.
Common Questions About the Air Brakes Test
Even after hours of studying, it's natural to have a few nagging questions as your test day approaches. Getting these sorted out can make all the difference in calming your nerves and walking in with confidence. Let's tackle some of the most common "what-ifs" we hear from students getting ready for their air brakes test practice.
Think of this as your final check-in. We'll cover the questions that pop up most often, so you know exactly what to expect on both the written and practical exams.
How Many Questions Are on the Air Brakes Test?
This can vary a bit from state to state, but you can generally expect the written air brakes test to have 25 questions. The passing score is almost always a strict 80%, which means you need to get at least 20 questions right.
There’s not much wiggle room there. You really have to know your stuff inside and out, not just be vaguely familiar with it. I always tell my students to check their state’s official CDL manual just to be certain, but that 20 out of 25 is the number to aim for.
What Happens If I Fail the Practical Inspection?
This is a big one, so listen up: messing up the hands-on air brake inspection is an automatic failure of your entire CDL skills test for that day. It's not something you can recover from.
The moment you make a critical error during that part of the test, the examiner will stop you right there. You won’t get to move on to backing maneuvers or the road test. You'll have to go home, reschedule, and pay for another attempt. This is precisely why we drill that inspection sequence until it becomes second nature.
For drivers who already have a CDL but carry an "E" restriction (no air brakes), this inspection is often the biggest hurdle to getting it removed. Nailing the hands-on check is everything.
What Are the Most Critical PSI Numbers to Memorize?
If you only have time to make flashcards for one thing, make them for these pressure numbers. They are absolutely essential for both the written test and the hands-on inspection. You have to know them cold.
- Governor Cut-Out: The compressor shuts off around 120-140 PSI.
- Governor Cut-In: The compressor kicks back on at about 100 PSI.
- Low Air Warning: Your light and buzzer must come on at or above 55 PSI.
- Spring Brake Engagement: The yellow and red brake knobs should pop out between 20-45 PSI.
- Applied Air Loss Limits: With your foot on the brake for one minute, you can't lose more than 3 PSI (straight truck) or 4 PSI (combo vehicle).
Can I Use a Checklist During My Practical Test?
Nope. You can’t bring any notes, checklists, or cheat sheets with you for the pre-trip inspection, and that includes the air brake check. The whole point is to demonstrate that you've committed the entire process to memory.
The examiner needs to see that you can perform a thorough safety inspection on your own, just as you would every single day on the job. This is where hands-on practice pays off. You're building muscle memory so you can flow through each step in the right order without even thinking about it. For drivers in an E restriction removal course, mastering this is the key to unlocking more driving opportunities.
At Patriot CDL, we make sure our students don’t just memorize the steps but actually understand why they're doing them. That’s how you build real confidence to not only pass the test but to be a safe, competent driver on the road.
Ready to start your journey? Learn more about our CDL training programs at https://patriotcdl.com.