A proper trailer brake inspection begins long before you ever lay a wrench on a wheel. It starts with setting up a safe, stable workspace. I've seen too many close calls happen from cutting corners here, so take it from me: getting this foundation right is non-negotiable. It ensures the trailer stays put and allows you to do an accurate, thorough job without worrying about your own safety.
Your Pre-Inspection Safety and Tool Setup
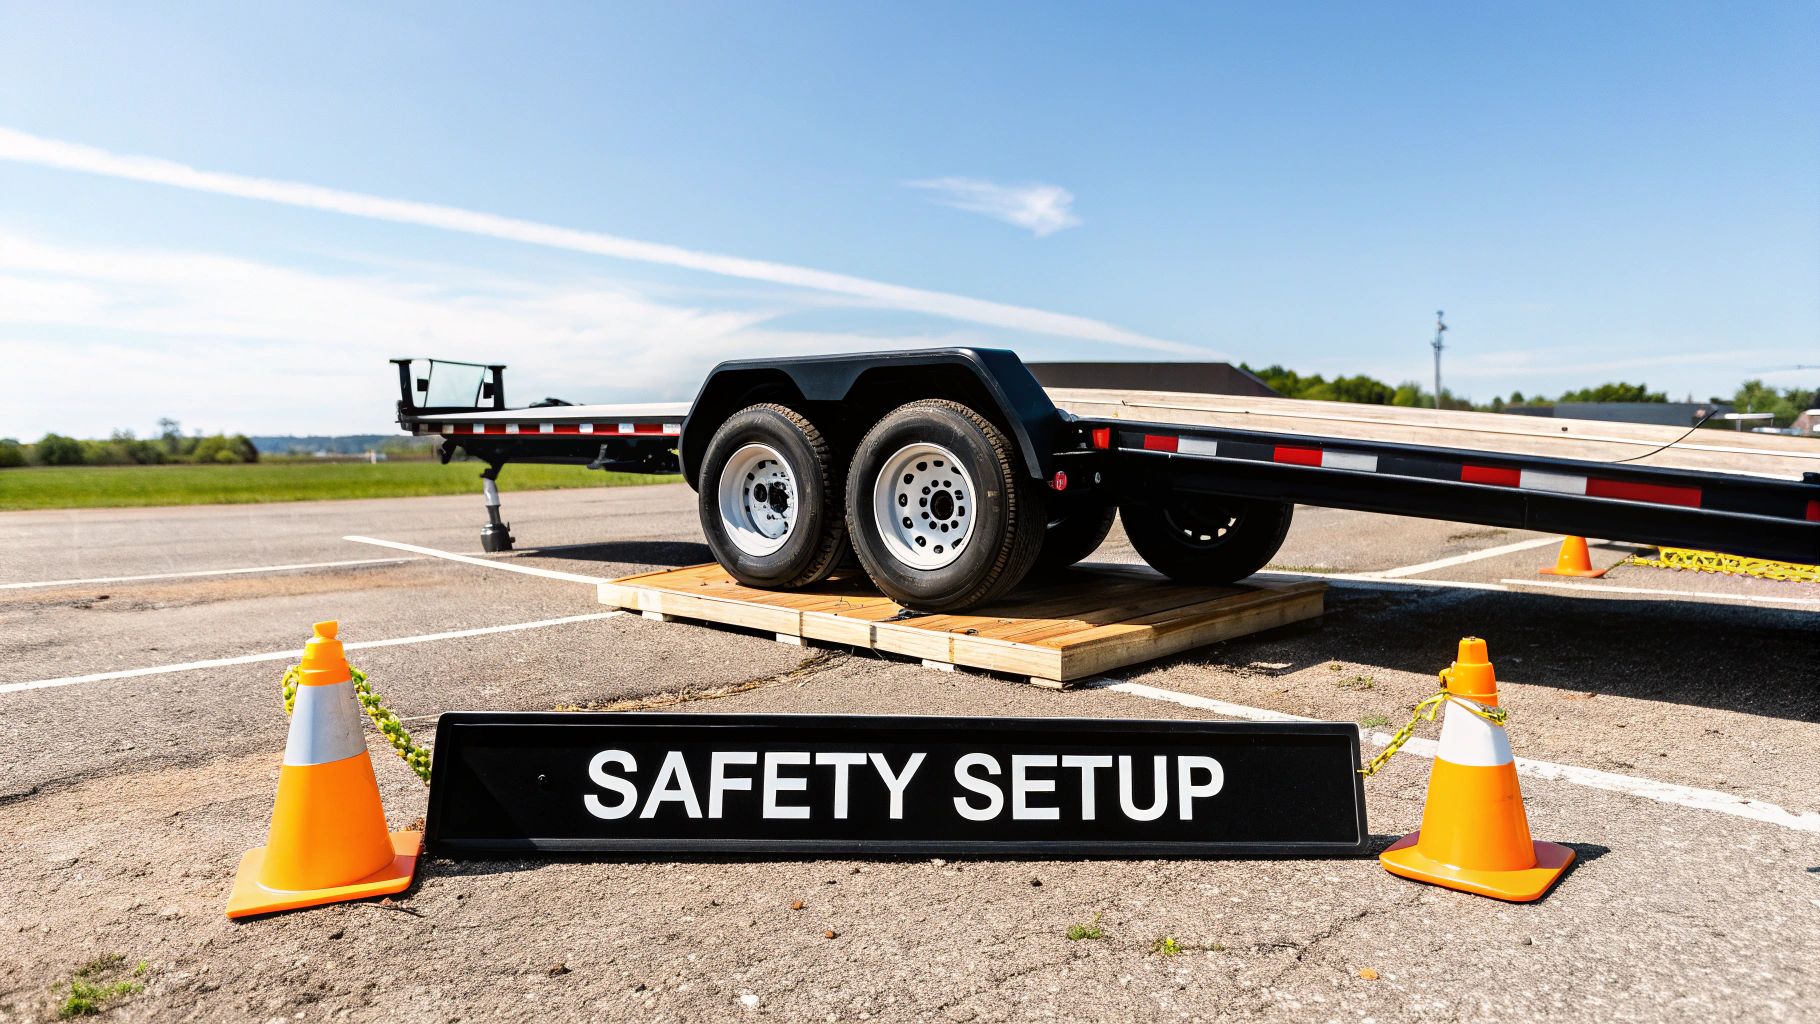
First things first, let's talk about creating a safe work environment. This isn't just a suggestion—it's the most critical part of the entire process. The last thing you want is a multi-ton trailer shifting while you're underneath it. Always, and I mean always, work on a solid, level surface. Concrete or asphalt is ideal; never try this on soft ground or a slope.
Once you’ve found your spot, firmly place heavy-duty wheel chocks against the tires that are staying on the ground. Chock both the front and back of at least one tire to create a physical barrier. This is your primary defense against any unexpected movement.
Gathering The Right Equipment
With the trailer secured, it's time to get your tools in order. Trust me, you don’t want to be halfway through the job, covered in grease, only to realize the one wrench you need is still in the toolbox across the shop. Lay everything out so it’s within arm’s reach.
Before you start, make sure you have everything on this list. Having the right gear not only makes the job easier but also ensures your measurements are accurate.
Essential Tools and Safety Gear for Your Inspection
| Tool or Gear | Primary Use | Pro Tip |
|---|---|---|
| Heavy-Duty Jack & Stands | Safely lifting and supporting the trailer's weight. | Always match the jack and stand ratings to your trailer's GVWR. Never rely on the jack alone; always use stands. |
| Wheel Chocks | Preventing the trailer from rolling during the inspection. | Use solid rubber or urethane chocks. Position them snugly against the tire tread on both sides. |
| Lug Wrench/Impact Gun | Removing and reinstalling the wheel lug nuts. | An impact gun saves a ton of time and effort, but always finish by torquing the lug nuts to spec with a torque wrench. |
| Brake Measuring Tools | Checking wear on brake shoes, drums, and slack adjuster travel. | A simple tape measure works for pushrod travel, but a dedicated brake shoe gauge is best for checking lining thickness. |
| Hand Tools & Flashlight | For prying, adjusting, and illuminating the work area. | A bright headlamp is a game-changer, as it keeps your hands free while you're deep inside the wheel well. |
Having these items ready to go turns a frustrating chore into a smooth, professional process.
A well-prepared workspace is the hallmark of a pro. Rushing the setup is a rookie mistake that can lead to overlooked problems or, worse, a serious accident. Take your time here; it pays off.
This whole prep phase is a crucial piece of a driver's routine. In reality, it's a small but vital part of a much larger complete pre-trip inspection, which is fundamental for staying safe and compliant on the road.
Getting Your Hands on the Brake Components
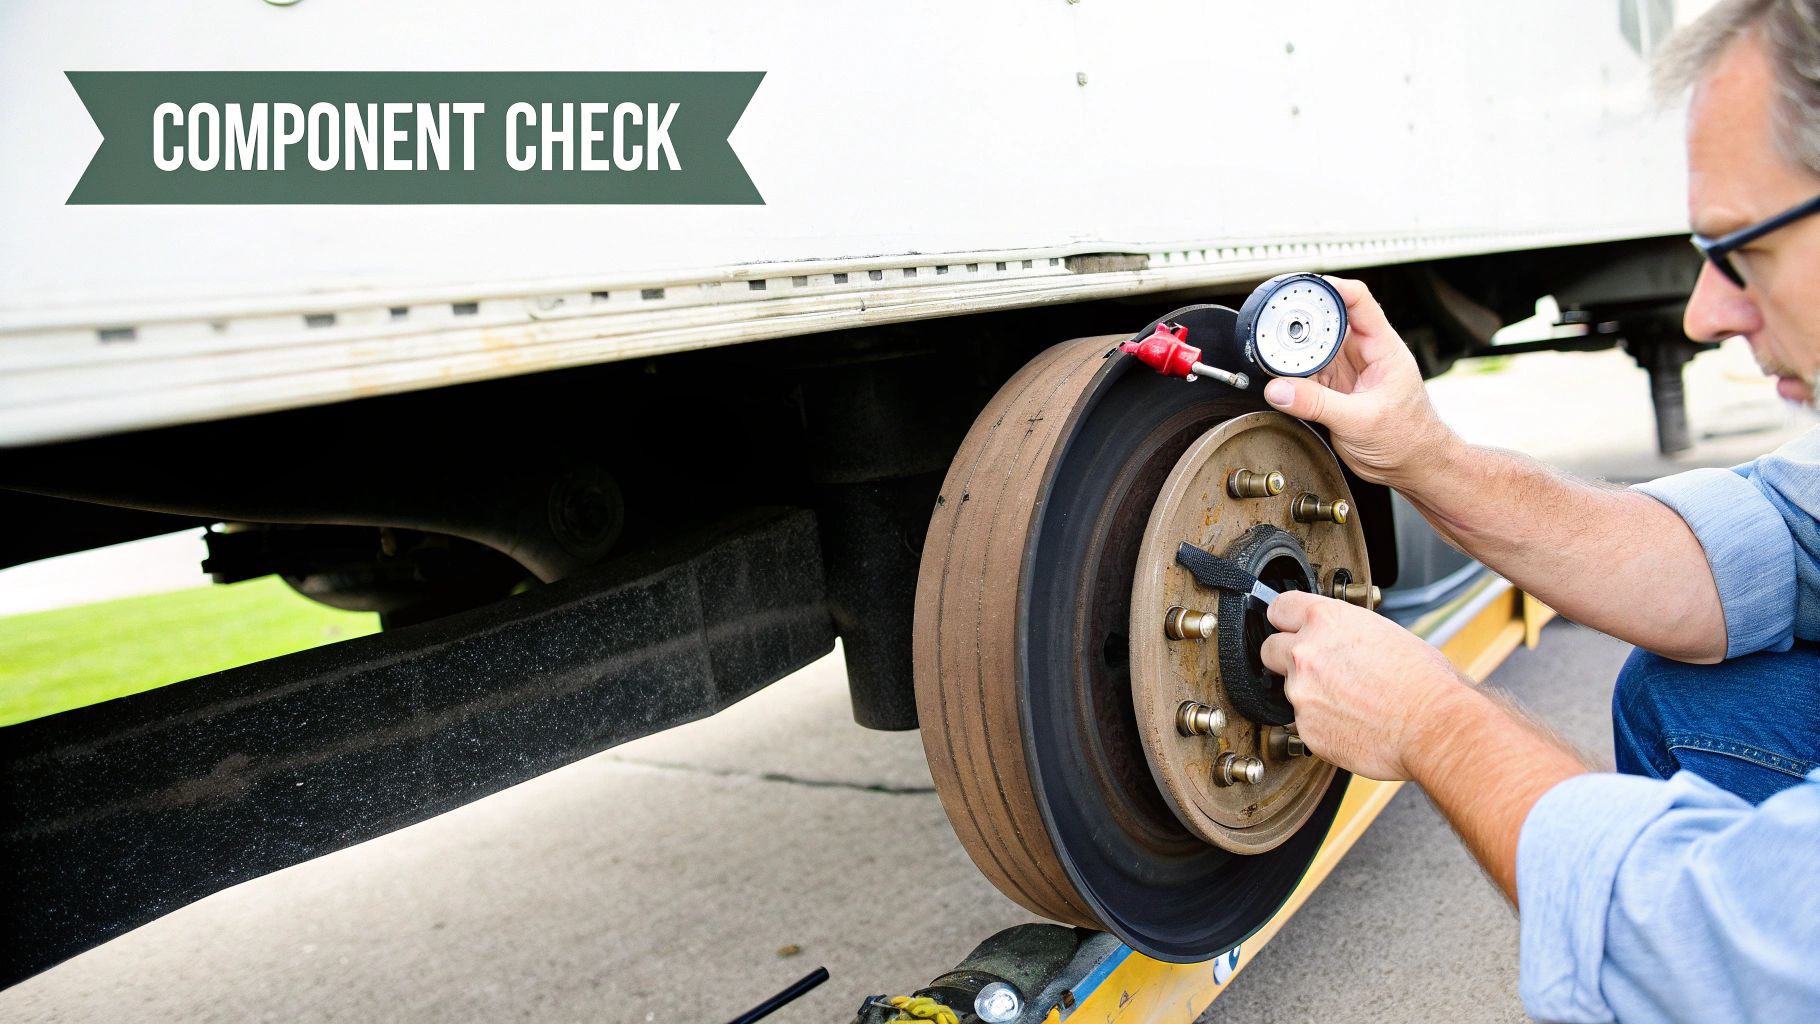
Alright, with the trailer secure and the wheels off, it’s time to get down to business. This is where a visual check turns into a real diagnosis. Every part of this assembly has a story to tell, and a good mechanic knows how to read the signs of wear and tear.
Start with the big stuff: the brake drums or rotors. Get a good look at the entire friction surface. What you're scanning for are problems like deep grooves, heavy scoring, or any weird discoloration. If you see a bluish tint, that’s a dead giveaway for overheating, which can weaken the metal and lead to serious trouble down the road.
Pay close attention to cracks. You might see what's called heat checking—a web of tiny, superficial cracks. A little bit of that can be normal. But if you find a crack wide enough to catch a fingernail on, or one that travels all the way to the edge of the drum, that part is done. It needs to be replaced immediately, no questions asked.
Checking Out the Linings and Pads
Next, your eyes should go to the brake linings (for drum brakes) or the pads (for discs). Thickness is the name of the game here. The absolute minimum you want to see is 1/4-inch of lining material at the thinnest point. Anything less than that is pushing your luck and heading straight for metal-on-metal contact and total brake failure.
While you're there, look for any signs of contamination. Oil or grease on the friction material is a major red flag, usually pointing to a leaky wheel seal. This stuff soaks into the lining and kills your stopping power. If you find contamination, you've got two jobs: replace the brake shoes and hunt down and fix that leak.
Here’s a pro tip I learned the hard way: always check both sides. It's easy to just glance at the outer pad or shoe, but uneven wear between the inner and outer is a classic symptom of a bigger problem, like a binding S-cam or a seized caliper slide pin.
Making Sure Everything Moves as It Should
Last but not least, you need to check the mechanicals. On a drum brake setup, this means focusing on the S-cam and the slack adjuster. Have a buddy press the brake pedal (or use a pry bar to carefully simulate it) and watch the S-cam. It should rotate smoothly, without any hitches or binding.
Give the slack adjuster a good wiggle. Grab it and try to move it side-to-side. A tiny bit of play is expected, but if it feels sloppy and loose, the bushings are likely shot. Mastering this check is crucial, and it’s a key part of what’s covered in professional driver exams. A properly working slack adjuster isn't just a suggestion; it's essential for keeping the brakes in adjustment and ensuring your rig stops when you need it to.
Inspecting the Air System for Leaks and Damage
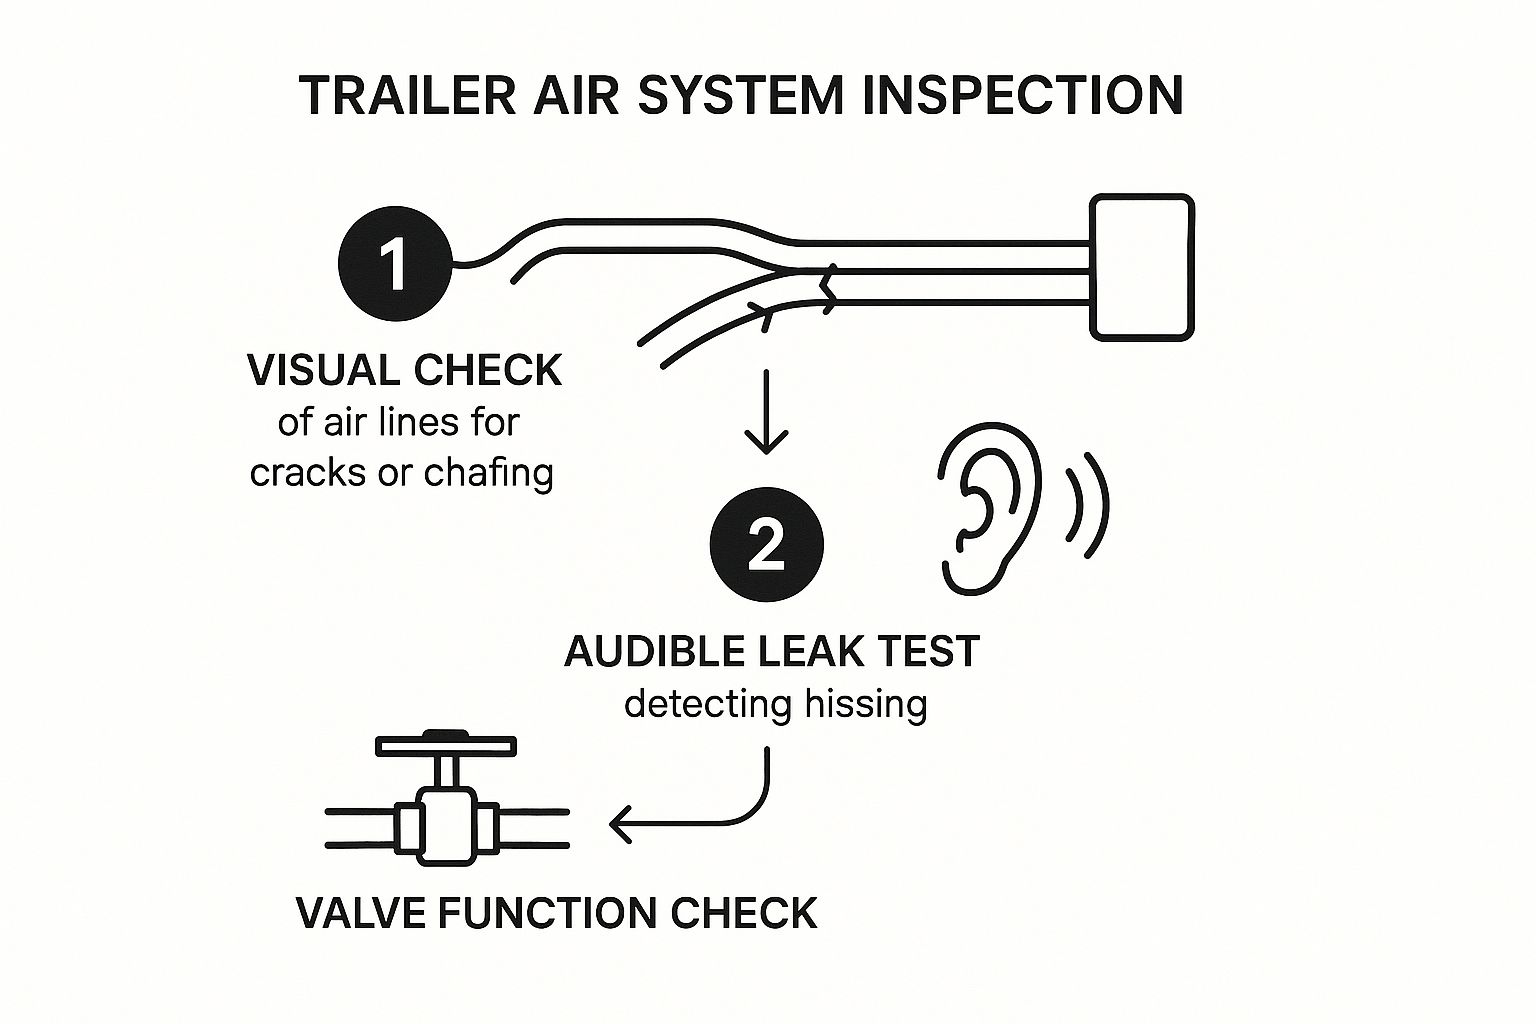
This infographic provides a solid roadmap for checking your air system, covering everything from the visual once-over to the function tests. Following a consistent process like this is key, because even a tiny issue in the air system can spiral into a serious problem on the road.
Now that we’ve put our eyes on the mechanical hardware, it's time to shift focus to the system that powers it all: the air. I like to think of the air lines and hoses as the arteries of the brake system. If you've got a leak, you've got trouble brewing.
Start by walking the length of the trailer, visually inspecting every air line you can see, all the way from the gladhands back to each brake chamber. Look for tell-tale signs of chafing where a hose might be rubbing against the frame or another component. You'll also want to keep an eye out for brittle, cracked, or weathered-looking rubber. That’s a clear sign the hose is getting old and could fail under pressure. This simple visual scan is your first and best line of defense.
The Audible Air Leak Test
Once you're satisfied with the visual check, it's time to use your ears. With the system fully pressurized, shut down the engine and just listen. Walk around the trailer slowly, paying close attention. What you're listening for is that unmistakable hissing sound of escaping air.
Don’t just stand back and listen from a distance. You need to get up close and personal with the connection points, valves, and the brake chambers themselves. A small leak might be so quiet that you won't hear it unless you're right on top of it, and a small leak today can easily become a big one tomorrow.
This isn't just a formality; it's a critical diagnostic step. In fact, brake hose defects and excessive air loss are some of the most common reasons trucks get put out of service during inspections. During one safety blitz alone, inspectors found 77 cases of brake hose or tubing defects and 38 failures from excessive air loss rates. That shows you just how common these problems are.
To finish up, make sure the tractor protection and trailer air supply valves are doing their job. When you pull that trailer supply valve, you should hear an immediate and obvious rush of air as the trailer's spring brakes engage. Getting this entire sequence down is a fundamental skill for any driver. Reviewing the official CDL air brakes test material is a great way to sharpen your knowledge.
Getting a Handle on Brake Stroke and Adjustment
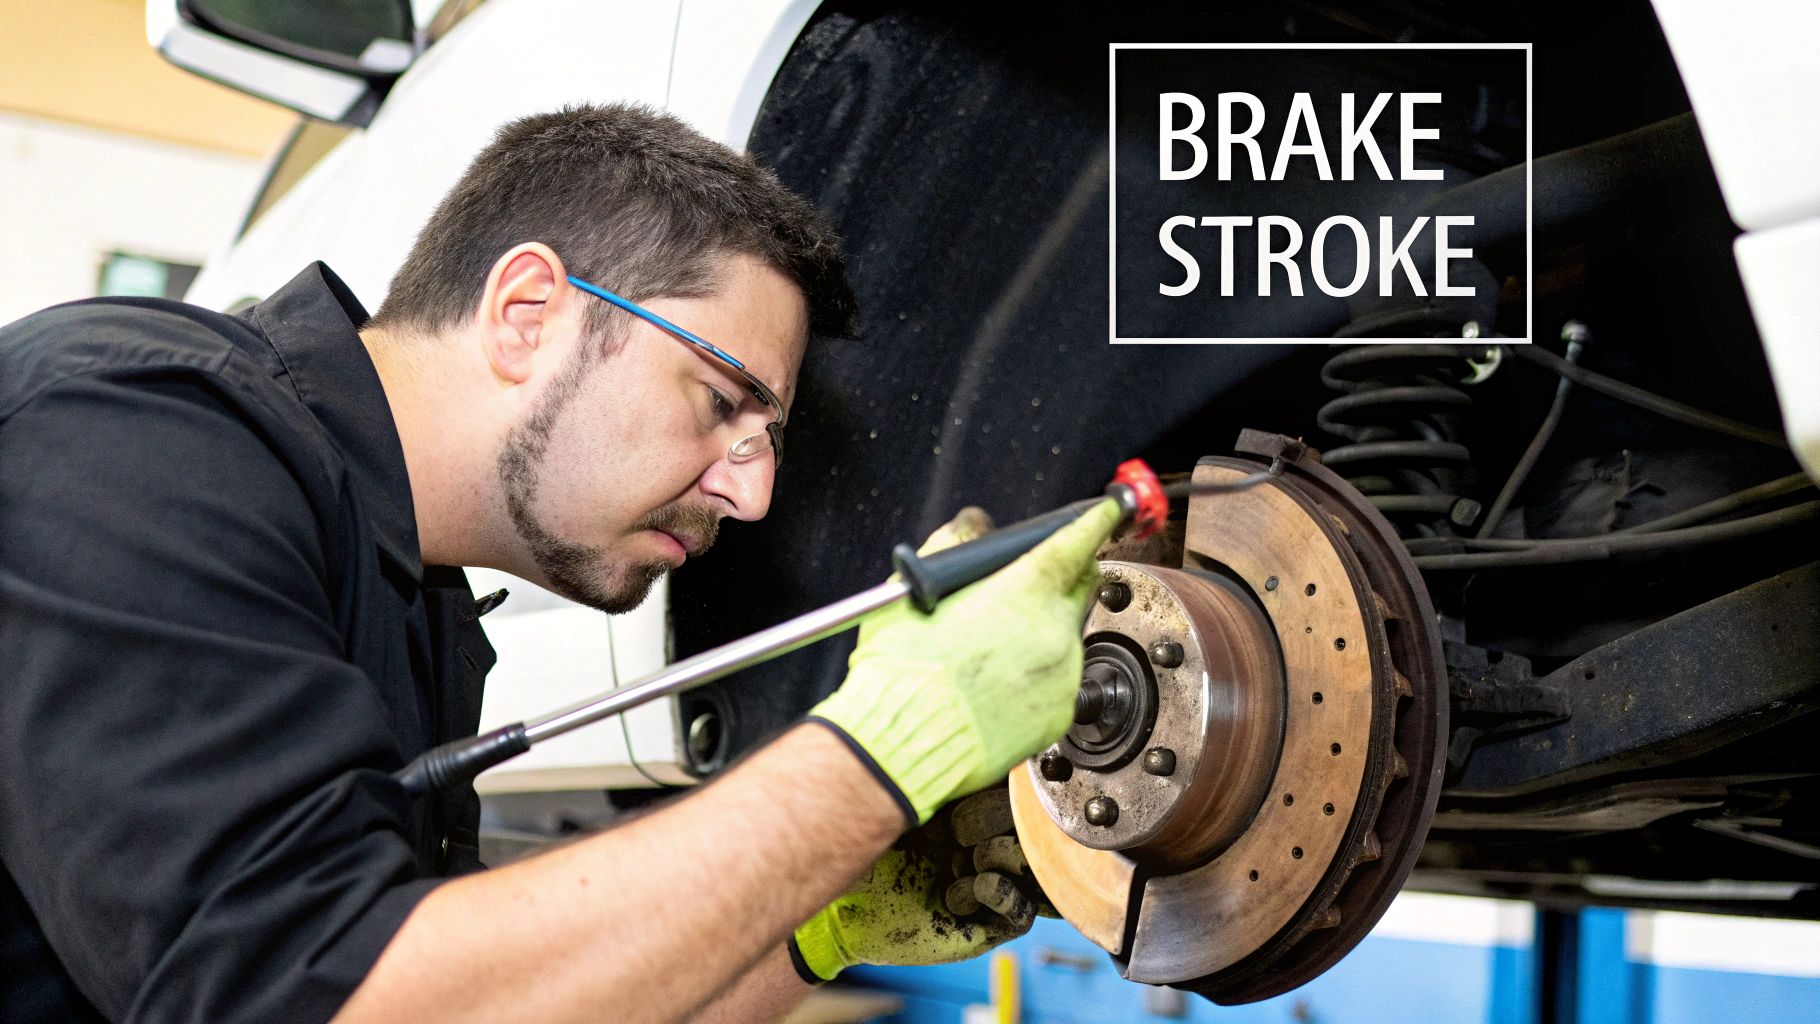
If there's one thing that will get you slapped with an out-of-service violation faster than anything else, it’s bad brake adjustment. That’s why knowing how to accurately measure the brake stroke—the distance the pushrod travels when the brakes are applied—is a non-negotiable skill for any driver. It’s the difference between a safe stop and a roadside shutdown.
The whole point of this check is to make sure your brakes have enough room to work properly without the pushrod traveling too far. You can get a good read on this yourself. First, chock your wheels and release the parking brakes. Then, make sure your air system is fully charged, somewhere in the 100-120 PSI range.
Now, grab a pry bar and use it to move the slack adjuster just like the air pressure would. As you do this, keep a close eye on the pushrod and measure how far it comes out of the brake chamber. That measurement is your brake stroke, and it has to be within the legal limits. No exceptions.
Staying Within the Legal Stroke Limits
The maximum pushrod travel isn't a single number; it changes depending on the size and type of the brake chamber on your trailer. Knowing these limits by heart is your ticket to passing inspections.
Maximum Pushrod Stroke Limits
| Brake Chamber Type | Maximum Allowable Stroke |
|---|---|
| Type 16 Long Stroke | 2.0 inches |
| Type 20 Long Stroke | 2.0 inches |
| Type 24 Long Stroke | 2.5 inches |
| Type 30 Standard | 2.0 inches |
| Type 30 Long Stroke | 2.5 inches |
If your measurement goes even a fraction over these limits, that brake is officially out of adjustment. This isn't just a note for your next maintenance stop—it's a critical safety flaw.
Having just one brake out of adjustment is bad news for your stopping distance. But if an inspector finds two or more, you're getting shut down on the spot. This is the infamous '20% brake violation' rule, and it’s a huge focus for DOT officers.
This rule is exactly why brake inspections are so important. During one massive three-day inspection blitz across North America, bad service brakes were the top violation, resulting in a staggering 3,387 out-of-service orders. A huge chunk of those came from simple adjustment issues that fall under that '20% rule'—if 20% of your brakes are bad, your trip is over.
Getting comfortable with checking your stroke and knowing these tables is just part of the job. Going through a CDL air brakes test guide is a great way to make sure the knowledge sticks.
Common Problems and When to Call a Mechanic
When you're digging into a brake inspection, you'll run into all sorts of issues. Some are quick fixes, but others are serious red flags that mean it's time to call in a professional. Knowing how to tell the difference is what keeps you from slapping a temporary patch on a problem that could cause a total failure on the road.
Certain problems are absolute deal-breakers. If you find a cracked brake drum, for instance, that's it—the part is compromised and has to be replaced by a qualified mechanic. Period. Same goes for a seized S-cam that just won't rotate. Don't try to force it. That’s a clear sign of serious internal trouble that needs a pro's touch.
Knowing When to Get Professional Help
Another big one to watch for is any sign of oil or grease on the brake linings. This almost always points to a leaking wheel seal. Just swapping out the brake shoes without fixing the underlying leak is a complete waste of time and incredibly dangerous. A mechanic has the tools to properly replace the seal and inspect the entire wheel-end to make sure it's safe.
Think of yourself as a detective during an inspection, not the surgeon. Your job is to find the clues. Spotting a serious problem, like a stubborn air leak you just can't track down, is a success. The right move is to hand it over to a professional who has the diagnostic tools and experience to fix it right.
The numbers don't lie: brake defects are a top reason for being put out of service. During major inspection blitzes, brake-related violations account for roughly 24.4% of all out-of-service orders. The most common culprits are often things like faulty protection valves, worn-out hoses, and leaky air lines—problems that are nearly impossible for a driver to diagnose and repair safely without the right equipment.
And whatever you do, never manually adjust an automatic slack adjuster that isn't doing its job. That's a classic rookie mistake. An ASA that’s out of adjustment is a symptom, not the disease. It’s screaming that something else in the foundation brake system is wrong, and a certified mechanic needs to find out what that is.
Common Questions About Brake Inspections
When it comes to trailer maintenance, especially brakes, questions are a good thing. It means you're taking safety seriously. Let's walk through some of the most common questions I hear from drivers out on the road.
How Often Should I Really Inspect My Brakes?
A quick visual check is part of your daily pre-trip, no question. You're looking for anything obviously wrong. But a full, get-your-hands-dirty inspection? That’s a different story.
For most rigs, a thorough brake inspection is needed about once a month or every 10,000 to 12,000 miles. Of course, always stick to what your company’s maintenance schedule and DOT regulations require. Those are the final word.
What's This "20% Rule" I Keep Hearing About?
This one is critical. The "20% rule" is a DOT out-of-service violation you absolutely want to avoid.
Put simply, if 20% or more of your rig's service brakes are defective, you're getting shut down on the spot. On a typical 5-axle tractor-trailer, you have 10 brakes. That means if just two of them are out of whack, your truck is officially out of service until it's fixed. It’s that serious.
Can I Just Adjust an Automatic Slack Adjuster Myself?
I get this one a lot, and the answer is a hard no. You should never manually adjust a modern automatic slack adjuster (ASA).
If an ASA is out of adjustment, it's not the problem—it's a symptom. It’s waving a red flag that something else is wrong, like a worn S-cam bushing or a bad install. Cranking on it with a wrench just hides the real issue and makes the brake unreliable and dangerous. The root cause needs to be found and fixed by a qualified mechanic.
Mastering the technical side of your rig is just as important as knowing the rules of the road. A solid understanding of these systems is a core part of the knowledge needed for your commercial license.
Knowing these details is non-negotiable for any professional driver. To make sure you’ve got a solid foundation, it never hurts to brush up with a good general knowledge test guide for the CDL.