


A different training truck can make a familiar maneuver feel unfamiliar. The mirrors may show less of the trailer, the seat may place your eyes at another height, and a control you reached automatically yesterday may be elsewhere today. None of those changes means you have lost your previous learning. They mean the new vehicle deserves a proper introduction before it moves.
The safest first lesson begins with parked orientation, a vehicle-specific inspection, and controlled practice chosen by the instructor. This guide explains what a student should notice, what to ask, and how to carry useful skills from one truck to another without assuming every reference point will transfer unchanged.
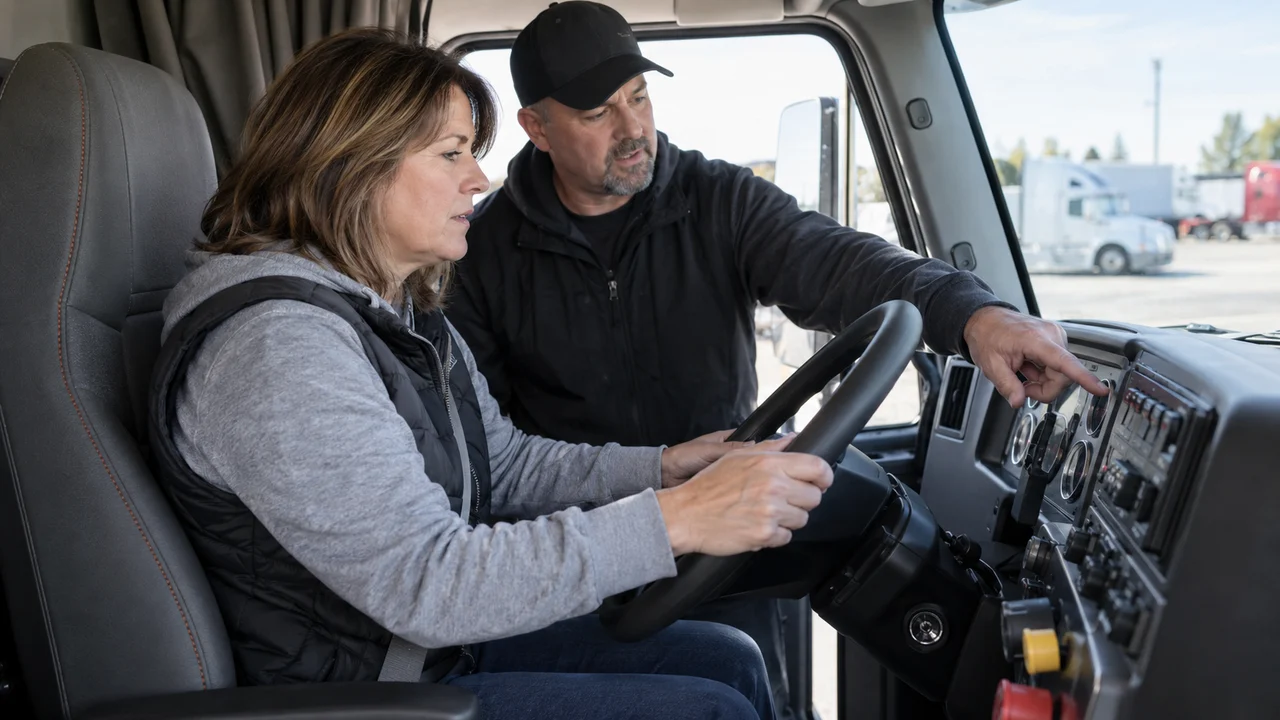
Start with the identity and configuration of the truck
Ask what vehicle you will operate and how its configuration differs from the previous one. A straight truck and a tractor-trailer present different tracking and backing problems. Even two tractors can have different wheelbases, turning responses, mirror arrangements, and transmission controls. Identify the combination rather than relying on the color, model name, or appearance of the cab.
Explain your previous equipment experience
Confirm relevant dimensions and restrictions through the instructor and vehicle information. Never estimate overall height because another truck in the fleet looked similar. A familiar destination can become unsuitable for a vehicle with different clearance needs. The same principle applies to route selection: prior success in another vehicle is useful experience, not proof that this combination will fit.
Tell the instructor what you have driven before. Include transmission type and the maneuvers you have actually practiced. Saying “I drove this kind of truck” may hide important differences in trailer length or brake configuration. A precise introduction lets the instructor build from genuine experience while addressing what is new.
Set the driving position before learning controls
Adjust the seat so that you can use pedals and steering comfortably while maintaining the required driving position. Check reach through the expected range of pedal movement under the instructor's direction. A seat that feels comfortable while parked may still place the driver poorly for controlled operation. Secure the seat adjustment before proceeding.
Understand what each mirror can show
Set mirrors after the seating position is established. Identify what each mirror covers and where blind areas remain. Wide-angle mirrors can make objects appear farther away, and a different mirror shape can change familiar visual references. Ask the instructor to demonstrate a safe way to understand coverage while the truck remains secured. Do not learn the blind areas by experimenting around moving traffic.
Check the belt, dashboard visibility, sun visor, and essential ventilation controls. Small discomforts can become repeated distractions during a lesson. Once these items are prepared, keep your attention on the driving task. If a necessary adjustment becomes apparent later, explain it and stop in a suitable location instead of reaching or twisting while moving.
Find important controls while the vehicle is secured
Identify service and parking brake controls, transmission selection, lights, turn signals, wipers, washers, horn, and hazard warning lights as appropriate to the equipment. Ask about warning indicators you do not recognize. The instructor should explain the operating sequence for the actual vehicle, including any interlocks or unusual arrangements.
Learn the response behind each control
Do not assume an automatic transmission eliminates the need for transmission knowledge. Different systems may select ranges or display warnings differently. A manual transmission can have a shift pattern or operating characteristics that do not match the previous truck. Learning a control's location is only the first step; understand when it should be used and what feedback confirms the intended response.
Find emergency equipment and learn the reporting procedure for a defect or warning. A student should know how to communicate uncertainty before attempting a workaround. Searching for a control after a problem develops consumes attention needed for the vehicle. The parked orientation creates a chance to ask basic questions without the demands of motion.
Inspect the actual equipment rather than reciting a script
Use the current training and inspection procedure for the vehicle in front of you. Identify components by location and function. A memorized description of a part that is not present can reveal that the student has learned a speech instead of an inspection. Ask the instructor to point out differences in suspension, braking components, coupling equipment, and access points.
Connect components with their function
For a combination vehicle, review the coupling and connection arrangement with the instructor. Do not assume the condition or setup of the previous combination carries over. Pay attention to what can be observed safely and what requires a specific procedure. Avoid reaching into areas or moving equipment without instruction merely to confirm a remembered phrase.
Use the pre-trip inspection resource to organize questions, then reconcile those questions with the actual vehicle and official manual. An online guide cannot confirm that a particular component is serviceable. The practical lesson must connect a component's purpose with the inspection method and the condition you are looking for.
Rebuild low-speed references before complex maneuvers
Begin with the controlled exercises selected by the instructor. The first objective is to notice the truck's response at low speed and establish observation habits. A different wheelbase or steering response can make a remembered steering cue inappropriate. Treat fixed visual landmarks as provisional until a qualified instructor confirms their usefulness on the new combination.
Watch tracking rather than copy steering
Observe how the rear wheels and trailer track in a turn. The front of the vehicle clearing an object does not establish that every other part will clear it. Watch both sides as instructed and stop when visibility or clearance becomes uncertain. A deliberate stop is preferable to making a large correction based on a guess.
When backing is introduced, reset the setup rather than trying to force the truck into the result achieved with the previous vehicle. Discuss what the mirrors show, when the student loses useful information, and what a safe stopping point looks like. Use getting out and looking in accordance with instruction and site conditions; no reference mark replaces direct clearance assessment.
Transfer principles and rewrite equipment-specific notes
Some learning should transfer: protecting space, checking mirrors, communicating uncertainty, inspecting deliberately, and moving only when the situation is understood. Other learning is tied to equipment: a particular mirror reference, a control position, or the amount of steering associated with a familiar setup. Separating those categories prevents an equipment change from undermining the whole skill.
Record what changed between vehicles
After the lesson, write a “same principle, different execution” note. For example, the principle may be maintaining awareness of trailer position, while the execution involves a different mirror view and an earlier setup. Describe the difference in terms that the next instructor can verify. Avoid writing an unexplained number of steering turns as if it applies universally.
If the new vehicle will be used for a skills test, ask the school and testing provider about its suitability and any consequences for license restrictions. The test vehicle can affect what the resulting CDL authorizes. Review the Class A or Class B program information with those equipment questions in mind.
A practical training example
A student who has practiced straight-line backing in one tractor is assigned another tractor for the next lesson. On the first attempt, the student turns more sharply than intended because the familiar mirror reference appears different. The instructor stops the attempt before the student tries to correct faster. They return to the beginning of the exercise and discuss the seat and mirror position.
With the vehicle secured, they identify which part of the trailer the student was using as a reference and why the new mirror arrangement changed its appearance. The next attempt is shorter and slower. The student describes what is visible on each side, stops when uncertain, and makes only the adjustment directed by the instructor. The lesson focuses on seeing the developing angle rather than reproducing yesterday's steering amount.
The takeaway is not a new universal backing formula. It is that the student's observation principle was sound but the equipment-specific cue needed revision. At the debrief, the student records the mirror difference, the control layout, and one successful setup. That record becomes a useful bridge to the following lesson instead of an unsupported claim that the new truck is harder.
| Area to compare | What to establish | Useful next action |
|---|---|---|
| Seat and mirrors | Reach, coverage, and blind areas | Adjust while secured; confirm view with instructor |
| Transmission | Selection pattern and displayed feedback | Learn the vehicle-specific operating sequence |
| Dimensions | Height, length, wheelbase, configuration | Verify information; reassess route and clearance |
| Inspection | Component location and brake/coupling differences | Inspect actual equipment with the correct procedure |
| Backing references | What appears in each mirror | Use controlled practice before relying on old cues |
Action plan and review
Make a vehicle comparison page with three columns: feature, previous vehicle, and current vehicle. Start with mirrors, transmission, wheelbase or tracking, brake configuration, and inspection differences. Leave unknown entries blank and ask the instructor; an honest blank is more useful than a confident guess.
Before the next lesson, select one difference that could affect a driving decision. Explain the consequence aloud. For instance, a changed mirror view may affect how early you recognize a trailer angle, while a changed height affects route clearance. Connecting the difference with an action turns the comparison into practical preparation.
After practice, add what the instructor confirmed. Do not turn notes into a private operating manual that overrides training. Their purpose is to help you arrive with precise questions and remember the correction that worked. If another truck is assigned later, use the same comparison method while treating that vehicle as a new orientation.
A useful orientation question is, “What would surprise a student coming from the last truck?” The answer may concern a control layout, a different view of the trailer, a change in turn geometry, or an indicator that behaves differently. Asking this question gives the instructor a chance to address the most likely transfer error before it appears during movement.
Take particular care with dashboard assumptions. The same symbol location or switch shape does not prove the same function across vehicles. Ask about unfamiliar indicators and the response expected if they appear. If a warning is already present, resolve its significance before beginning the lesson rather than assuming it is normal for that truck.
Also review the outside access routine. Step positions, grab handles, storage, and engine-compartment access can differ. A student concentrating on the new driving controls may overlook a changed entry or exit arrangement. Use designated handholds and steps and follow the instructor's directions for opening or securing equipment.
After the initial controlled exercise, describe the truck's response without making an unsupported mechanical diagnosis. “The mirror view changed sooner than I expected” is an observation the instructor can analyze. “The steering is wrong” jumps to a conclusion and may hide a setup issue. Accurate descriptions make coaching more effective.
Before leaving the lesson, ask which differences should remain on the next-day briefing. Some surprises disappear once the control is located. Others, such as a changed trailer reference, need continued attention until the student can use observation reliably. Keep only the relevant reminders so the preparation page stays practical.
If another instructor takes over, share those reminders at the start. This is not a request to avoid the new vehicle. It is a concise account of what has been learned and what remains uncertain. Good handover information lets the next lesson build on evidence instead of repeating the same orientation problem.
Readiness checklist
- I can identify the vehicle configuration and relevant differences.
- I can reach controls with the seat and belt set correctly.
- I know the mirrors coverage and its limits.
- I can locate essential controls without searching while moving.
- I have reviewed inspection differences with the instructor.
- I know when to stop and ask about an unfamiliar response.
Frequently asked questions
Should the same backing reference work in every truck?
No. Vehicle geometry, trailer configuration, seating, and mirror arrangements can change the view and response. Transfer observation and space-management principles, then rebuild equipment-specific references with the instructor.
Is an automatic truck immediately familiar if I drove another automatic?
No. Controls, transmission behavior, warnings, and interlocks can differ. Learn the specific vehicle while it is secured and confirm the operating sequence before moving.
Can a different test truck affect my license?
Potentially. Transmission, air-brake, and combination configuration can influence restrictions. Ask the school and licensing or testing provider about the actual vehicle you will use.
What should I record after my first lesson in another truck?
Record control differences, mirror and visibility changes, inspection differences, and one maneuvering observation. Include the instructor correction rather than a universal steering formula.
Official references and further reading
- — vehicle operation, inspection, and CDL study guidance.
- — applicability and federal training framework.
- — training components, proficiency, and completion records.
Updated October 19, 2026. Educational guidance: use current official requirements, the actual vehicle procedure, and qualified instruction for your situation.