


A commercial truck can look level and still have a steering or suspension defect hidden among its linkages, mounts, springs, hoses, and fasteners. For a CDL student, the answer is not to memorize a single sentence such as “secure and not damaged.” The student needs a safe inspection route, accurate component names, specific conditions to check, and a clear way to report uncertainty before the vehicle moves.
This guide connects federal equipment rules with Pennsylvania’s inspection procedure. A driver or student can report an observable condition, but should not disassemble, adjust, or diagnose the system without training and authorization.
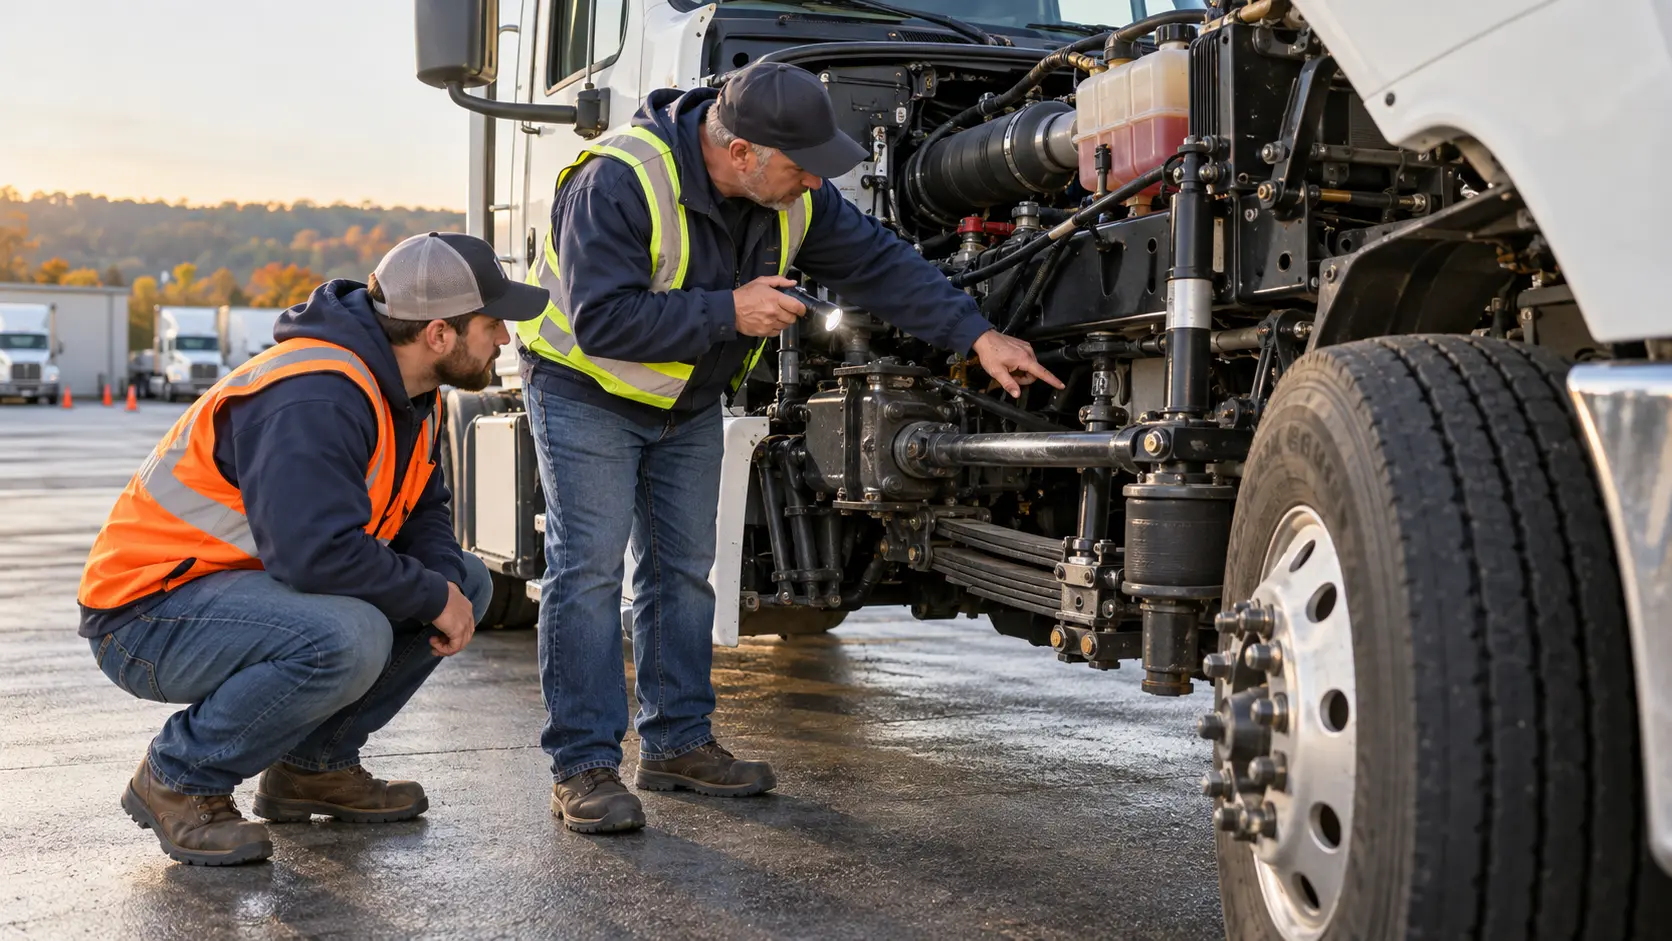
Why steering and suspension belong in one inspection plan
The steering system turns the driver’s input at the steering wheel into movement at the steer tires. The suspension supports the vehicle, locates the axles, absorbs road forces, and helps keep the vehicle stable. They are separate systems, but they meet around the axle and wheel area. A loose steering connection can change direction control; a shifted or broken suspension component can change axle position, vehicle level, tire clearance, and handling.
Inspect by function, not by a memorized pile of parts
Begin with the function you are trying to verify. For steering, the question is whether driver input can pass through a securely mounted, serviceable mechanism to the wheels without prohibited looseness, damage, leakage, or interference. For suspension, the question is whether the axle is correctly positioned and supported by intact, secure components without a condition that changes ride height, alignment, or clearance.
This approach also organizes component names. The steering wheel and column lead to the steering gear; the pitman arm and visible links, arms, rods, joints, and sockets carry movement toward the wheel. Suspension components may include leaf or coil springs, mounts, U-bolts, torque rods, air bags, shocks, and adjustable-axle locking devices.
The inspection is a decision process
Say what is present, what condition is being checked, and what follows if the condition is uncertain. When a concern has not been evaluated or corrected, do not turn doubt into permission to drive. The related commercial-truck tire inspection plan explains adjacent tire checks; unusual wear is a clue to report, not proof of a steering or suspension diagnosis.
Know the current federal baseline
The federal requirements reviewed on October 27, 2026 are in 49 CFR Part 393. The regulation is the legal baseline; FMCSA’s Safety Planner is a training summary and points readers back to the eCFR. Vehicle design varies, so a student should learn the actual training vehicle and follow its manufacturer and school procedures.
Steering requirements under 49 CFR 393.209
Section 393.209 requires the steering wheel to be secured, with no spoke cracked through or missing. It sets maximum steering-wheel lash by wheel diameter and whether the system is manual or powered. For diameters not listed, the limit is 14 degrees for manual steering and 30 degrees for power steering. Use the taught measurement method rather than guessing by feel.
The steering column must be securely fastened. Universal and ball-and-socket joints may not be worn, faulty, or welded. The gear box and brackets may not be cracked or have loose or missing mounting bolts; the pitman arm may not be loose; and the wheels must turn freely through their travel.
For power steering, components must operate without loose or broken parts. Belts may not be frayed, cracked, or slipping; the system may not leak; and the reservoir must have sufficient fluid. Do not open a hot or pressurized system, reach into moving equipment, or adjust linkage without authorization.
Suspension requirements under 49 CFR 393.207
Section 393.207 requires axle-positioning parts to be free of cracks, breaks, looseness, or missing components, and requires the axles to be properly aligned. Locking pins on adjustable axles may not be missing or disengaged. Leaf springs may not be cracked, broken, missing, or shifted out of position. Coil springs and torsion bars may not be cracked or broken.
For air suspension, the rule addresses operating pressure, vehicle level, and leakage. It states that the air pressure regulator valve must not supply the suspension until the braking system has at least 55 psi, that the vehicle must be level rather than leaning left or right, and that air-suspension leakage may not exceed 3 psi in five minutes when the vehicle’s air gauge shows normal operating pressure. A driver should follow the approved test procedure and should not confuse this suspension provision with a complete service-brake air-leak test.
PennDOT’s inspection expectations
PennDOT Section 10M tells the applicant to identify and explain each safety-critical item; crawling under the vehicle is not required. For steering, check secure gear mounting, leakage, hoses and connections, fasteners and cotter keys, and visible links, arms, rods, joints, and sockets.
For suspension, PennDOT directs applicants to inspect visible and accessible springs, mounts, air-ride components, shocks, and whether the vehicle sits level. Test directions do not replace broader operational responsibilities.
Prepare a safe inspection position
Secure the vehicle before approaching components
Use an approved, level inspection area away from moving traffic. Apply the parking brake, place the transmission as instructed, and use wheel chocks when required by the school, employer, test site, or procedure. Keep the engine off for the exterior visual inspection unless a supervised step specifically requires it to run. Do not place hands near belts, fans, shafts, steering joints, or suspension pinch points while they may move.
If the hood must be opened, use the vehicle’s procedure and verify that it is supported. Maintain three points of contact while entering or exiting. Keep clothing, jewelry, flashlights, and hands clear of moving or hot components. Never crawl under an unsupported commercial vehicle, and do not ask another person to turn the steering wheel while someone is positioned where linkage movement could trap a hand or body part.
Establish a baseline before focusing on details
Stand back first. Note a lean, a low corner, unusual tire-to-component clearance, or fresh fluid on the pavement without diagnosing the cause. Then identify the vehicle and axle. Steering is concentrated at the front, but suspension continues through drive and trailer axles. Use a fixed route so no axle or far side is skipped.
Inspect the steering system in a logical path
Begin at the wheel and column
Inside the cab, confirm the steering wheel is secure and has no spoke cracked through or missing. Check the column and visible mounting area for security. With the vehicle secured and under the correct supervised procedure, assess steering-wheel lash using the vehicle-appropriate method. Do not compare a powered system with a memorized manual-steering number, and do not use a rough hand movement as a substitute for an actual controlled check.
During an authorized operational check, report binding or unusual resistance and whether the engine was running. Do not force the wheel against the stops or name a failed pump or gear without evidence.
Move to the power steering supply and gear
At the engine area, locate the power steering reservoir, pump or driven components where visible, hoses, connections, and steering gear. Verify fluid level by the approved indicator and only under safe conditions. Look for wetness, active drips, spray patterns, damaged hoses, rubbing, missing supports, loose fittings, and a belt that is visibly frayed, cracked, loose, or contaminated when applicable.
Inspect the steering gear and bracket for cracks, missing hardware, loose mounting, or movement. Old dirt is not the same as an active leak, and a drop does not prove its source. “Fresh wet fluid below the hose connection at the steering gear” is more useful than “steering box bad.”
Follow the mechanical linkage toward the wheel
Identify the pitman arm and visible connecting links, arms, rods, joints, and sockets used on the vehicle. Look for cracks, bends, missing or loose nuts and bolts, missing cotter keys or retaining devices, unauthorized welding, damaged boots, contact with other components, or obvious looseness. Do not pry a joint, strike a component, or put a finger into a connection to test movement unless a qualified procedure specifically requires it.
End at both steer-wheel areas and verify visible clearance for hoses, lines, and linkage. Record unusual tire wear separately; it supports qualified evaluation but does not prove which part caused it.
Inspect suspension axle by axle
Leaf springs, mounts, and axle-positioning parts
At each visible axle, inspect the spring leaves for cracks, breaks, missing sections, and shifting. Compare their position with the mounts and with the other side when appropriate. Look at hangers, shackles, brackets, U-bolts, torque rods, and other axle-positioning parts used on that vehicle for cracks, breaks, looseness, missing hardware, displaced parts, or contact with a tire or frame.
A shifted leaf may threaten tire clearance. Do not reach between the parts. Record axle, side, location, clearance and vehicle level, then hold the vehicle for qualified review.
Coil springs, torsion components, and shocks
Where equipped, inspect coil springs for breaks, distortion, displacement, and secure mounts; torsion components for cracks or breaks; and shocks for secure mounting, damage, and leakage. Report whether you see a stain, road splash, or active fluid trail rather than declaring failure from a distant glance.
Suspension designs differ. Learn the actual vehicle rather than claiming a component is missing because another truck uses it. Confirm that the parts required by this design are present, secure, and free from observed disqualifying damage.
Air bags, height, and audible leaks
Inspect air bags for secure mounting, damage, abrasion, folds or displacement, and audible or visible evidence of leakage. Check their surrounding brackets, lines, and clearance. Do not place a hand on an air bag or air line to search for a leak while the system can change height. Use the authorized leak-detection and measurement procedure.
Observe vehicle level on a suitable surface. A lean requires investigation but does not prove a bad air bag. Record surface, loading, tire and visible suspension conditions for qualified evaluation.
Adjustable axles and locking devices
For a sliding tandem, lift axle, or another adjustable assembly, verify the applicable locking pins are present and engaged and inspect visible parts for damage. Do not operate release controls or move an axle merely to prove it works.
Translate observations into useful reports
A good report names the unit, axle, side, component, condition, time, and immediate action. It separates evidence from diagnosis. This helps the instructor or technician find the issue and prevents the next driver from receiving a vague note such as “front end feels weird.”
| Observed condition | Useful report language | Safe next step |
|---|---|---|
| Fresh wetness below a steering hose connection | Identify the vehicle, exact connection and whether fluid is dripping, pooled or only damp | Hold movement and request qualified evaluation; do not tighten a pressurized fitting |
| Missing cotter key or retaining device | Name the steering joint and exact side; state that the retaining device is not present | Do not operate until the assembly is inspected and properly secured |
| Leaf spring shifted toward a tire | Give axle, side, spring position and visible clearance to the tire | Keep clear of the pinch area and request maintenance review before movement |
| Vehicle leans on level pavement | Record direction of lean, loading condition, surface and any visible suspension clues | Investigate tires, load and suspension through the authorized process; do not guess the cause |
| Air leak heard near an air bag | Describe the sound location, system pressure condition and whether it continues | Use the approved leak test and qualified repair process; stay clear of changing ride height |
| Shock shows fluid trail | Identify axle, side, upper or lower area, secure mounting and visible fluid path | Report for evaluation; do not label road splash as a confirmed internal failure |
Reinspect after correction
After authorized work, repeat the affected inspection. For a steering hose, inspect routing, connections, mounting, fluid level, leakage, and supervised operation. For a spring or mount, check position, fasteners, vehicle level, tire clearance, and adjacent lines.
Carry the verified result into the required reporting process. The DVIR handoff guide shows how precise descriptions connect drivers and maintenance without inventing a diagnosis.
Worked scenario: a shifted leaf spring near the tire
During a morning pre-trip, a student inspects the right-front steering axle of a training tractor on level pavement. The truck does not show an obvious lean. The power steering reservoir and visible hoses appear secure and dry. The steering gear mount and visible linkage have their fasteners and retaining devices. At the spring, however, the student sees that one leaf does not line up with the rest of the pack and its end sits noticeably closer to the inside of the tire than the matching assembly on the left.
Stop at the observation
The student does not place a hand between the spring and tire, push the leaf back, or ask someone to roll the truck for a better view. The student steps clear, tells the instructor, and records: “Unit 12, right-front steering axle, one leaf in the spring pack appears shifted toward the inside of the tire. Clearance is visibly smaller than on the left side. No contact confirmed. Vehicle remains parked and instructor notified at 6:50 a.m.”
Let qualified personnel determine the cause
The report does not claim a broken center bolt, loose U-bolt, bent axle, or alignment failure. Those are possible technical questions, not facts established by the visual inspection. Authorized maintenance personnel inspect the assembly, decide what correction is required, and document the work. Until that evaluation is complete, the student does not treat the absence of visible tire damage as permission to drive.
Close the loop
After the repair is released, the student repeats the right-front inspection and compares both sides again. The spring leaves are aligned in the pack, mounts and visible axle-positioning parts are secure, tire clearance is normal, the vehicle sits level, and no adjacent hose or brake line was disturbed. Under supervision, steering operation is checked as required. The complete lesson is observe, isolate, report, repair, and verify—not guess, move, and hope.
Build clear skills-test language
PennDOT expects the applicant to identify and explain each listed safety-critical item. A useful steering statement covers secure gear mounting, leaks, hose condition, required fasteners and retaining devices, and visible links, arms, rods, joints, and sockets.
For suspension, cover missing, shifted, cracked, or broken springs; damaged mounts; air bags and shocks when equipped; leaks; and vehicle level. Adapt the words to what is actually installed and visible rather than reciting parts from another vehicle.
Point accurately and preserve safety
Stay out of wheel paths and pinch points. If a component is not visible or accessible, explain the limitation and follow the examiner’s instructions. Do not crawl under the vehicle.
Practice the words beside the same type of vehicle you will use, with an instructor correcting component identification. The broader CDL training guide explains why vehicle access, supervised practice, and a clear lesson plan matter when comparing training options.
CDL steering and suspension inspection checklist
Before the inspection
- Park on an approved, level surface away from traffic and secure the vehicle.
- Use wheel chocks and hood-support procedures when required.
- Keep the engine off unless a supervised procedure specifically requires operation.
- Identify the vehicle, axle, side, and actual steering or suspension design.
- Review unresolved inspection reports before making a go/no-go decision.
Steering system
- Confirm the steering wheel is secured and has no spoke cracked through or missing.
- Inspect steering-column security and assess lash only with the approved method.
- Verify power steering fluid by the safe vehicle-specific indicator.
- Inspect visible belts, hoses, connections, and components for damage, looseness, and leaks.
- Check the steering gear and brackets for secure mounting, cracks, and missing hardware.
- Follow the pitman arm and visible linkage toward both steering wheels.
- Look for worn, faulty, loose, cracked, bent, missing, welded, or interfering components.
- Confirm required nuts, bolts, cotter keys, and retaining devices are present.
Suspension at each axle
- Inspect axle-positioning components and adjustable-axle locking pins where equipped.
- Check leaf springs for missing, shifted, cracked, or broken leaves.
- Check coils and torsion components for cracks, breaks, distortion, or displacement where equipped.
- Inspect mounts, hangers, brackets, U-bolts, and visible fasteners for security and damage.
- Inspect air bags, lines, and surrounding clearance without entering a pinch point.
- Inspect shock absorbers for secure mounting, damage, and visible leakage.
- Confirm springs or mounts do not contact or threaten tires, hoses, lines, or the frame.
- Observe whether the vehicle sits level on a suitable surface.
Before movement
- Report the exact unit, axle, side, component, condition, time, and action taken.
- Separate what you observed from what a technician must diagnose.
- Do not drive with an unresolved safety concern or a condition prohibited by the applicable rule.
- After authorized repair, reinspect the affected system and nearby components.
- Complete the required pre-trip, post-trip, and carrier documentation.
Frequently asked questions
Can a CDL student crawl under the truck to inspect steering or suspension?
No. PennDOT’s current Section 10M says the applicant will not have to crawl under the vehicle. Inspect visible and accessible components from safe positions, follow the examiner or instructor’s directions, and never go beneath an unsupported vehicle.
Does a truck leaning to one side prove an air bag is bad?
No. A lean is an important observation, not a complete diagnosis. Confirm the surface and loading conditions, inspect visible tires and suspension components, record the direction of the lean, and request qualified evaluation before operation when the cause or safety is uncertain.
What should I say when I find looseness in a steering component?
Name the vehicle, axle, side, and exact joint, arm, rod, gear, or mount; describe the observed movement and the conditions under which it appeared. Do not guess which internal part failed. Keep the vehicle parked and notify the instructor, carrier, or maintenance process.
Should steering and suspension be rechecked after a repair?
Yes. Reinspect the corrected component, its mounting, adjacent hoses or lines, tire clearance, and any function affected by the work. A completed repair order is valuable documentation, but it does not replace the driver’s pre-trip determination that the vehicle is safe to operate.