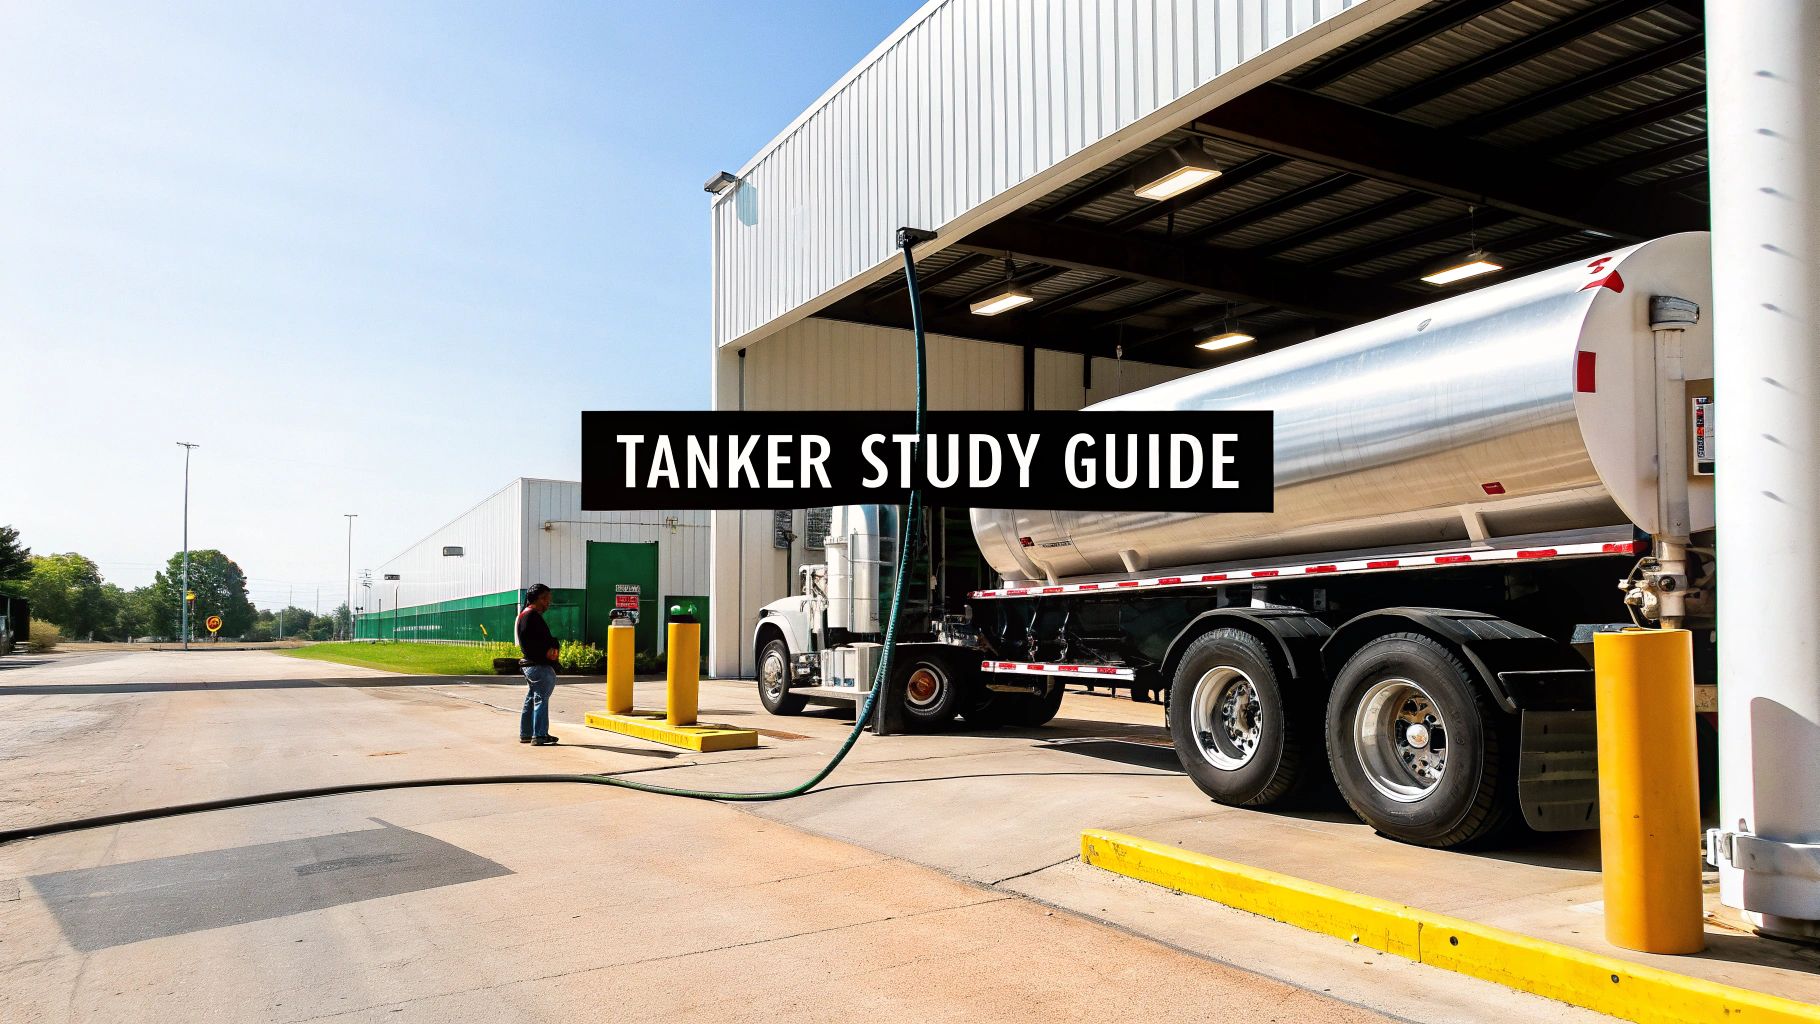
Getting your tanker endorsement is so much more than just another stamp on your CDL. Think of it as a direct key to better-paying jobs and a much more stable career path. This specialized certification shows you can handle the very real challenges of hauling liquid cargo safely. This tanker endorsement study guide is designed to be your complete roadmap—not just to pass the test, but to truly master the skills you'll need for this demanding, and rewarding, line of work.
Why This Endorsement Is Your Next Career Step
If you're serious about taking your trucking career to the next level, the tanker endorsement is one of the smartest moves you can make. Let's be honest, hauling a dry van is one thing; safely managing thousands of gallons of sloshing liquid is a completely different ballgame. It demands a unique skillset, and that's exactly why companies pay a premium for drivers who have this certification.
Statistically, tank vehicles are a higher risk on the road. The constant movement of liquid cargo—that sloshing and surging—creates a shifting center of gravity that can be unpredictable. This dramatically increases the risk of rollovers, which are a major factor in highway accidents, especially those involving hazardous materials.
The Unique Physics of Liquid Cargo
Here's a simple way to think about it: imagine carrying a shallow pan of water. If you stop or turn quickly, the water sloshes around, making it tough to keep your balance.
Now, picture that on a massive scale. We're talking about 8,000 gallons of liquid surging inside a huge cylindrical tank. That powerful movement, called liquid surge, can shove the truck forward or sideways without warning. It takes real skill and anticipation to handle that.
This is precisely why the Federal Motor Carrier Safety Administration (FMCSA) requires the endorsement. It’s not about rote memorization. It’s about genuinely understanding the physics in play and knowing how to drive proactively to keep that massive weight under control and keep everyone on the road safe.
By mastering these skills, you're not just a truck driver; you become a specialist in a high-demand field. This expertise directly translates into better job opportunities and a significant increase in earning potential, with tanker drivers often earning $10,000 to $15,000 more annually than their dry van counterparts.
Unlocking New Career Opportunities
With a tanker endorsement, you suddenly have access to a whole new world of industries that need bulk liquids moved. You become an essential link in supply chains that never stop running. Before you can jump into those roles, though, you first need to get your commercial learner's permit.
Your career path could lead you to:
- Fuel and Petroleum: Hauling gasoline, diesel, and jet fuel to gas stations and airports.
- Chemical Hauling: Moving industrial chemicals, which often goes hand-in-hand with a Hazmat endorsement.
- Food-Grade Transport: Transporting milk, juice, or other liquid foods in sanitary tanks.
Each of these jobs requires a sharp focus, a strong sense of responsibility, and a deep knowledge of safety—all things that start right here, with passing your tanker endorsement exam. Let's get you ready.
Mastering Tanker Dynamics and Inspections
When you get behind the wheel of a tanker, you're not just driving a truck; you're managing a dynamic, moving load. Two things are absolutely critical to doing this safely: understanding how that liquid affects your rig on the road and knowing every last piece of your specialized equipment. Let's break down exactly what you need to know for your exam and, more importantly, for the real world.
Driving a tanker is a completely different ballgame. The biggest challenge you'll face is liquid surge—the massive force created by thousands of gallons of fluid sloshing around inside the tank.
Think about carrying a shallow pan full of water. When you stop short, the water surges forward and pushes you. Take a corner, and it sloshes to the side, throwing off your balance. Now, imagine that force magnified by thousands of pounds. That's what you're dealing with every single day.
This forward surge can dramatically increase your stopping distance. The side-to-side motion in a turn can shift your vehicle's center of gravity dangerously high, making a rollover a very real possibility. These forces are at their absolute worst in a partially filled tank, where the liquid has plenty of room to build up momentum.
Controlling the Surge with Baffles and Bulkheads
Tanker manufacturers don't just leave you to deal with that surge on your own. Tankers are engineered with internal structures designed to tame the beast in the back. You can bet your bottom dollar the exam will ask about these.
- Baffles: Picture these as walls inside the tank with holes in them. They stand across the width of the tank and act like speed bumps for the liquid, breaking up one massive surge wave into smaller, much less powerful movements.
- Bulkheads: These are completely solid walls that divide one large tank into several smaller, separate compartments. Each compartment essentially becomes its own small tank, which almost eliminates front-to-back surge because the liquid has nowhere to go.
Here's the key takeaway: baffles are great for controlling front-to-back surge, but they do almost nothing to stop side-to-side sloshing. Bulkheads offer much better overall control but mean you have multiple compartments to manage during loading and unloading.
The Tanker-Specific Pre-Trip Inspection
Your standard CDL pre-trip is just the starting point. Tankers have a whole different layer of specialized gear that demands its own careful inspection, and this is a huge focus on the endorsement test. The basics you learned for your initial permit are a good foundation, but now it’s time to get specific. If you need to brush up on those fundamentals, our guide to the CDL general knowledge test is a great place to start.
Your tanker pre-trip has to include a meticulous check of the tank itself and all its associated hardware.
Look over every inch of the tank shell for dents, leaks, or any other signs of damage. What looks like a tiny crack can quickly become a catastrophic failure under the pressure and stress of a moving liquid load. Safety is non-negotiable, and it all starts with this hands-on visual check.
Beyond the tank body, you need to zero in on the parts that do the work. Get up close with all the valves, pipes, and hoses. Make sure everything is secure and bone-dry—no drips, no exceptions. Check that the manhole covers are latched down tight and their gaskets are in good shape to create a perfect seal.
Finally, you absolutely have to test your emergency shut-off systems. This means checking both the internal valve and the remote shut-off controls to ensure they work perfectly. When things go wrong, these systems are your lifeline to prevent a major spill. Knowing they're ready before you turn the key is a fundamental part of the job and a critical topic on the test.
To ace this part of the exam, it helps to be systematic. This table highlights the must-check items unique to tankers that you're likely to be tested on.
Critical Tanker Pre-Trip Inspection Checklist
| Component Area | Key Inspection Items | Potential Hazard if Overlooked |
|---|---|---|
| Tank Shell | Check for dents, cracks, leaks, or corrosion. | A compromised tank could rupture under pressure, leading to a major spill. |
| Pipes & Hoses | Inspect for secure connections, leaks, and signs of wear. | Leaks can cause product loss, environmental damage, and create slip or fire hazards. |
| Valves | Ensure all valves open and close smoothly and seal completely. | A stuck or leaky valve can prevent proper loading/unloading or fail in an emergency. |
| Manhole Covers | Verify covers are securely fastened and gaskets are intact. | A poor seal can lead to spills, especially during turns or braking. |
| Emergency Shut-Offs | Test both internal and remote emergency shut-off systems. | A non-functional system removes your primary defense against a large-scale spill. |
| Vents | Make sure vents are clear and functioning to prevent pressure buildup. | Clogged vents can cause a tank to implode or rupture due to pressure changes. |
Thinking through these points methodically will not only prepare you for test questions but will also build the habits of a safe, professional tanker driver.
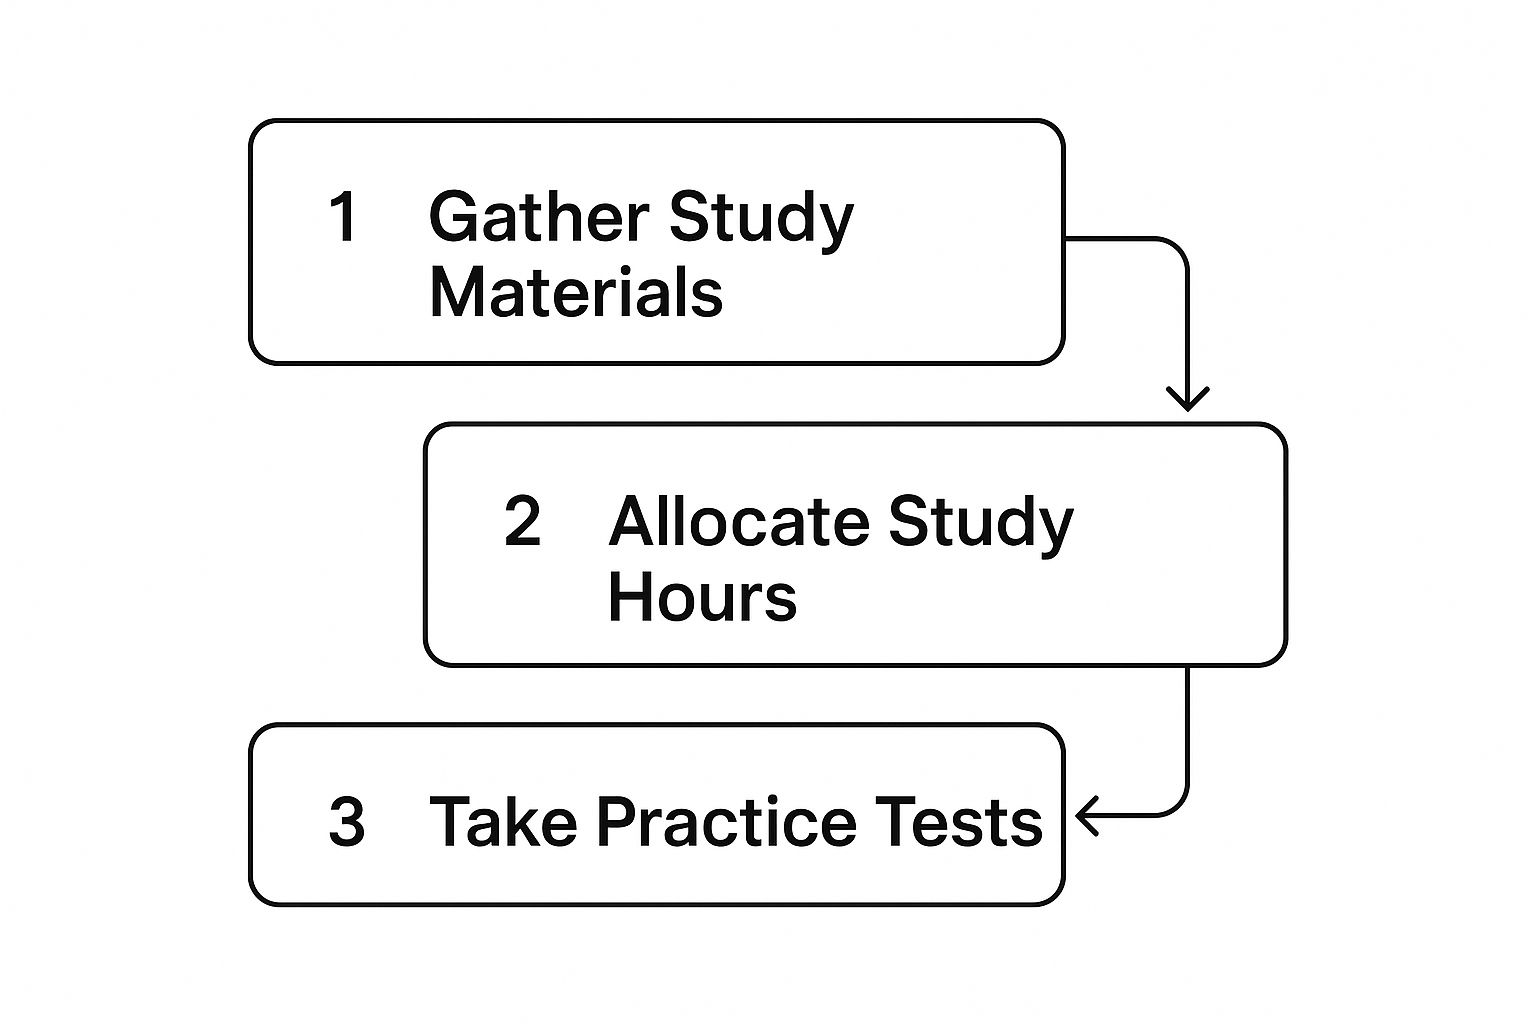
This image maps out a clear study plan. Follow that flow—from learning the material to actively testing your knowledge—and you'll be in the best possible shape to pass your endorsement test with confidence.
Safe Loading and Unloading Procedures

The tanker endorsement exam spends a lot of time on loading and unloading protocols, and for a very good reason. This is where things can go wrong—fast. Spills, fires, and injuries are most likely to happen during transfer, so mastering these steps isn't just about passing a test; it's about building a safe, successful career.
Think of loading and unloading as a detailed safety ritual, not just a single task. Every single step, from the moment you park to the second you drive away, is critical. Rushing through the process or skipping one small check can lead to a disaster.
Pre-Transfer Safety Checks
Before a single drop of product moves, your job is to secure the entire area, starting with your rig. The first thing you always do is chock your wheels. This ensures the truck can't roll, no matter what.
Next, you have to connect a grounding cable. This runs from your tank to the loading rack or storage tank you're connecting to. This is an absolutely non-negotiable step, especially when you're dealing with flammable liquids like gasoline. As that liquid surges through pipes and hoses, it generates static electricity, and a big enough spark can cause a catastrophic explosion. A good ground connection channels that static safely away.
Once the truck is secure and grounded, turn your focus to the connections. You need to meticulously inspect every hose, clamp, and fitting you plan to use. You're hunting for any sign of wear and tear—cracks, frays, or damage that could fail under pressure and cause a leak.
Understanding Your Cargo's Behavior
A good tanker endorsement study guide will drill this into you: not all liquids are created equal. How a product behaves dictates how you handle it safely. Two of the most important concepts you’ll be tested on are vapor pressure and density.
Vapor pressure is just a fancy term for how easily a liquid evaporates. Something with high vapor pressure, like gasoline, throws off flammable vapors constantly. This is why proper venting and keeping ignition sources far away is so critical.
Density, or its weight per gallon, is what keeps you from overfilling your tank and running overweight. For example, water weighs about 8.3 pounds per gallon, but gasoline is much lighter at around 6 pounds per gallon. If you don't account for that difference, you can easily end up with an overweight load even if the tank looks like it has room.
The most common mistake new drivers make is assuming all liquids behave identically. The exam will test your knowledge on adjusting procedures based on the specific product you're hauling. Knowing the cargo's characteristics is as important as knowing your equipment.
The Loading and Unloading Sequence
With all the pre-checks done, you can finally start the transfer. This process follows a strict, logical order that’s designed from the ground up to maximize control and safety.
The Loading Process:
- Connect Hoses Securely: Make sure every connection is tight, then double-check them.
- Open Internal Valves First: This is key. Always open the valves on the tanker before you open the valves from the loading rack. This gets your tank ready to receive the product.
- Monitor the Flow: Stay at the controls and watch everything. You never, ever leave a tanker unattended while it's loading.
- Close Valves in Reverse: When the tank is full, close the loading rack valve first, and then close your tanker's internal valves.
The Unloading Process:
Unloading is pretty much the exact reverse. You'll connect your hoses, open your tanker's valves first to let the product flow out, and then open the receiving tank's valves. The whole time, your eyes are peeled for any leaks or pressure changes.
This step-by-step discipline is what prevents spills caused by pressure imbalances and ensures you are always in control of the product. You can bet the exam will hit you with scenario questions that test your knowledge of this precise valve sequence. Nail this down, and you'll prove you’re ready for the responsibility that comes with the endorsement.
Getting a Handle on the Rules and Regulations
Let's be honest—the rulebook for hauling tankers can look pretty intimidating. It's easy to see it as just a bunch of red tape, but every single one of those regulations exists for a good reason. Most were put in place after a real-world incident showed just how important that rule was for keeping people safe.
Think of it less like memorizing a book and more like understanding your fundamental role in preventing disaster. These rules are the bedrock of safe tanker operation, designed to protect you, the public, and the product you're hauling.
Weight Distribution and a High Center of Gravity
The first thing you have to wrap your head around is a tanker’s high center of gravity. Unlike a dry van where the weight is low and spread out, a tanker is basically a massive liquid-filled cylinder sitting high on the frame. This makes it a lot easier to roll over, especially when you’re taking a curve or have to swerve suddenly.
That’s why the rules on weight distribution are so strict. Your goal is always to keep the load as low and stable as you can. If you’re driving a tanker with multiple compartments separated by bulkheads, you have to load them evenly. Get it wrong, and one part of your truck becomes way heavier than another, which can throw your steering and braking into chaos.
What is Outage? Understanding Liquid Expansion
Ever forgotten a can of soda in the freezer, only to find it exploded later? That same principle is a massive deal in the tanker world. Liquids expand when they get hot and shrink when they cool down. This brings us to a critical concept you absolutely must know: outage.
Outage is simply the empty space you intentionally leave at the top of the tank. It’s not wasted space—it’s a safety buffer that gives the liquid room to expand.
Without enough outage, a tanker sitting in the sun on a hot day could build up incredible pressure as the liquid expands. That pressure can be enough to rupture the tank or force product right out of the valves. Your exam will definitely test you on how to calculate the right amount of outage for different products and conditions. It's a non-negotiable part of the job.
Placarding Hazmat Loads the Right Way
When you're hauling hazardous materials, your truck needs to communicate what’s inside to anyone who sees it, especially first responders. This is where placards come in. Those diamond-shaped signs on all four sides of the tanker aren't just for decoration; they are required by federal law.
Each placard instantly tells emergency crews what they’re dealing with—be it flammable, corrosive, or poisonous material. You have to know the exact placards for your load before you even think about starting the engine. A wrong or missing placard isn't just a ticket waiting to happen; it could tragically mislead the very people trying to help in an emergency.
The study guides we use today are a direct result of decades of learning and evolving safety standards. The FMCSA and other agencies have consistently updated the rules, especially around hazmat and placarding, to make the industry safer. Think of your study guide not just as a test-prep tool, but as a summary of hard-won safety knowledge.
Before any new driver can get behind the wheel, they have to go through specific, federally mandated training. You can learn more about the required Entry-Level Driver Training (ELDT) in our detailed guide. These programs are designed to give every driver a solid foundation in these non-negotiable safety rules from day one.
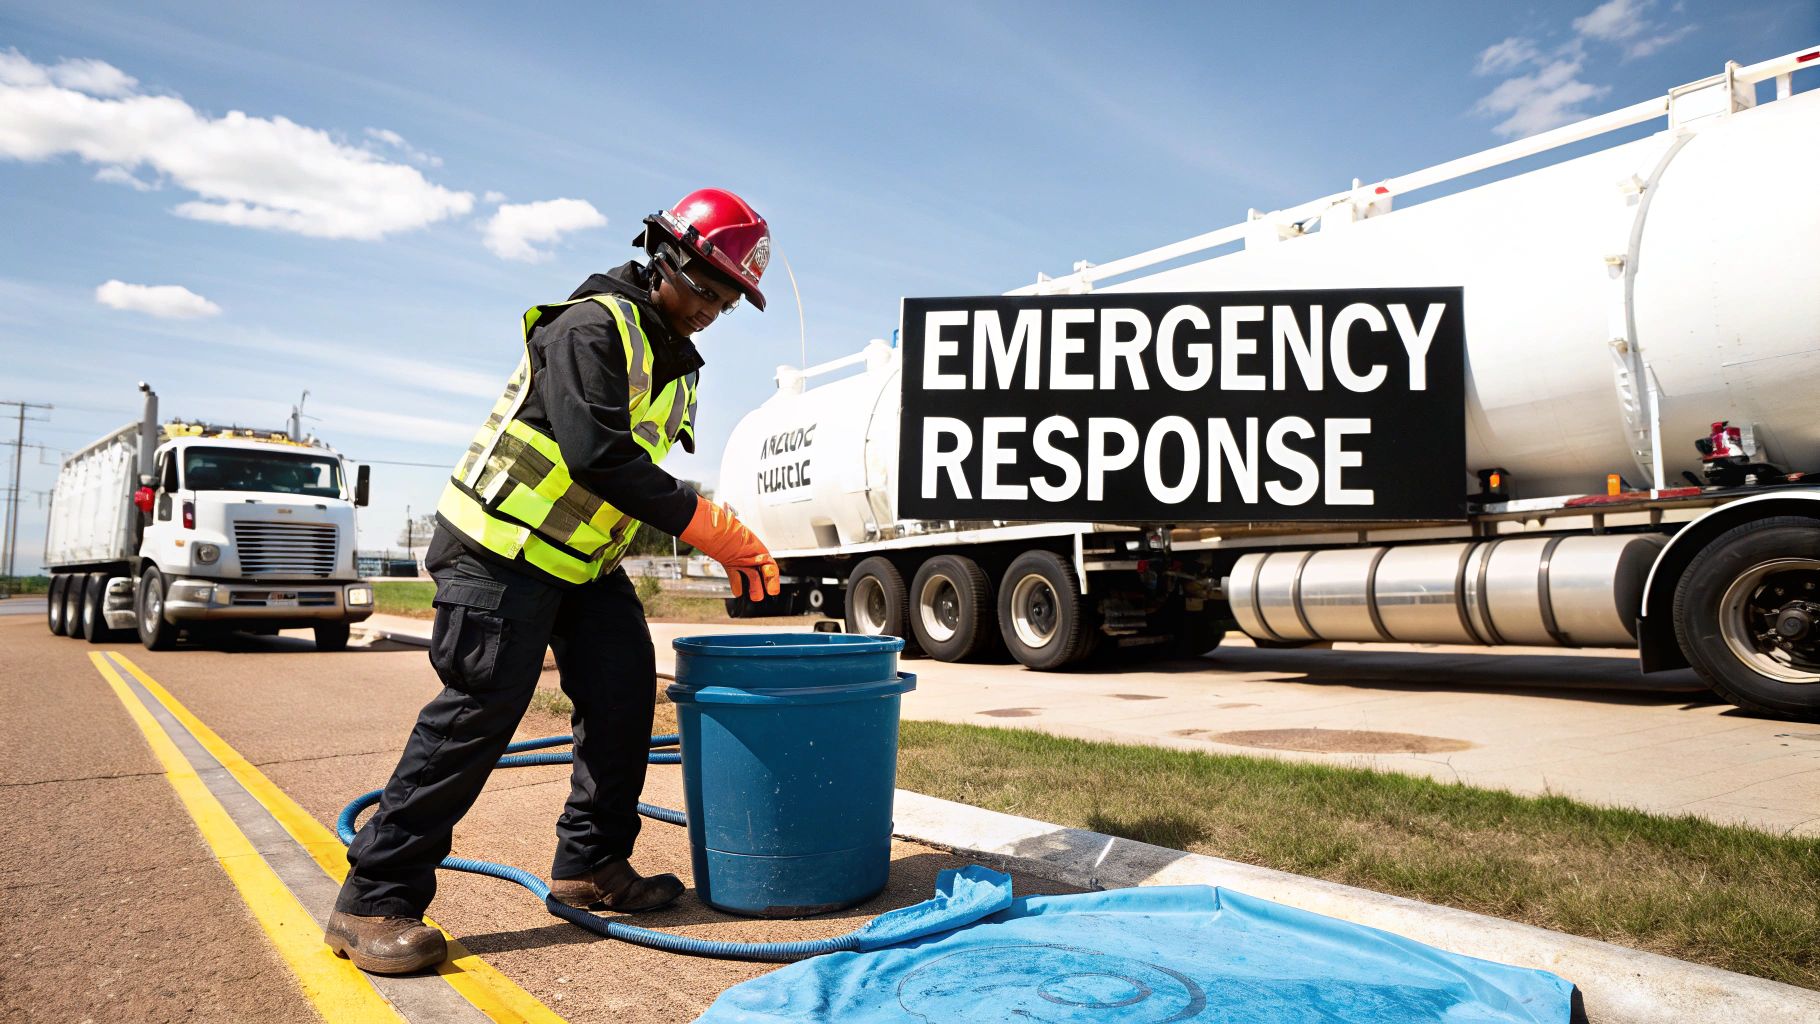
Handling Spills and Emergency Situations
Knowing what to do when things go sideways isn't just another chapter in a study guide—it’s a skill that absolutely has to be second nature for any tanker driver. Sure, we all hope for routine trips, but out on the road, you've got to be ready for the worst-case scenario. This section is all about your role as the first responder, a responsibility that’s key to passing your exam and, more importantly, keeping people safe.
When something happens, whether it’s a tiny leak or a major rollover, what you do in those first few moments is critical. There’s no time for panic. Your training needs to take over, letting you think clearly under serious pressure and follow a step-by-step plan.
The Driver's Immediate Responsibilities
In any emergency, you are the first line of defense. Your job is to get a handle on the situation and stop it from getting worse. That all starts with securing the area right away.
If you can, pull over to a safe spot, away from traffic and anything that could ignite the spill, like open flames or sparks. Get your emergency flashers on to warn other drivers. Before you even think about getting out, you need to assess the situation from a safe distance. Never rush into a scene where you could be hit by fumes or exposed to dangerous materials.
Your personal safety is always #1. If the spill involves hazmat and you don't have the right Personal Protective Equipment (PPE), stay upwind and uphill. You can't help anyone if you become a casualty yourself.
Once you know you're safe, your responsibilities boil down to three main things:
- Secure the Scene: Keep other vehicles and people out of the danger zone.
- Notify Authorities: Call 911 immediately. Give them clear, accurate information.
- Identify the Material: Use your shipping papers and placards to tell first responders exactly what you’re hauling.
Using Your Emergency Response Tools
Every tanker comes equipped with tools to help you manage a crisis, and the endorsement exam will test you on how to use them. Your two most important assets are your onboard spill kit and the Emergency Response Guidebook (ERG).
The spill kit usually has things like absorbent pads, booms (which are like long absorbent socks to circle a spill), and protective gloves. These are for small leaks you can safely handle. For instance, if a valve has a slow drip, you can use these materials to soak it up and keep it from spreading while you wait for help.
The ERG, that little orange book, is your best friend when dealing with hazardous materials. You'll learn how to use the placard number to look up whatever you're carrying. The ERG gives you the essential details on the specific dangers—like fire, explosion, or health risks—and tells you what to do in the first few minutes of an incident.
Communicating with First Responders
When you call 911, being precise is everything. The information you give them determines what kind of response team gets sent out.
Be ready to provide these details:
- Your exact location.
- The name of the material you are hauling.
- The ID number from the placard and shipping papers.
- A description of what happened (e.g., "My truck has rolled over and is leaking a flammable liquid").
- A rough estimate of how much has spilled.
- The direction the wind is blowing.
This info lets the fire department and hazmat teams start planning their approach before they even get there. Your calm, clear communication can save precious time and, ultimately, save lives.
It’s a lot like doing a thorough pre-trip inspection to prevent a mechanical failure; a clear emergency report prevents a bad situation from becoming a total catastrophe. To learn more about those foundational checks, check out our guide on the pre-trip inspection. Mastering both routine checks and emergency protocols is what makes you a true professional tanker driver.
Your Action Plan to Pass the Tanker Exam
Alright, you've got all the information. Now, how do you make it stick? A solid study plan is what turns all this knowledge into confidence on test day. This isn't about last-minute cramming; it's about building a solid foundation so the right answers come naturally.
Think of it like this: each topic, from liquid surge to emergency protocols, is a building block. Your job is to stack them correctly. When you do that, you create a base of knowledge that won’t get shaky when you’re under pressure. Let’s map out a straightforward plan to get you across the finish line.
Deconstruct Your CDL Manual
Your state's CDL manual is the official playbook. Don't just skim it—take it apart. Break the tanker section into smaller, more focused topics like inspections, specific driving techniques, and what to do when things go wrong.
Tackle one topic at a time. This approach, often called chunking, is a game-changer. It keeps you from getting overwhelmed and helps you actually remember what you've studied. As you master each little piece, you'll start to see how everything fits together.
Here's a pro tip: Don't just memorize the rules. Ask why they exist. For example, understanding that outage is necessary to prevent a tank rupture from liquid expansion is way easier to remember than a dry definition.
Try explaining a concept out loud, like you're teaching it to a rookie. This simple trick forces you to truly understand the material, locking it into your long-term memory.
Use Practice Questions as a Learning Tool
Practice tests are your secret weapon. They do more than just show you what you know—they get you comfortable with the real exam's format and wording. They're perfect for finding your weak spots before they count against you.
Once you finish a practice test, the real work begins. Spend more time reviewing the answers than you did taking the test, especially the ones you missed. Every wrong answer is a chance to get smarter.
- Analyze the Mistake: Did you rush through the question? Misunderstand a key term? Or just plain forget a rule?
- Return to the Manual: Go right back to that section in the CDL manual and read it again. And again, if you need to.
- Write It Down: Seriously, get a notebook and write down the correct answer and the "why" behind it. It really helps.
This cycle of testing and reviewing builds your knowledge brick by brick. You’ll move from making educated guesses to knowing the answer cold. Of course, before you can take any endorsement test, you have to meet the basic qualifications. Our guide on CDL requirements can walk you through that initial checklist.
Memorization Techniques That Stick
Let's be honest, some things just have to be memorized—placard rules, emergency steps, specific numbers. For these, you need a few tricks up your sleeve.
Flashcards are classic for a reason. The act of making them and flipping through them is far more powerful than just reading a list. You can also get creative with mnemonic devices. Make up a silly phrase or acronym to remember a sequence, like the exact steps for handling a leak.
By combining a structured plan with these active study methods, this tanker endorsement study guide becomes your clear path to success.
Common Questions About the Tanker Endorsement
As you get ready to take the test, a few questions always seem to come up. Getting those sorted out now will help you walk into the DMV feeling confident and prepared. Let's break down some of the most common things drivers ask about.
The path to getting your tanker endorsement begins once you already have your Class A or B CDL. The main hurdle is a written knowledge test at your local DMV, which is made up of multiple-choice questions. It’s designed to make sure you truly understand the unique challenges of hauling liquids, like surge, proper inspections, and all the safety rules we’ve covered.
What’s the Difference Between the ‘N’ and ‘X’ Endorsements?
You'll hear drivers talk about two different tanker endorsements, and it's crucial to understand what each one means for your career. They aren't the same, and the one you choose depends on what you want to haul.
The 'N' Endorsement: Think of this as the standard tanker endorsement. It gives you the green light to transport any non-hazardous bulk liquid, like milk, juice, or water.
The 'X' Endorsement: This one is a two-for-one deal. It combines the 'N' endorsement (tanker) with the 'H' endorsement (hazardous materials). If you have an 'X' on your CDL, you can legally haul both bulk liquids and hazardous materials, which opens the door to more specialized, and often better-paying, gigs.
To get the 'X' endorsement, you have to pass both the tanker and hazmat knowledge tests and complete a federal security threat assessment. It's more work, but it definitely makes you a more versatile and valuable driver in the industry.
What Should I Expect on Test Day?
The tanker test isn't about memorizing facts; it's about proving you can handle the unique safety situations that come with the job. You’re looking at around 20-30 questions, and you'll need to score at least an 80% to pass.
The questions are almost always scenario-based. For instance, they might describe a half-full tanker going up a hill and ask you to identify the biggest danger (that would be liquid surge!). Or, they might give you a load type and ask you to pick the right placard. If you've really absorbed the concepts in this guide, you’ll be able to think through these situations and nail the right answer.
Ready to stop studying and start driving? At Patriot CDL, our expert instructors provide the hands-on training you need to pass your exams and launch a successful trucking career. Learn more about our CDL programs.