


A commercial truck’s driveshaft transfers power from the transmission toward the drive axle. It rotates at high speed, changes angle as the suspension moves, and depends on shafts, yokes, universal joints, fasteners, slip components, and sometimes a center support bearing working together. A defect in that system is not just a source of vibration. It can affect the truck’s ability to move safely and can damage nearby air lines, wiring, exhaust parts, frame components, or the roadway if a driveline part separates.
For a CDL student, the goal is not to diagnose driveline geometry or perform a shop inspection. The goal is to recognize the visible components, check the conditions required by the Pennsylvania vehicle-inspection material, notice warning signs during operation, and make a precise report without crawling under an unsecured truck. This guide builds that safe, repeatable routine.
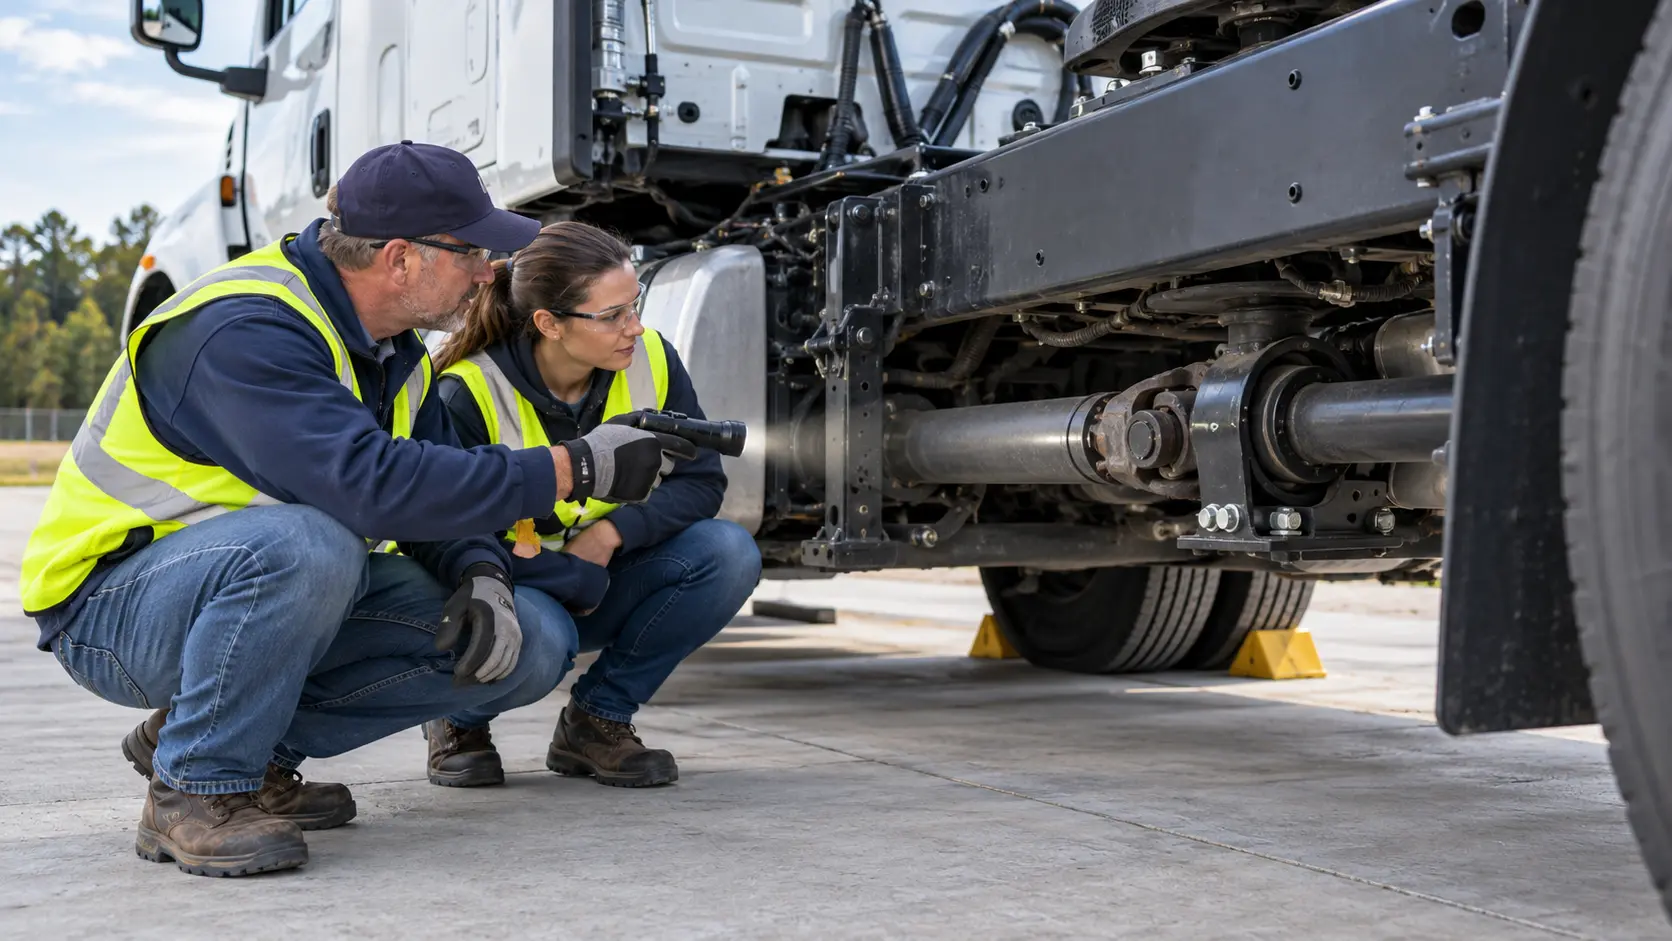
What the Driveshaft Does—and Why Its Condition Matters
The transmission sends torque through the driveline to the drive axle or axles. The driveshaft tube carries that rotating load. Universal joints allow the shaft to operate as the transmission, frame, suspension, and axle sit at different angles. A slip section permits controlled length change as the axle moves. Longer wheelbase vehicles may use more than one shaft with a center support bearing between sections.
These parts are designed as a system. A sound-looking tube does not make a loose universal-joint bearing strap acceptable. A secure rear yoke does not cancel a damaged center-bearing bracket. An inspection should therefore follow the entire visible power path instead of focusing on the largest tube.
Driveshaft coupling is not fifth-wheel coupling
PennDOT uses the word “couplings” in its driveshaft check. In this context, it means the driveline connections, such as universal-joint and yoke areas. It is different from the tractor-to-trailer coupling system of fifth wheel, kingpin, locking jaws, and related controls. The tractor-trailer coupling verification guide covers that separate inspection.
Federal Duties and the Pennsylvania CDL Standard
requires motor carriers to systematically inspect, repair, and maintain vehicles under their control. It also requires parts and accessories that may affect safe operation to remain in safe and proper operating condition. The rule does not turn a driver into a mechanic; it establishes the carrier’s maintenance responsibility and the safety context for reporting a driveline defect.
requires the driver, before driving, to be satisfied that the vehicle is in safe operating condition and to review the previous driver vehicle inspection report when the rule requires it. prohibits operation of a vehicle in a condition likely to cause an accident or breakdown. Together, these provisions support a simple decision: a concerning driveline finding must be resolved through the carrier’s process before normal operation.
The exact PennDOT training language
The tells applicants to see that the driveshaft is not bent or cracked and that the couplings are secure and free of foreign objects. During the inspection test, the applicant must point to or touch each required item as directed and explain what is being checked and why; the manual also states that the applicant will not have to crawl under the vehicle.
That CDL test language is concise. It does not authorize a student to rotate the shaft, remove a guard, reach between components, or make a serviceability ruling. A carrier’s maintenance program and the vehicle manufacturer’s instructions can require additional inspection detail. Use the PennDOT statement for the skills-test explanation and the approved fleet procedure for actual equipment decisions.
Secure the Vehicle Before Looking at the Driveline
Inspect on level, firm ground in an area approved by the school or carrier. Apply parking brakes, place the transmission in neutral or park as appropriate, shut down and control the key according to procedure, and use wheel chocks when the procedure requires them. Confirm that another person cannot start or move the truck while you are beside it.
Stay outside the frame rails and use available sight lines from the side or rear. A flashlight and a mirror can improve visibility without moving closer. Never place the head, shoulders, arms, or legs beneath a vehicle that is merely held by air suspension, hydraulic pressure, a jack, or parking brakes. Shop access below a truck requires approved lifting or support equipment and qualified personnel.
Never inspect a rotating driveshaft
Loose clothing, gloves, hair, cords, and tools can become caught instantly in a rotating driveline. Do not run the engine, select a gear, or ask someone to “bump” the truck while a person is near the shaft. A driver-level visual inspection takes place with the driveline stationary. Any powered test belongs in an approved maintenance environment with controls suited to that procedure.
Trace the Driveline Route Before Judging a Part
Begin at the rear of the transmission and visually follow the driveline toward the drive axle. Depending on the truck, the route may include one shaft or multiple sections, universal joints, slip components, a center support bearing, yokes, flanges, straps, guards, and fasteners. Identify which parts are visible from each safe position before making any conclusion.
Look for overall alignment and clearance. The shaft should not appear bent, displaced, or unusually close to frame members, crossmembers, hoses, wiring, brake chambers, exhaust components, or body equipment. Compare both sides of the available clearance. Bright metal, fresh scrape marks, polished rings, missing paint, or nearby damaged lines can indicate contact even when the shaft is stationary.
Keep the area free of foreign material
Check for wire, plastic banding, rope, cloth, vegetation, or other material wrapped around or lodged near the shaft and couplings. Do not reach in and pull an object free when the location is unsafe or the material is under tension. Secure the truck and report it so qualified personnel can remove it without rotating the driveline or damaging nearby lines.
Inspect Shaft Tubes, Welds, and Slip Areas
Look for cracks, bends, dents, and twist
Use the flashlight at a shallow angle so surface changes cast a shadow. Inspect as much of the tube circumference as is visible without going under the truck. Look for a crack in the metal or weld, an obvious bend, a sharp dent, a bulge, a crease, or evidence that the tube has twisted. Dirt lines can resemble cracks, so describe what is visible rather than scraping, grinding, or cleaning aggressively.
A balance weight can be a normal welded feature. Do not remove it or call it a repair. Conversely, a clean rectangular area, torn weld mark, or fresh discoloration may show that a weight is missing. Qualified maintenance determines whether the shaft is balanced and serviceable.
Check the slip section without pulling it apart
If a slip joint or splined section is visible, look for abnormal separation, displaced protection, contamination, fresh metal, or signs of binding. The allowed engagement and lubrication method are vehicle-specific. Do not pull, pry, hammer, or add lubricant during a driver inspection. Record what you see and let maintenance use the correct specification.
Inspect Universal Joints, Yokes, and Fasteners
Universal joints transmit torque while allowing angular movement. Visually check that bearing caps appear seated and that the retaining method—such as straps, bolts, clips, or a flange arrangement—is present and secure. Look for a missing or backed-out fastener, a broken strap, a displaced cap, fresh rust trails, cracked metal, or a gap that differs from the corresponding side.
Inspect yoke ends for visible cracks, damage, or looseness. Do not use a pry bar or rotate the shaft to test play during a routine driver inspection. A qualified technician may measure movement using a specified procedure, but a student should not substitute an improvised force test.
Check the Center Support Bearing on Multi-Piece Drivelines
A multi-piece driveshaft may pass through a center support or carrier bearing mounted to a bracket and crossmember. From a safe visible position, check that the bracket and mounting hardware appear present and secure. Look for a cracked bracket, missing fastener, displaced bearing, torn or separated rubber support, or shaft position that appears off-center.
Do not confuse designed rubber isolation with a loose mounting. The support can include flexible material that manages vibration. Maintenance information determines acceptable movement and alignment. A driver’s report should identify whether movement appears at the bracket, fastener, rubber support, bearing, or shaft rather than simply saying “center bearing bad.”
Connect Road Symptoms to a Safe Response
A pre-trip view cannot reveal every driveline problem. During normal operation, remain alert to a new vibration through the floor or seat, a clunk during torque change, squeaking or chirping related to road speed, shudder during acceleration, or a striking sound beneath the truck. These symptoms do not identify one specific failed part, but they justify a controlled response.
Do not accelerate to “see whether it clears.” Reduce demand smoothly, avoid abrupt torque changes, and move only as necessary to reach a safe stopping position under the carrier’s emergency procedure. Activate warning devices and protect the scene when required. If the vehicle is already safely parked, do not move it merely to reproduce the symptom.
Separate vibration from wheel and tire evidence
Vibration can also come from tires, wheels, suspension, cargo, or engine-related sources. Record whether it changes with road speed, engine speed, gear, throttle, or braking. Pair that observation with the commercial-truck tire inspection plan and the wheel and rim inspection plan. The goal is not to guess which system failed; it is to give maintenance a useful pattern.
Driveline Findings and the Correct Driver Action
| Observation | Why it matters | Safe driver response |
|---|---|---|
| Tube appears straight, intact, clear of contact, and connections appear secure | Matches the visible PennDOT inspection conditions | Complete the rest of the vehicle inspection; do not claim hidden parts were inspected |
| Visible crack, sharp dent, obvious bend, or twist in a shaft tube | May affect structural integrity and rotating balance | Do not continue normal operation; secure and report the exact location |
| Missing, loose, or broken universal-joint strap, fastener, cap, or yoke part | Connection may not retain the rotating shaft | Keep the vehicle stationary and request qualified evaluation |
| Wire, banding, rope, or other material wrapped around the shaft | Can damage seals, lines, joints, or nearby components | Do not reach into an unsafe area; report for controlled removal |
| Fresh polished metal or matching contact marks on shaft and crossmember | Suggests interference during movement | Document both locations and report before driving |
| Fresh circular grease spray near a joint | May indicate lubricant leaving a rotating component | Preserve the evidence and request maintenance inspection |
| Center-bearing bracket cracked, displaced, or missing hardware | Support and alignment may be compromised | Stop; identify the affected bracket or mount and report it |
| New vibration, clunk, chirp, or underbody strike while moving | May signal a developing driveline or nearby-system problem | Follow the carrier’s controlled-stop procedure; do not repeat the symptom unnecessarily |
Worked Scenario: Vibration After Driveline Service
A student and instructor receive a tractor that returned from maintenance after a universal-joint service. The work order is closed. During the pre-trip, the student secures the truck and looks from the side with a flashlight. The main tube is not visibly bent or cracked, and no foreign material is wrapped around it.
Step 1: Follow the entire visible route
Instead of stopping at the tube, the student traces the shaft from the transmission area to the drive axle. At the rear joint, one bearing-strap bolt appears different from the others: the head is not seated to the same depth, and there is a fresh bright mark beside the strap. The student does not touch or tighten it.
Step 2: Describe evidence, not a conclusion
The student reports, “At the rear universal-joint strap on the driver side, one bolt head appears raised compared with the adjacent bolt. Fresh bright metal is visible beside that strap. I did not move the vehicle or test the fastener.” This is more useful than “the U-joint is loose” because it separates a visible fact from a diagnosis.
Step 3: Respond to a second symptom
Maintenance examines the truck and releases it after correction. On the supervised road check, a new vibration begins only during acceleration above a moderate road speed. The instructor directs a controlled return to the safe area without repeated hard acceleration. The student records the speed range, gear, throttle condition, and the fact that the vibration decreased while coasting.
Step 4: Close the loop
The carrier sends the truck back for qualified diagnosis rather than treating the first repair as proof that the driveline is now correct. After the second release, the assigned person repeats the visible inspection, reviews the repair documentation as required, and completes a normal road check. A completed work order begins verification; it does not replace it.
Make a Defect Report Maintenance Can Use
Include the unit number, date and time, exact driveline section, side of the vehicle, surrounding component, and operating condition. For a visible defect, describe the location relative to the transmission, center support, or axle. For a symptom, record when it starts and stops, whether it follows vehicle speed or engine speed, and whether throttle, gear, braking, or coasting changes it.
Avoid unsupported terms such as “unbalanced,” “bad angle,” or “failed bearing” unless qualified testing established them. Better wording is: “Vibration felt through floor between approximately X and Y road speed during acceleration; reduced while coasting,” with the actual observed values. Follow the carrier’s reporting procedure and keep the truck’s status visible to dispatch, the instructor, and the next driver.
Review the prior report before driving
When 49 CFR 396.13 requires review of the previous DVIR, confirm that required repairs were certified as performed or certified as unnecessary before acknowledging the report. The post-trip inspection and DVIR handoff guide explains the difference between observing a defect, recording it, certifying a repair, and verifying the vehicle before the next trip.
Common Driveshaft Inspection Mistakes
- Crawling under the truck: the Pennsylvania skills-test inspection does not require it, and an unsecured vehicle creates crushing hazards.
- Checking only the tube: yokes, joints, fasteners, slip areas, and support bearings also belong to the visible system.
- Confusing coupling systems: driveshaft couplings are not the fifth-wheel connection between tractor and trailer.
- Rotating the shaft by hand: unexpected vehicle movement and pinch points make improvised manipulation unsafe.
- Calling dirt a crack: use lighting and report the line’s location without scraping away evidence.
- Calling every grease mark a failure: describe residue, spray pattern, freshness, and related symptoms.
- Tightening a visible bolt: correct hardware, torque, retention, and follow-up checks belong to qualified maintenance.
- Recreating a vibration repeatedly: additional load can worsen a developing defect.
- Ignoring nearby damage: shaft contact can affect air lines, wiring, exhaust, guards, or crossmembers.
- Using a vague report: “driveshaft problem” does not tell maintenance where or when to reproduce the condition.
Commercial-Truck Driveshaft Inspection Checklist
Use this study checklist only with the actual truck, the current PennDOT material, and the school or carrier procedure.
- □ Vehicle is on approved firm, level ground and secured against movement.
- □ Engine and key are controlled, and wheel chocks are used when required.
- □ I stay outside the frame rails and do not crawl beneath the vehicle.
- □ I never inspect, touch, or approach a rotating driveline.
- □ I identify the transmission end, shaft section or sections, and drive-axle end.
- □ Shaft tubes appear straight and are not visibly bent, cracked, sharply dented, or twisted.
- □ Tube-end welds show no visible crack or separation.
- □ No foreign object is wrapped around or lodged near the shaft or joints.
- □ Driveshaft has appropriate visible clearance from frame, crossmembers, lines, wiring, and exhaust.
- □ There are no unexplained fresh scrape marks, polished rings, or impact evidence.
- □ Universal-joint caps, straps, clips, flanges, and visible fasteners appear present and secure.
- □ Yoke ends show no visible crack, displacement, or missing component.
- □ Slip area shows no obvious abnormal separation, binding evidence, or exposed damage.
- □ Center-bearing bracket, hardware, rubber support, and nearby crossmember appear secure, if equipped.
- □ I note fresh grease spray, displaced seals, or unusual residue without wiping away evidence.
- □ I report any new vibration, clunk, chirp, shudder, or striking sound with operating conditions.
- □ I review the prior DVIR and repair certification when required.
- □ A questionable vehicle remains controlled until authorized evaluation and release.
Frequently Asked Questions
Can a CDL student crawl under a truck to inspect the driveshaft?
Not during the Pennsylvania CDL vehicle-inspection test, and not during routine training unless a qualified instructor has established an approved, protected procedure. Inspect only from a safe visible position; never place any part of the body beneath a vehicle that is not properly secured and supported for maintenance.
What does PennDOT require a CDL applicant to say about the driveshaft?
PennDOT's vehicle-inspection material tells applicants to check that the driveshaft is not bent or cracked and that its couplings are secure and free of foreign objects. The applicant should identify the visible component and explain those conditions clearly.
Is grease around a universal joint always proof of a failed driveshaft?
No. Grease can have several causes, including normal service residue, over-lubrication, or a seal problem. Record the location, amount, fresh spray pattern, looseness, noise, or heat evidence and let qualified maintenance determine the cause and repair.
Can a driver continue if the driveshaft has a visible crack or a loose universal-joint component?
Do not continue normal operation. A visible crack or loose, broken, or missing driveline component can worsen suddenly. Secure the vehicle, report the exact condition, and wait for the carrier or qualified maintenance to evaluate and release it under the applicable procedure.
Official Sources Reviewed
Educational information only, not legal or maintenance advice. Regulations, inspection procedures, vehicle designs, and carrier policies can change. Official sources were reviewed November 2, 2026.