


A commercial-truck wheel end asks for more than a quick glance at the tire. The tire carries air and provides the road contact patch, but the wheel or rim supports the tire, the studs and nuts hold the assembly to the hub, and the hub and seal area can reveal leakage or movement that needs attention. A driver who checks only tread and inflation can miss a cracked rim, an out-of-round bolt hole, a missing fastener, or a trail showing that parts may have shifted.
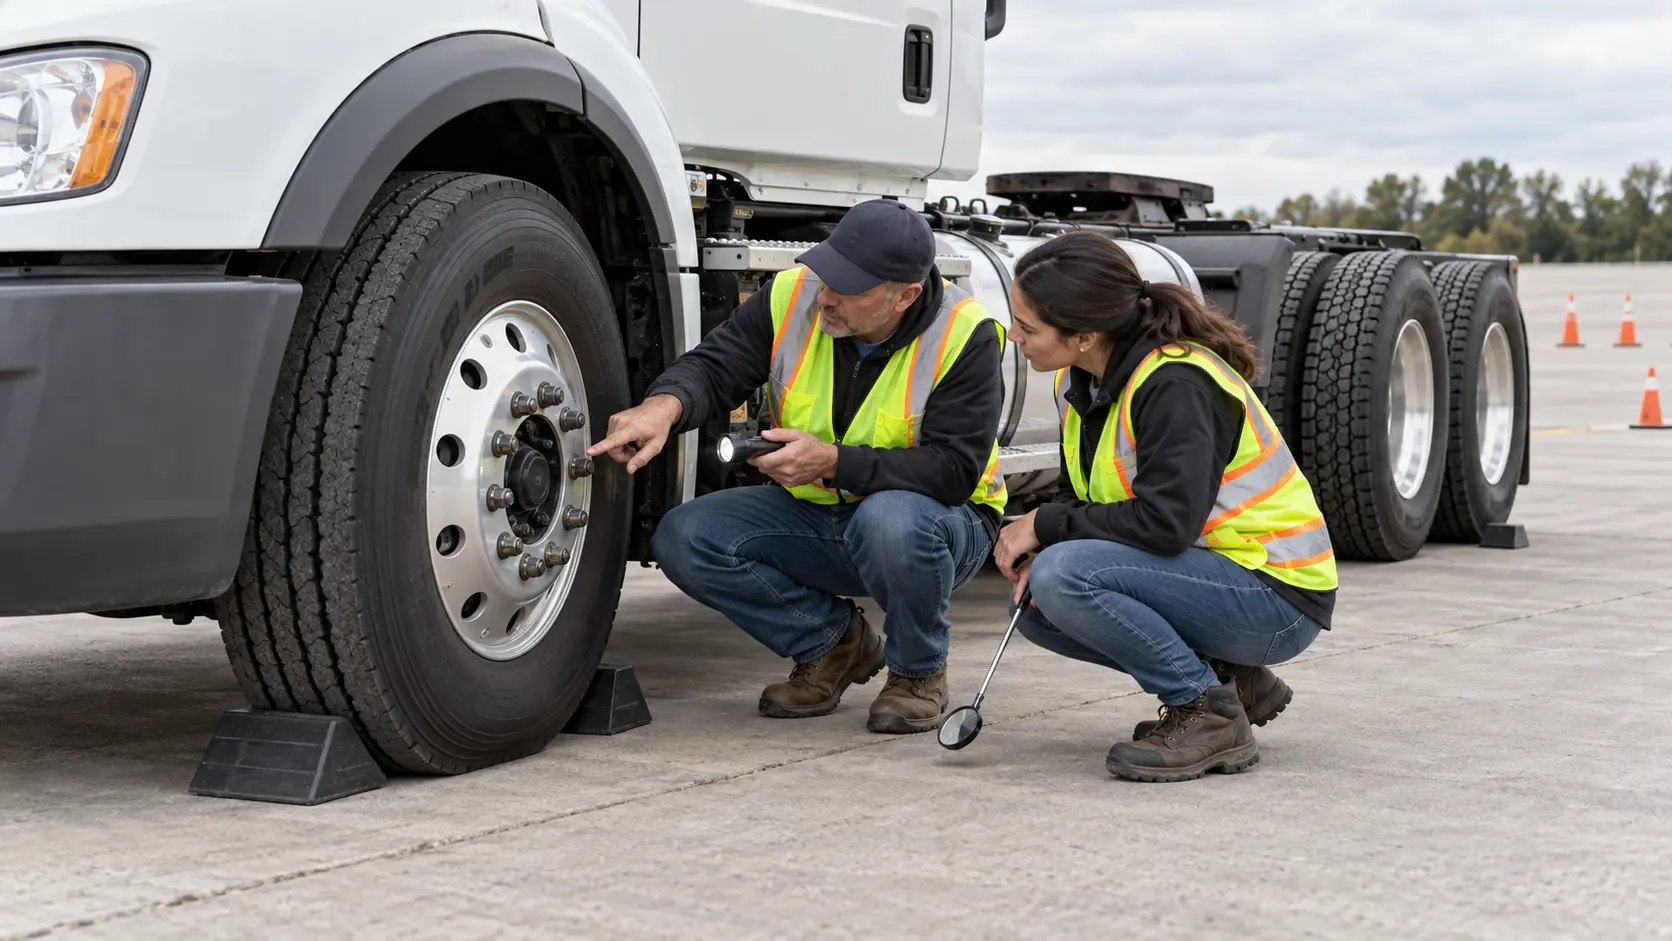
Understand the wheel-end system
The words wheel and rim are sometimes used interchangeably in everyday speech. On the vehicle, the important skill is identifying the metal component that carries the tire and the attachment points that secure it. Different designs use different shapes, fastener arrangements, and hub covers, so learn the truck in front of you rather than memorizing one photograph.
Separate the wheel check from the tire check
A tire inspection covers inflation, tread, sidewall damage, valve components, and tire-to-tire clearance. A wheel inspection covers the metal wheel or rim, its stud or bolt holes, attaching nuts or bolts, and related evidence of movement or damage. The two checks overlap at the bead and flange, but neither replaces the other. Use the commercial-truck tire inspection plan for the tire-specific routine.
Know what a driver can and cannot determine
A driver can see a crack, broken metal, bent flange, missing nut, oil trace, elongated hole, or rust trail. A visual check cannot establish fastener torque, bearing end play, internal bearing condition, or the remaining strength of a wheel. Good reporting identifies the component, axle, side, position, and visible condition. It does not convert a visual clue into a technical certification.
Know the federal and Pennsylvania baseline
49 CFR 393.205: wheels
The current federal rule is compact and specific. Wheels and rims must not be cracked or broken. Stud or bolt holes must not be elongated or out of round. Nuts or bolts must not be missing or loose. Read the operative language at . The FMCSA Motor Carrier Safety Planner repeats these three inspection points, but FMCSA notes that its planner is guidance and not a substitute for the regulation itself.
PennDOT's vehicle-inspection language
PennDOT's Commercial Driver's Manual identifies rims and lug nuts as steering-axle inspection items. Its modernized Section 10M material directs applicants to inspect for damaged, cracked, or bent rims; welding repairs; rust trails that can indicate movement on an applicable wedge-wheel design; elongated stud or bolt holes; and missing or loose nuts or bolts. The current manual and skills-test resources are available from PennDOT's and .
Inspection is not permission to repair
Federal minimum conditions and test language tell you what to look for. They do not authorize a driver to tighten, weld, straighten, or replace wheel components without the training, tools, specifications, and carrier approval required for that work. Wheel service is safety-critical. If the condition is uncertain, the conservative action is a precise report and qualified evaluation before the vehicle moves.
Prepare for a safe inspection
Control the vehicle first
Use a level, designated inspection area when possible. Apply the parking brake, place the transmission as directed, and chock wheels when required by the testing site, employer, or training procedure. Keep the key and vehicle state controlled. Do not inspect beside moving traffic unless the situation and approved safety procedure require it, and never place yourself where a vehicle could roll toward you.
Let heat and recent service shape the method
Wheel ends, brakes, and hubs can be hot after operation. Do not touch a wheel end merely to judge temperature. Use the carrier's approved method and equipment, and report heat, odor, smoke, or discoloration without putting your hand near the assembly. Before beginning, review any driver report, repair order, tire change, brake work, hub service, or wheel-removal note. Recent work is not automatically defective, but it changes where you should look carefully.
Build an axle-by-axle route
Start at the left steering axle, then inspect the right steering axle, drive axles, and each trailer axle. On every position, repeat the same sequence: tire, rim face and flange, holes, fasteners, hub and seal area, then the inside wheel and dual spacing when applicable. A fixed route reduces the chance that the easy-to-see outer wheel receives attention while an inside dual is skipped.
Inspect the rim or wheel
Scan the complete visible circumference
Stand where you can view as much of the wheel face and flange as the vehicle allows. Look for cracks, broken sections, bends, distortion, impact marks, or a flange that no longer follows an even circle. Pay attention near hand holes, the bead seat and flange, the center area, and each fastener hole. Use a flashlight from several angles because dirt, shadow, and paint edges can hide or imitate a line.
Do not strike, pry, scrape, or load a suspected area to “test” it. If coating or debris prevents a useful view, report the access limitation. A suspected crack is enough reason to stop the normal release decision and ask for qualified inspection; the driver does not need to prove crack depth.
Notice bends and contact evidence
A curb strike or road debris can leave a bright scrape, flattened flange area, or localized bend. Check the corresponding tire bead and sidewall without assuming the damage stops at the visible mark. Also look for contact between a wheel and another component, or for a wheel that appears to run at an unusual angle. Such observations may involve the tire, suspension, hub, or axle and should be reported as a combined condition.
Do not accept an unfamiliar weld by appearance
PennDOT's inspection guidance tells applicants that rims cannot have welding repairs. A smooth-looking weld or fresh paint is not evidence that a repaired wheel is acceptable. Identify the exact location, keep the vehicle in the reporting process, and let qualified maintenance determine replacement and disposition. Never grind, cover, or repaint a suspect area before it is evaluated.
Check studs, holes, nuts, and bolts
Account for every required fastener
Inspect the complete fastener pattern. Look for a missing nut or bolt, a broken or visibly damaged stud, a nut sitting at a different depth, mismatched hardware, or a fastener that does not seat squarely. Decorative nut covers can hide the condition; follow the carrier's procedure for viewing the actual fasteners rather than assuming every cover is proof of a nut underneath.
Look for movement clues
Rust trails radiating from a nut, polished metal, disturbed paint, metal dust, a shifted washer, or circular marks around a hole can suggest movement. These are reasons for escalation, not substitutes for torque measurement. Report what you see: “rust trail from the lower-right steering-axle lug nut and polished area at the seat,” rather than “lug is loose by ten pounds.”
Inspect holes for elongation
A proper stud or bolt hole should retain its designed shape. An elongated or out-of-round hole may appear stretched in the direction of movement, have an uneven edge, expose fresh metal, or allow the fastener to sit off-center. Compare similar holes on the same wheel only as an observation aid. If one appears different, do not remove the fastener or drive to see whether the condition worsens.
Never use a hammer or wrench as a diagnostic shortcut
Sounding fasteners or trying them with a hand wrench does not confirm correct torque and can create a misleading result. Correct wheel installation depends on clean mating surfaces, suitable hardware, the specified pattern, calibrated equipment, and manufacturer or fleet procedures. The inspection task is to detect a condition that needs service, not to improvise wheel service in the yard.
Inspect the hub and seal area
Look for leakage and contamination
View the hub cap, axle-end area, visible seals, and the inside of the wheel. Look for fresh oil, grease, wet streaks, splatter, or residue that differs from ordinary road grime. Follow a trace upward to its likely source without reaching into the assembly. A leak can contaminate brake surfaces or reduce lubricant available to wheel-end components, so include the nearby brake area in the report.
The presence of residue does not tell a driver how much lubricant remains or whether a bearing is serviceable. Record color, location, spread, and whether the material appears fresh. If the hub has a sight window, inspect it only according to the approved procedure and manufacturer markings. Do not remove plugs, caps, or covers during a routine driver walkaround.
Watch for indirect warning signs
An unusual odor, smoke, discoloration, repeated leakage, wheel-end heat reported by approved monitoring equipment, or a new vibration noted during operation deserves immediate attention under the carrier's procedure. Do not continue driving to collect more evidence. Safely stop, communicate the axle and side, and allow qualified personnel to determine whether the concern involves the bearing, brake, seal, tire, or another component.
See the complete dual-wheel assembly
Do not let the outer wheel hide the inner wheel
Use a flashlight and approved inspection mirror to view accessible portions of the inside rim, fasteners or mounting system, tire sidewall, valve area, hub, and seal. Move around the assembly rather than reaching through hand holes. If the inner wheel cannot be adequately seen, report the limitation and follow the fleet's method for a closer inspection.
Check spacing and trapped material
Inspect the space between dual tires for debris, stones, chains, or other material that could damage either tire. Confirm the tires are not touching and that nothing protrudes into the space. A dual-spacing problem may begin with tire size, inflation, load, wheel condition, or installation; the driver reports the condition rather than choosing the cause.
Match observations across the pair
Compare the apparent seating, fastener condition, valve access, and visible rim profiles of the pair. A difference may be normal for the design, so use it as a prompt to identify the actual component and check the vehicle documentation. Do not assume mixed-looking hardware is acceptable or defective without qualified review.
Pay extra attention after wheel service
A wheel that was recently removed and installed deserves a documented handoff. Review the repair order or service note and confirm that the correct axle and position are identified. The carrier, wheel manufacturer, or service provider may require a follow-up fastener check after a defined service interval. Follow that exact written procedure; do not invent a universal mileage or time rule.
Inspect before the first movement
Confirm all visible fasteners are present and seated consistently, the rim is not damaged, the valve and tire are accessible, and no tools or loose parts remain. Check the inside wheel when applicable. If torque documentation, a required recheck, or service status is unclear, resolve it before departure rather than treating the lack of information as approval.
Recheck during the trip when required
If the fleet procedure calls for a recheck, plan a safe location and ensure qualified personnel or approved equipment are available. During normal en-route inspections, look again for new rust trails, polished metal, missing hardware, leakage, odor, or heat warnings. A condition that changed since departure is especially important to report with time and location.
Turn observations into actions
This table organizes driver communication. It is not a substitute for the carrier's out-of-service, maintenance, or wheel-installation procedure.
| Observation | Precise report language | Safe next action |
|---|---|---|
| Visible line through a rim hand hole | “Suspected crack at the upper edge of the left steer-wheel hand hole; visible from two angles.” | Do not operate; mark the location and obtain qualified wheel inspection. |
| One lug nut missing | “Right front wheel has one missing nut at the 4 o'clock position; stud remains visible.” | Keep the vehicle in the maintenance process; do not substitute hardware. |
| Rust trail and polished nut seat | “Rust trail extends from the left forward drive-axle nut; seat has a fresh polished area.” | Report as suspected movement and request fastener and wheel evaluation. |
| Hole appears stretched | “Upper-left stud hole on the outer rear wheel appears elongated and exposes bright metal on one side.” | Do not remove the nut or continue driving; obtain qualified assessment. |
| Fresh oil on inside wheel | “Fresh oil trace starts at the right rear hub area and spreads onto the inside rim toward the brake area.” | Escalate for hub, seal, lubricant, and brake-contamination inspection. |
| Stone trapped between duals | “Large stone lodged between the left rear dual tires; sidewall contact is visible.” | Do not reach between tires; have the hazard removed under an approved safe procedure. |
| Recent service with missing recheck record | “Right steer wheel was installed yesterday; required follow-up status is not documented in the handoff.” | Resolve documentation and required inspection before releasing the vehicle. |
Worked scenario: a wheel changed yesterday
A student is assigned a tractor whose right steering-axle tire and wheel were removed during roadside service the previous afternoon. The service note identifies the position and says the vehicle returned to the yard, but the school's normal follow-up field is blank. The student does not assume that a completed repair order means the wheel is ready.
Step 1: establish the service context
The student confirms the tractor number, axle, and side, then asks the instructor how the school's wheel-service handoff should be documented. The instructor confirms that maintenance must clear the follow-up before the truck enters the lesson. While waiting, the student performs the authorized visual inspection without touching the fasteners.
Step 2: inspect the complete position
All nuts are present, but one sits visibly farther outward than neighboring nuts. A narrow rust trail runs from that seat toward the rim edge, and the paint beneath the washer area looks freshly disturbed. The rim has no visible crack from the accessible views, the hole does not appear elongated, the hub area is dry, and the tire shows no obvious damage.
Step 3: report facts and stop the release
The student reports: “Right steer wheel removed during service yesterday. All nuts present; nut at approximately 2 o'clock sits farther outward than adjacent nuts, with a rust trail and disturbed paint at its seat. No visible rim crack or hub leak from accessible views. Follow-up service status is not documented.” Maintenance checks the installation under the approved procedure before the instructor uses the truck. The student succeeds by combining service history with a precise visual observation, not by trying a wrench.
Practical wheel-and-rim checklist
- Secure the vehicle on an approved surface and chock wheels when required.
- Review driver reports, repair orders, wheel removals, tire changes, and required follow-up checks.
- Follow the same axle-by-axle route on the tractor, straight truck, and trailer.
- Inspect each visible rim face, flange, hand hole, center area, and accessible inside surface.
- Look for cracks, broken metal, bends, distortion, impact damage, and welding repairs.
- Account for every required nut or bolt and inspect visible studs.
- Look for elongated holes, off-center seating, mismatched hardware, rust trails, polished metal, and disturbed paint.
- Inspect hub caps and seal areas for fresh oil, grease, residue, and splatter.
- Check nearby brake areas for possible contamination without reaching into the assembly.
- Use safe angles and approved lighting to inspect inside wheels on dual assemblies.
- Check between dual tires for contact, debris, and obstructions.
- Report heat warnings, smoke, odor, vibration, or wheel-end changes immediately under the carrier's procedure.
- Do not strike, pry, weld, straighten, tighten, or remove wheel components during a routine driver inspection.
- State the vehicle, axle, side, wheel position, component, visible condition, and service context.
- Obtain qualified clearance before operation when wheel integrity or attachment is uncertain.
Common mistakes to avoid
Looking only at the tire
Good tread does not confirm a sound rim or secure attachment. Finish the tire check, then deliberately move your eyes to the metal wheel, every fastener, the hub area, and the inner wheel. Use a spoken sequence during training until the separation becomes automatic.
Calling every rust mark a loose lug
Rust can come from water, exposed metal, or previous service, while a radiating trail can also be a movement clue. Describe the mark and its location. Do not dismiss it, and do not claim a torque result from appearance. Qualified maintenance can clean, measure, and inspect the joint correctly.
Using a wrench to “make sure”
A hand wrench cannot verify specified torque and may disturb the evidence or damage hardware. Tightening one fastener without checking the entire joint, mating surfaces, sequence, and specifications is not a safe shortcut. If something looks different, stop and report it.
Skipping the inner dual and the post-service record
The outer wheel can look normal while the inner wheel or hub area has a problem. Likewise, a new-looking assembly can still have an unresolved follow-up requirement. Treat physical inspection and service documentation as two necessary parts of the release decision. For the broader end-of-day communication process, review the post-trip and DVIR handoff plan.
Frequently asked questions
Is a rust streak proof that a commercial-truck lug nut is loose?
No. A rust trail or shiny movement mark is a warning sign, not a complete diagnosis. Record its location, compare the fastener with the others, and report it for qualified inspection. Do not ignore it, but do not claim you measured looseness when you did not.
Should a CDL driver tighten a loose lug nut during a pre-trip inspection?
Only if the driver is specifically trained, authorized, equipped, and following the carrier's approved wheel-service procedure. Wheel fasteners require the correct sequence, condition checks, and specified torque. The normal driver response is to stop, report the exact condition, and obtain qualified maintenance clearance before operation.
Can a cracked or welded commercial-truck rim remain in service?
A cracked or broken wheel or rim does not meet 49 CFR 393.205. PennDOT's CDL inspection guidance also directs applicants to identify damaged, cracked, or bent rims and says rims cannot have welding repairs. A driver should report the condition and leave the serviceability decision and replacement work to qualified maintenance.
Do the inside wheels in a dual-wheel assembly need to be inspected?
Yes. The inside wheel, its fasteners or attachment system, the space between dual tires, and visible hub or seal areas are part of the wheel-end inspection. Use safe viewing angles and approved tools such as a flashlight or inspection mirror; never crawl under an unsecured vehicle or reach into a wheel assembly.