


A tire failure in a commercial vehicle can change steering effort, stability, and available stopping control in a moment. The first job is not to identify the tire, call dispatch, or reach an exit. It is to keep the vehicle pointed where it is safe to go while speed comes down in a controlled way. That sequence matters because a hard brake application or abrupt steering input can turn a manageable tire failure into a lane departure, trailer swing, or rollover.
This guide builds a practical response around the current , the federal tire rules in , and the stopped-vehicle warning requirements in . It is a training framework, not a substitute for an employer’s emergency procedures, the vehicle manufacturer’s instructions, or professional roadside service.
Why a tire failure is a control emergency
A blowout is loud, but the sound is not the main danger. The risk is the change in the vehicle’s contact with the road. A steer tire can increase steering effort and pull the tractor toward the failed side. A drive or trailer tire may cause thumping, vibration, or unstable movement. Preserve the remaining traction and keep every correction small.
The natural reactions that can make the event worse
Many drivers instinctively lift their eyes from the road, grab the brake, or turn sharply toward the shoulder. Those reactions compress several decisions into one abrupt movement. Hard braking transfers weight and may intensify instability. A sudden steering command can cause a trailer to track across a lane or place wheels on a soft shoulder before the combination is ready. Looking at mirrors for too long can also sacrifice the forward view when lane control matters most.
PennDOT’s commercial manual gives a clear first sequence: hold the steering wheel firmly, stay off the brake unless a collision is imminent, let the vehicle slow, then brake very gently and pull off the road. This is different from ordinary planned stopping. During the first seconds after a failure, the goal is to stabilize the vehicle before asking it to turn or brake significantly.
Prevention and response are connected, but not identical
A careful commercial-truck tire inspection can find low pressure, cuts, bulges, exposed material, uneven wear, and dual-tire problems. Federal rules prohibit operation on specified defects, including a flat tire, exposed ply or belt material, and tread or sidewall separation. Inspection reduces avoidable exposure, but drivers still need a rehearsed response.
Recognize the warning signs without chasing the diagnosis
The current PennDOT manual organizes tire-failure clues into sound, vibration, and feel. Treat any one of them as a reason to protect control. You may not immediately know whether the failed tire is on the tractor or trailer, and you do not need that answer while the vehicle is still moving.
Sound: assume the bang may be yours
A loud bang can seem to come from another vehicle, especially in traffic or beside a barrier. The commercial manual’s practical advice is to assume the sound may be your tire. Keep looking ahead, hold the wheel, and check the vehicle’s response. Do not make a sudden lane change solely because of the noise.
Vibration: thumping can be the only rear-tire clue
A heavy thump or strong vibration may indicate that a tire has gone flat. Rear failures may first appear mainly as vibration. The force can change with speed, but the driver should not accelerate or brake sharply to “test” it. Maintain direction, begin the controlled slowdown, and use brief mirror checks only after the combination is stable enough to spare attention.
Feel: heavy steering and side-to-side movement
A front failure can make steering feel heavy and may try to twist the wheel. A rear failure can allow some side-to-side movement or fishtailing, although dual rear tires may limit that effect. These are clues, not an invitation to diagnose the exact wheel from the cab. Keep both hands engaged, eyes far enough ahead to select an open path, and corrections smooth.
| What you notice | What it may mean | Useful immediate action | Avoid |
|---|---|---|---|
| Loud bang | Possible rapid tire failure | Assume it may be your vehicle; look ahead and hold direction | Jerking the wheel or looking backward |
| Heavy thumping or vibration | Possible flat rear, drive, or trailer tire | Stabilize, ease off power, and let speed reduce | Accelerating to identify the sound |
| Heavy steering or pull | Possible steer-tire failure | Use a firm two-handed grip and small corrections | Hard braking or a sharp shoulder move |
| Side-to-side movement | Possible rear instability | Keep the combination straight and create time to slow | Rapid countersteering |
| Smoke, debris, or sparks in a mirror | Possible tire or adjacent component damage | Continue the controlled stop and choose the safest available location | Stopping in a live lane if a safer position is reachable |
The immediate response: control first, speed second, shoulder third
A short mental command can make the sequence easier to recall: hold, track, ease, slow, signal, stop. It is not a racing technique or a promise that every situation will unfold neatly. It is a way to prioritize the actions supported by the commercial manual while leaving room for the driver to avoid an immediate collision.
1. Hold the steering wheel firmly with both hands
Keep your shoulders supported, maintain a firm grip, and look where you want the vehicle to travel. Do not lock your arms or fight every small vibration. The purpose of the grip is to keep a failed steer tire from pulling the wheel out of your hands and to make measured corrections possible.
2. Keep the vehicle in its lane
Use the lane as a temporary stability zone. The shoulder is a later objective, not the first reaction. A combination vehicle needs time to settle, and an abrupt lateral move can bring the trailer close to traffic or put the right-side tires onto a narrow or soft surface. Maintain the best available space cushion and scan ahead for a straight, wide stopping area.
3. Stay off the brake while the vehicle begins to slow
Unless you must brake to avoid an immediate collision, do not make a hard brake application during the initial instability. Ease off the accelerator smoothly. The vehicle will begin losing speed. Avoid an abrupt downshift, engine-brake change, or control input that adds a new disturbance. Once the vehicle is stable and slower, apply the brakes very gently.
4. Communicate after control is established
Activate the hazard flashers when you are preparing to leave the normal traffic flow, and signal the move when appropriate. Make brief mirror checks for a safe opening. Do not let a long mirror stare pull your attention from the path ahead. If traffic prevents an immediate move, keep the vehicle predictable and continue slowing in a controlled manner.
5. Move gradually to the safest practical location
Choose the nearest location that provides meaningful separation from moving traffic: a broad paved shoulder, turnout, rest area, or exit only if it can be reached without continuing unsafe operation. Federal tire rules state that a commercial motor vehicle may not be operated on a flat tire. That does not mean the driver should freeze in the travel lane when a short, controlled movement is necessary to get out of immediate danger; it means a failed tire is not permission to continue the trip or “limp” miles to a preferred shop.
Choose a stopping position that protects the truck and the driver
A stop is not complete merely because the wheels no longer turn. The vehicle should be as far from moving traffic as the surface and circumstances safely allow, with the combination straight and visible to approaching road users. A narrow shoulder, bridge, curve, hillcrest, soft edge, or active work zone may make the first available spot unsuitable.
Read the shoulder before committing to it
Look for pavement width, drop-offs, guardrails, signs, drainage structures, soft ground, pedestrians, and the amount of trailer exposure. Reduce speed before placing weight onto an unknown shoulder. Enter it with a shallow, smooth steering angle. Straighten the combination and leave space on the traffic side whenever possible.
If the only immediate choice is poor, weigh the danger of remaining in the lane against the danger of moving a very short distance to a safer refuge. That judgment is situation-specific. The plan is not to reach the most convenient repair location; it is to end movement at the nearest place that reasonably reduces the immediate traffic threat.
Secure the vehicle before leaving the seat
Once stopped, follow the same disciplined ideas in a safe shutdown routine: set the parking brakes, place the transmission in the appropriate secure position, shut down as required, and take the key according to company policy. Keep the hazard flashers operating as required. Before opening the door, check mirrors for traffic and choose the protected side when it is safe and practical.
Protect the roadside scene and stay out of the danger zone
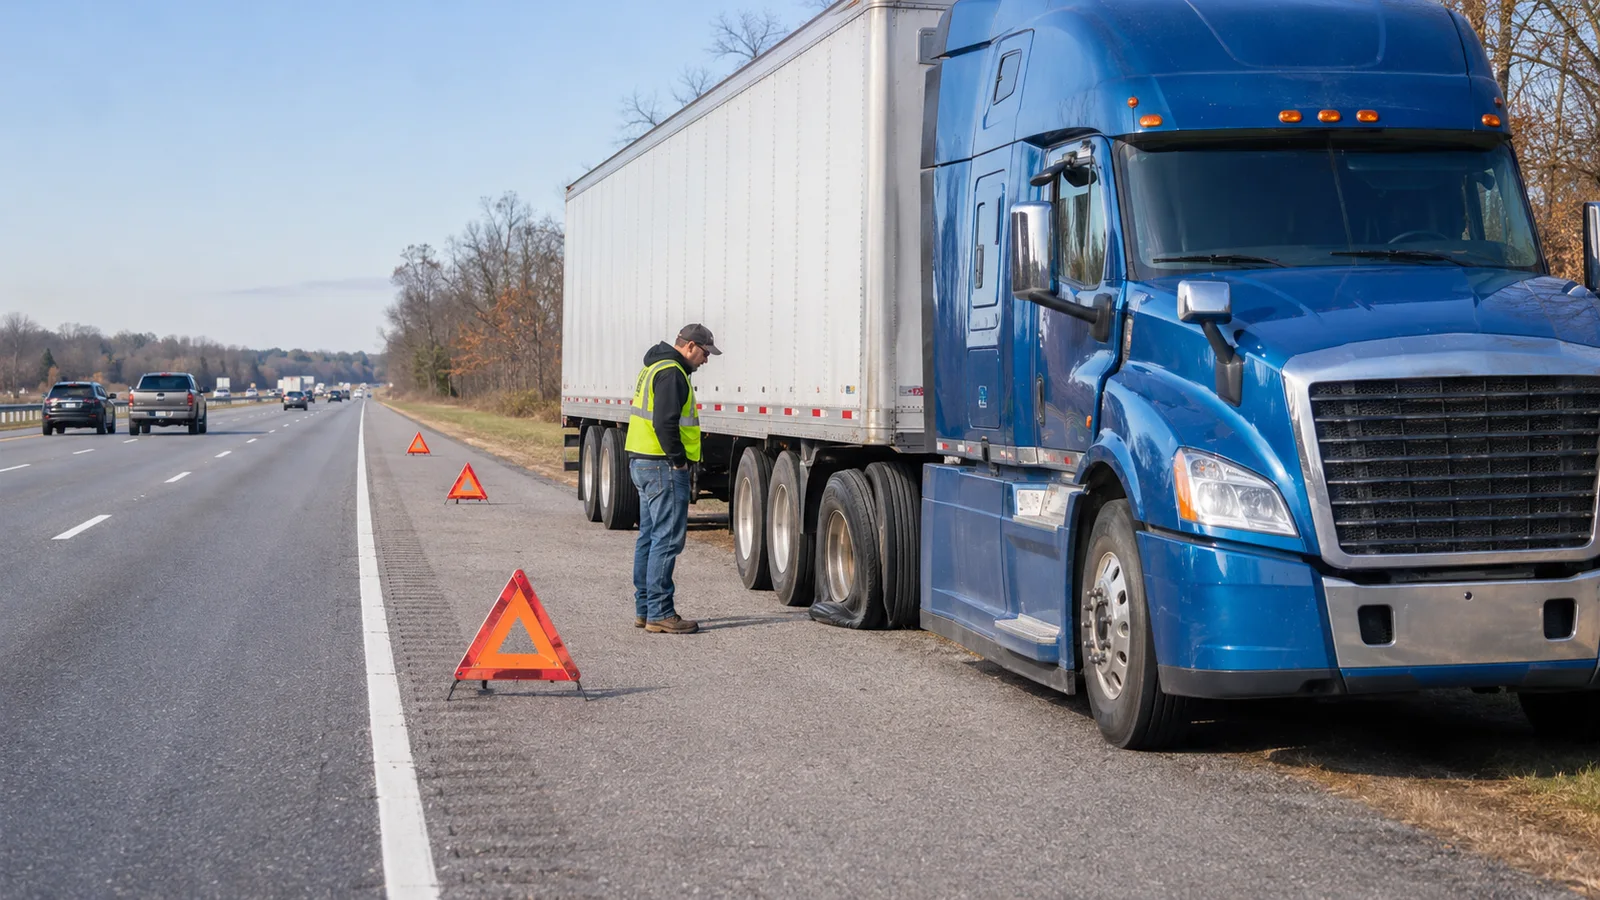
Under 49 CFR 392.22, a commercial motor vehicle stopped on the traveled portion or shoulder for a cause other than a necessary traffic stop must immediately use its hazard warning flashers. The flashers continue until required warning devices are placed, and they are used again while those devices are retrieved. In the general case, warning devices must be placed as soon as possible and within ten minutes. Curves, hills, obstructions, divided roads, and one-way roads have special placement rules.
Use the required pattern for the actual road
Do not rely on one memorized distance for every location. The general two-way-road pattern, the divided or one-way-road pattern, and the rule for a view blocked by a curve or hill are different. Review the full roadside warning-device placement plan and the current regulation before you need it. The goal is to give approaching traffic useful advance warning while minimizing your exposure on foot.
Your pre-trip should also confirm the presence and condition of the equipment covered in the commercial-truck emergency equipment guide. A triangle hidden behind unsecured cargo, a missing fire extinguisher, or a dead flashlight becomes a much larger problem on a dark shoulder.
Do not stand beside the failed tire
A damaged tire, wheel, hub, brake component, air line, mud flap, or body panel can remain hazardous after the truck stops. Traffic creates another danger. Stay away from the traffic side whenever possible, never crawl under the vehicle on a roadside, and do not place yourself between the truck and a barrier. If you cannot reach the failed area safely, remain in a protected location and tell dispatch or roadside service exactly what you can and cannot inspect.
Inspect, report, and decide what happens next
When it is safe to do so, perform a limited visual check from a stable, protected position. Look for the failed tire’s location, loose tread, damage to nearby tires, air lines, wiring, brake chambers, mud flaps, lights, fenders, and cargo-control equipment. Check for smoke, fire, leaking fluids, or parts contacting the road. Do not touch hot components or try to pull wrapped tread from an axle.
Give dispatch or roadside service a useful report
A calm report should include the road and direction of travel, nearest mile marker or exit, precise stopping position, tractor and trailer identifiers, likely axle and side, whether the truck is fully clear of traffic, any smoke or additional damage, cargo or hazardous-material considerations, and whether warning devices are in place. If there is fire, injury, a crash, a blocked lane, or immediate danger, contact emergency services first as required by the circumstances and company procedure.
Do not convert an emergency stop into an unauthorized repair
Changing a heavy commercial tire beside moving traffic is not an appropriate improvisation for an untrained driver. Wait for qualified service and follow carrier procedures. Even after a tire is replaced, adjacent tires, wheels, brake parts, suspension, air lines, lights, and the trailer body may need inspection. The trip resumes only after the vehicle is safe and legal to operate.
The event should also feed the carrier’s reporting and maintenance process. Record the defect and any related damage accurately rather than writing only “blowout.” A precise note helps maintenance determine whether inflation, load, road damage, wheel condition, or another issue needs investigation. This connects emergency response to the habits in a good post-trip inspection and DVIR handoff.
Worked scenario: a trailer-tire failure on a divided highway
Jordan is driving a loaded dry van in the right lane of a divided highway at a speed appropriate for the clear conditions. There is a wide paved shoulder ahead, but a bridge begins about a quarter mile farther on. Jordan hears a sharp bang followed by rhythmic thumping from the trailer area. The truck still tracks straight.
Jordan keeps both hands firmly on the wheel, looks down the lane, and resists the urge to brake. The accelerator is eased off smoothly. With the combination stable, Jordan activates the hazard flashers, makes short mirror checks, and lets traffic behind begin to respond. The truck loses speed without an abrupt shift in balance.
Rather than trying to reach the next exit, Jordan selects the broad shoulder before the bridge. After speed is much lower, Jordan uses gentle braking and a shallow steering angle to move fully onto the paved area. The tractor and trailer are straight, with as much room from the lane as the shoulder permits. Jordan secures the vehicle and checks traffic before exiting on the protected side.
The inspection is limited and deliberate. From a safe location, Jordan can see that an outside trailer tire has failed and that loose tread damaged a mud flap. There is no smoke, fire, fluid leak, or cargo issue. Jordan reports the exact location, vehicle identifiers, tire position, shoulder condition, and visible secondary damage. The warning-device pattern for a divided highway is placed according to 49 CFR 392.22, without walking in the travel lane.
Jordan does not attempt to pull rubber from the axle or drive to the next exit. Qualified roadside service replaces the tire and checks the companion tire, wheel, brake area, mud flap, and nearby lines. The carrier records the defect and repair before authorizing movement. The successful part of the scenario is not speed; it is the order of decisions: control, slowdown, safe position, warnings, report, and qualified inspection.
Tire-failure practice checklist
Use this checklist for classroom review or a parked-vehicle discussion. Emergency maneuvers should not be simulated by damaging a tire or creating instability on a public road. Practice the decision sequence verbally and connect it to your normal scan, space-management, and inspection habits.
Before the trip
- Inspect each tire for inflation, tread, cuts, bulges, separation, exposed material, and objects.
- Check dual spacing, matching, valve stems, caps, and anything trapped between duals.
- Confirm wheels, rims, fasteners, hubs, and seals show no obvious defect or leak.
- Verify the load is within limits and distributed appropriately.
- Confirm reflective triangles and other required emergency equipment are present and accessible.
- Know the carrier’s breakdown number and reporting procedure before departure.
While moving
- At a bang, vibration, heavy steering, or unusual movement, assume the problem may be yours.
- Keep both hands firmly on the steering wheel.
- Look ahead and hold the safest available lane path.
- Stay off the brake initially unless avoiding an immediate collision.
- Ease off the accelerator smoothly and let the vehicle slow.
- Avoid abrupt downshifts, engine-brake changes, and sharp steering.
- Activate hazard flashers and communicate the move after control is established.
- Use brief mirror checks and choose the nearest safe stopping area.
- Brake gently only after the combination is stable and slower.
- Enter the stopping area with a shallow, smooth steering input.
After stopping
- Park as far from moving traffic as safely practical and keep the combination straight.
- Secure the vehicle before leaving the seat.
- Check traffic before opening a door and use the protected side when possible.
- Place warning devices for the actual road and sight distance within the required time.
- Stay out of travel lanes and never crawl beneath the vehicle roadside.
- Check from a safe position for fire, smoke, leaks, loose parts, and adjacent damage.
- Report location, direction, vehicle IDs, tire position, shoulder status, and visible damage.
- Do not continue the trip on a flat or damaged tire.
- Use qualified roadside service and follow carrier instructions.
- Document the defect and repair before the vehicle returns to service.
Frequently asked questions
Keep a firm two-handed grip on the steering wheel, hold the vehicle in its lane, and stay off the brake while the vehicle begins to slow. The immediate priority is directional control, not diagnosing the tire or reaching the shoulder.
Should a driver brake immediately after a commercial-truck tire blows?Usually not. PennDOT’s commercial manual warns that braking immediately after a tire failure can cause loss of control. Unless a collision is otherwise imminent, stabilize the vehicle, let it slow, and then brake very gently as you move to a safe stopping place.
How can a driver tell which truck tire failed?A front-tire failure can make the steering feel heavy or pull, while a rear failure may create thumping, vibration, or side-to-side movement. Do not look away from the road or try to diagnose the wheel position while moving; control the vehicle first and inspect only after a safe stop.
Can a CDL driver continue slowly on a blown or flat tire to the next exit?A commercial motor vehicle may not be operated on a flat tire under 49 CFR 393.75. Stop at the nearest location that provides the safest practical separation from traffic, notify the carrier or roadside service, and do not resume the trip until the tire and any related damage have been properly addressed.
Build the response before you need it
A tire failure gives the driver very little time to invent a plan. A repeatable sequence—firm grip, steady path, controlled slowdown, safe position, warning devices, and a careful report—keeps priorities clear. Pair this response with disciplined tire inspections, adequate following space, and smooth control. The following-distance and space-cushion guide explains how room ahead can preserve choices when an unexpected mechanical problem occurs.
If you are preparing for a Pennsylvania CDL and want supervised practice that connects manual knowledge to real vehicle control, contact Patriot CDL at or visit 7800 Bristol Pike, Levittown, PA 19057. You can also review our guide to finding CDL training near you.
Official sources
- , especially Section 2.17.4, “Tire Failure.”
- .
- .
- .