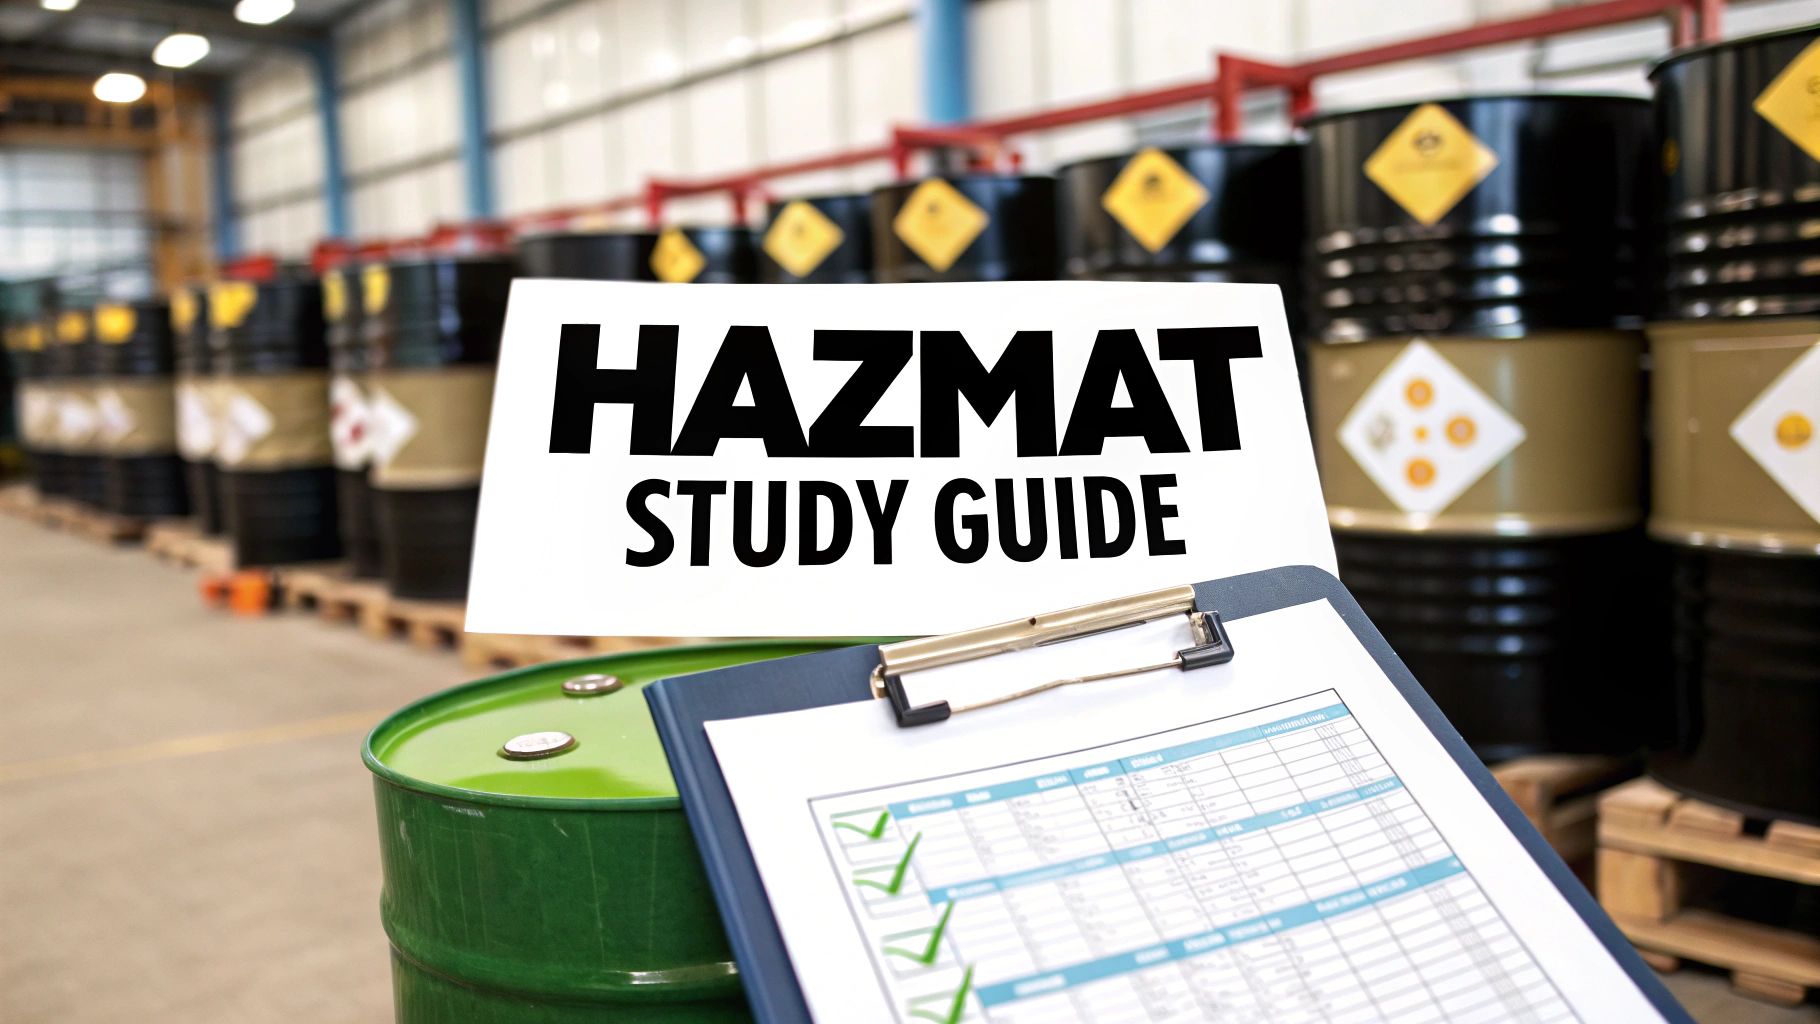
If you're a professional driver looking to take your career to the next level, getting a Hazardous Materials (Hazmat) endorsement is a fantastic move. It's a certification that proves you can be trusted with sensitive cargo, and that trust often translates into better pay and more opportunities. Think of this guide as your first step on that path.
Getting the endorsement involves two main hurdles: a written knowledge test and a full security screening. Let's break down what you're up against.
What to Expect from the Hazmat Endorsement

Earning your Hazmat endorsement is a big deal. It's not just another stamp on your CDL; it's a serious commitment to safety. You're essentially getting specialized training to handle materials that, if mishandled, could be dangerous to the public and the environment. This certification tells everyone that you have what it takes to transport these goods safely and by the book.
The process isn't just about cramming facts for a test. It's about truly understanding the safety protocols you’ll use every single day on the job. This guide is built to be your roadmap, breaking down the complex stuff into simple, bite-sized pieces.
Key Areas of Study
To pass the test and be a confident Hazmat driver, you need to master a few core topics. Your study time should be focused on these key areas:
- Hazardous Materials Identification: You'll learn the nine classes of hazardous materials and how to spot them.
- Placarding and Labeling: This is all about the diamond-shaped signs on your truck. They're a visual language that tells everyone, especially first responders, what you're hauling.
- Safety and Emergency Protocols: What do you do if there's a spill or a leak? Knowing the right procedures can minimize risk and save lives.
- Regulatory Compliance: You need a solid handle on the federal and state rules that govern everything you do with hazardous materials.
Acing the exam isn't about memorizing definitions. It’s about knowing how to apply these safety rules in the real world—from the loading dock to a roadside emergency.
The Testing Process
Transporting hazardous materials is a high-stakes business, and the regulations are tight for a reason. In the U.S., any driver wanting to haul this kind of freight must get a Hazmat endorsement. This means passing a knowledge test on federal regulations, how to handle different substances, and proper packaging. For example, in California, the test is 30 questions, and you need to get at least 24 right to pass.
But it’s not just about the written exam. You also have to clear a Transportation Security Administration (TSA) threat assessment. This includes a background check and fingerprinting. It’s a crucial security measure to ensure only trustworthy professionals are given this huge responsibility.
You can learn more about the foundational steps by checking out our guide on general CDL requirements. We'll walk you through everything you need to know to get ready for the test and build a successful career.
Decoding the Nine Classes of Hazardous Materials
If you want to earn your hazmat endorsement, getting a solid handle on the nine classes of hazardous materials is non-negotiable. This is the foundation of everything you'll do. But don't think of it as just memorizing a dry list. Instead, think of it like learning the unique "personalities" of the cargo you're hauling.
Each class behaves differently, brings its own set of risks to the table, and requires specific handling procedures. Mastering these distinctions is what keeps you—and everyone else on the road—safe. It’s also what will get you through the exam.
Let's put this into a real-world context. Imagine being a first responder arriving at an accident. The difference between a truck carrying Class 1 (Explosives) and one hauling Class 8 (Corrosives) completely changes the game plan. This guide is designed to make those distinctions stick in your mind.
To help you see the big picture, this infographic groups the classes by the kind of danger they pose: physical, health, or specialized hazards.
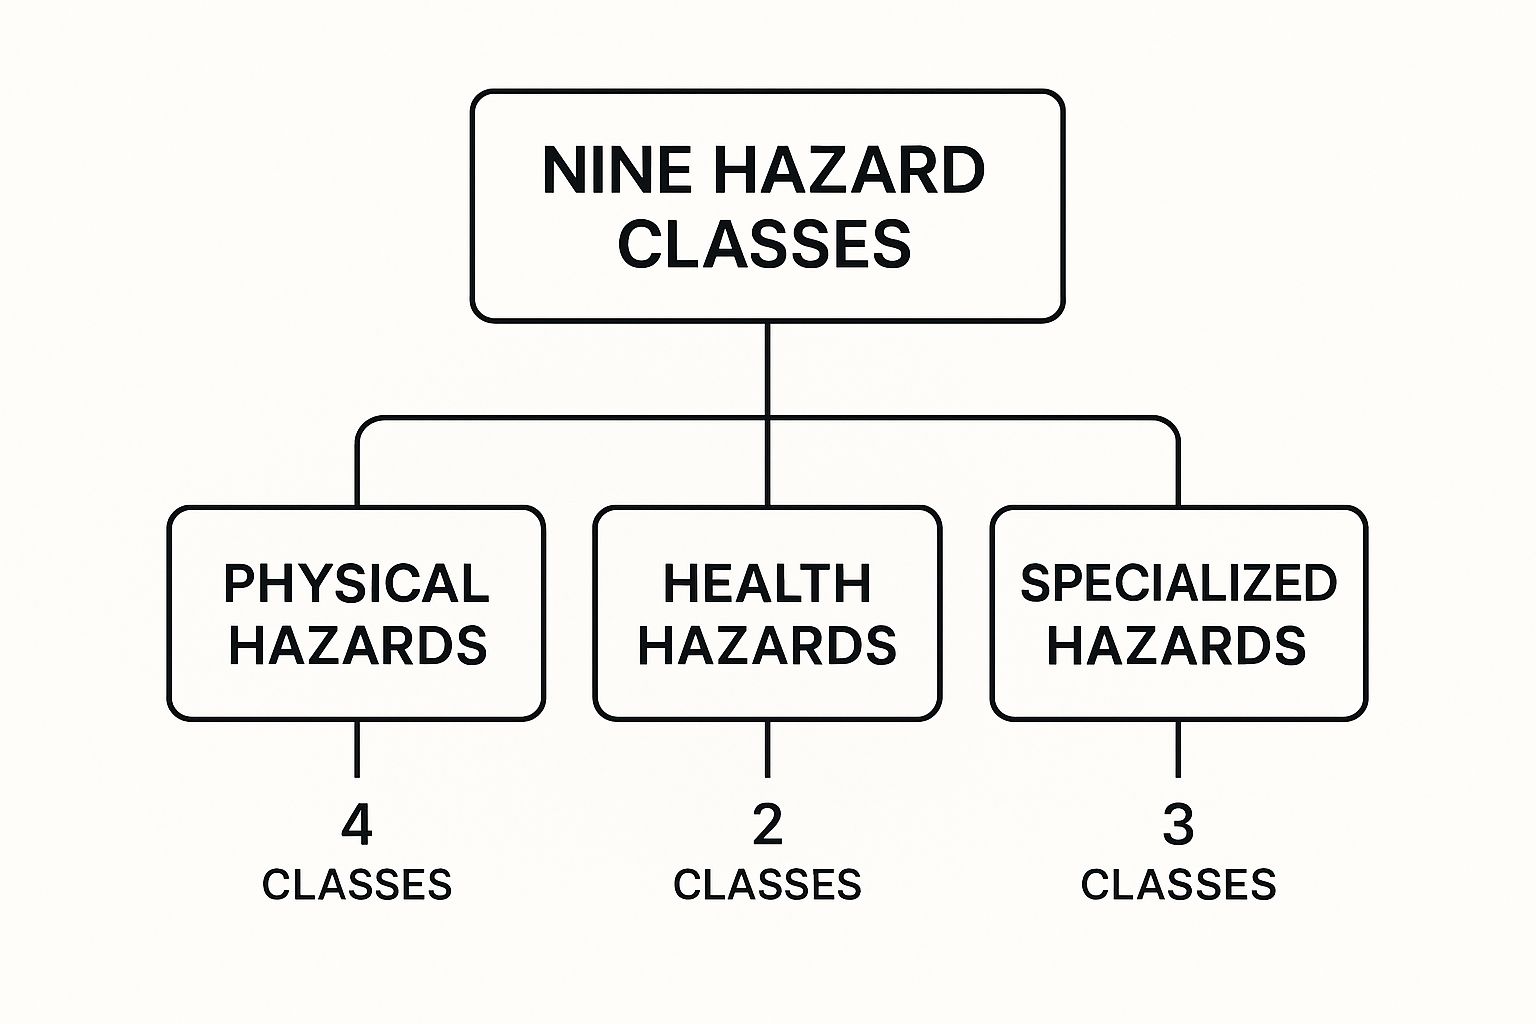
As you can see, most hazmat classes are considered physical hazards. This tells you right away that a huge portion of the materials you might encounter pose an immediate threat of fire, explosion, or some other dangerous chemical reaction.
The Foundation: The Nine Official Classes
The Department of Transportation (DOT) created a standardized system that every commercial driver with a hazmat endorsement must know inside and out. This system breaks everything down into nine distinct classes based on the specific danger a material presents.
These classifications aren't just for the test; they're the bedrock of your training and on-the-job safety protocols. Each class has its own placarding rules and handling requirements, which are instantly recognizable by their shape, color, and number.
For instance, a Class 2.3 placard for poison gas is an immediate red flag. It tells you that the material requires extreme caution because it can cause serious injury or death if handled improperly. Knowing these classes is what allows you to take the right precautions and stay compliant.
To help you get familiar, the table below provides a quick overview of each class with some everyday examples. Think of this as your cheat sheet for building a strong foundational knowledge.
A Practical Overview of the 9 Hazmat Classes
| Class Number | Class Name | Common Examples |
|---|---|---|
| Class 1 | Explosives | Dynamite, fireworks, ammunition |
| Class 2 | Gases | Propane, helium, chlorine, oxygen |
| Class 3 | Flammable Liquids | Gasoline, diesel fuel, alcohol, paint thinners |
| Class 4 | Flammable Solids | Matches, sulfur, sodium, magnesium |
| Class 5 | Oxidizing Substances & Organic Peroxides | Ammonium nitrate, hydrogen peroxide |
| Class 6 | Toxic & Infectious Substances | Pesticides, arsenic, medical waste |
| Class 7 | Radioactive Materials | Medical isotopes, uranium, plutonium |
| Class 8 | Corrosive Substances | Sulfuric acid, sodium hydroxide (lye), battery acid |
| Class 9 | Miscellaneous Hazardous Materials | Lithium batteries, dry ice, asbestos |
This table is a great starting point. As you study, you'll begin to connect these classes to the placards you see on trucks every day, making the information much more tangible.
Practical Recognition and Memory Aids
Trying to memorize all nine classes at once can feel overwhelming. The trick is to break them down into smaller, more logical groups.
For example, you could cluster them by the type of hazard. Classes 3, 4, and 5 are all related to fire risk—you have liquids that burn, solids that ignite, and substances that fuel fires. Grouping them this way makes them easier to recall.
Another powerful technique is to create a strong mental image for each class.
- For Class 1, picture a massive fireworks display.
- For Class 7, think of the classic radiation symbol.
- For Class 8, imagine a powerful acid eating right through a steel drum.
These simple mental shortcuts can be a lifesaver when you're under pressure during the hazmat test.
Finally, keep in mind that many classes have subdivisions that give you even more detail. Class 1 (Explosives), for example, is broken down into six divisions—from 1.1 (mass explosion hazard) to 1.6 (extremely insensitive articles). While you might not need to know every single subdivision for the test, understanding that they exist is part of becoming a true professional.
Understanding these nine classes isn’t just about passing a test. It's about developing the professional instinct to respect the cargo you carry and protect everyone on the road.
Mastering Hazmat Placards and Labels
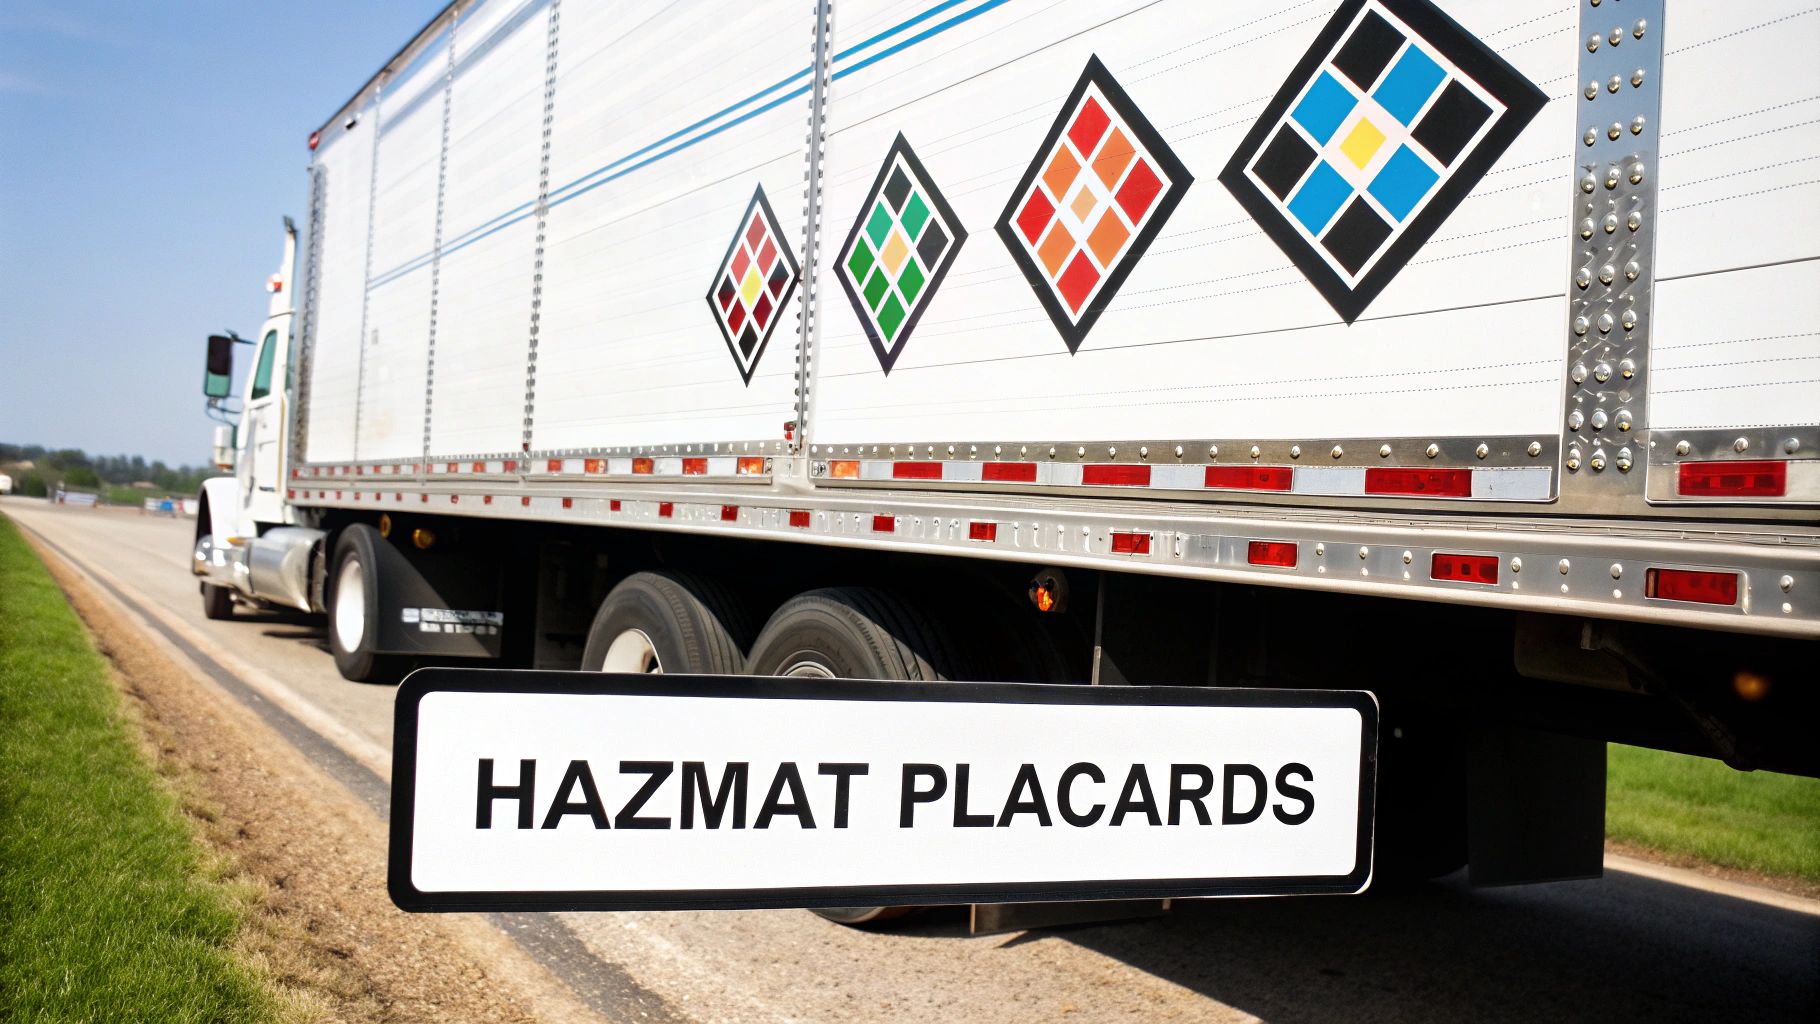
Think of hazmat placards as the universal language of road safety. These diamond-shaped signs are designed to scream "DANGER!" from a distance, giving everyone from fellow truckers to first responders the critical info they need in a split second. Getting them right isn't just about following the rules—it's a fundamental part of keeping people safe.
This section is your practical, no-nonsense guide to understanding and using placards and labels correctly. We're going to get past simple memorization and dig into the "why" behind the system. Nailing this stuff is a huge piece of any solid hazardous materials CDL study guide and a topic that's all over the endorsement exam.
The Purpose of Placards: Why They Matter
At their core, placards are a lifeline for first responders. If the worst happens, firefighters and police need to know exactly what they're walking into, and they need to know it from a safe distance. A placard for a flammable liquid versus one for a corrosive substance dictates two completely different emergency plans.
They also give a heads-up to everyone else on the road. Seeing a hazmat placard is a clear signal to other drivers to give you space and be extra cautious. It's a simple visual cue with some pretty powerful safety implications.
The Critical 1,001-Pound Rule
If there's one placarding rule you absolutely have to burn into your brain for the test, it's the 1,001-pound rule. This one trips up a lot of new drivers, but it's actually pretty straightforward once you get the hang of it.
For most materials—the ones listed in Table 2 of the regulations—you're required to display placards if you're hauling an aggregate gross weight of 1,001 pounds or more. The key here is "aggregate," meaning the total weight of all the different hazmat you have on board.
Let's break it down with a real-world example:
- Your Load: You've got 600 pounds of a Class 3 (Flammable Liquid) and 500 pounds of a Class 8 (Corrosive).
- The Math: Your total aggregate weight is 1,100 pounds.
- The Result: Since you're over the 1,001-pound threshold, you must put up placards for both the Flammable Liquid and the Corrosive classes.
Now, there's a big exception. Some stuff is so dangerous that it requires a placard no matter how little of it you have. These high-risk materials are found in Table 1 and include things like 1.1 explosives or 2.3 poison gas. For those, any amount means you placard. Always, always double-check your shipping papers and the hazmat tables.
The 1,001-pound rule is a cornerstone of hazmat safety. It's the system's way of ensuring that any significant quantity of hazardous material is clearly identified, creating a crucial safety net for everyone on the highway.
Decoding the Placard: What It All Means
Every piece of a placard tells a story. Learning to read them is like learning a simple, color-coded language that instantly describes your cargo.
Each placard has a few key components you need to know:
- Symbol: The picture at the top gives you a quick visual of the danger (a flame means flammable, a skull and crossbones means poison).
- Hazard Class Number: Tucked in the bottom corner, this number tells you which of the nine DOT hazard classes the material belongs to.
- Color: The background color is an immediate identifier. Red is for flammability, orange is for explosives, and so on. It’s the first thing you’ll notice.
- UN/NA Number: Sometimes, you'll see a four-digit number on the placard itself or on an orange panel nearby. This is the United Nations (UN) or North American (NA) ID number that pinpoints the exact chemical you're hauling.
Labels vs. Placards: Understanding the Difference
This one is simple, but it’s crucial for compliance and safety. While they look alike, labels and placards have very different jobs.
Labels are the smaller, diamond-shaped warnings that go directly on the individual packages, drums, or boxes. They identify the hazard inside that one container.
Placards are the big signs you put on the outside of the truck or trailer. They announce the general type of hazards contained within the entire vehicle.
Think of it this way: your trailer might be filled with 50 different boxes, and each one has a "Corrosive" label on it. On the outside of that trailer, you'll hang a single large "Corrosive" placard. This two-layer system makes sure the hazard is clearly communicated from the individual package all the way up to the whole truck, leaving no room for guesswork.
Getting a Handle on Critical Hazmat Rules
Knowing your placards and classes is a huge part of the job, but the real test of a professional driver comes down to understanding the rules of the road. We're talking about the regulations from the Department of Transportation (DOT) and the Federal Motor Carrier Safety Administration (FMCSA). It can feel like a lot of dense legal text, but think of this as your practical, on-the-job translation.
These aren't just abstract rules designed to make you memorize things for a test. They're the day-in, day-out procedures that keep you, the public, and your cargo safe. From the moment you load the trailer to the routes you're cleared to drive, every single regulation exists for a very important reason.
It All Starts With Shipping Papers
Before you even think about putting the truck in gear, you need to have your shipping papers in order. These documents are the official ID for your hazardous cargo, spelling out every critical detail about what you're hauling. In an emergency, first responders depend on this information to know exactly what they're dealing with, so there's zero room for error.
The rules are strict about where you keep them. While driving, they must be within your immediate reach—think a door pouch or right there on the seat next to you. If you step out of the truck, the papers need to be left on the driver's seat or in the door pouch where they can be easily seen.
Every set of shipping papers must clearly state:
- The proper shipping name and its UN/NA identification number.
- The specific hazard class or division.
- The assigned packing group number (e.g., PG I, PG II, or PG III).
- The total amount of hazardous material on board.
Keeping Things Separate: Cargo Segregation
You can't just toss hazardous materials in the back of a trailer and hope for the best. Some chemicals are like angry cousins at a family reunion—they just can't be in the same room. Mixing them can cause fires, explosions, or create deadly toxic gases. That's why cargo segregation is such a critical skill and a major focus of the hazmat test.
Picture this: you've got a Class 4.3 material labeled "Dangerous When Wet" loaded next to a leaky drum of a Class 8 corrosive liquid. That's a disaster waiting to happen. To prevent scenarios exactly like that, the DOT created a Segregation Table for Hazardous Materials.
The rule of thumb is simple: some things can never travel together. For example, you can never load cyanides with acids. Why? The combination can create hydrogen cyanide gas, which is incredibly lethal. When in doubt, always, always check the segregation chart.
Special Rules for Driving and Parking
Hauling a placarded load means you're held to a higher standard on the road. The stakes are just too high to treat it like any other trip.
- Railroad Crossings: You are required to stop at all railroad crossings. This stop needs to be between 15 and 50 feet from the nearest rail. Come to a complete stop, look both ways, listen, and only cross when you're absolutely certain the tracks are clear.
- Parking: Never park a placarded truck within 300 feet of an open fire. When you do park, you must stay within 25 feet of the vehicle unless you're in a designated safe haven.
- Tires: Make it a habit to check your tires at the start of every trip and every time you stop. An overheated tire on a regular load is a problem; on a hazmat load, it's a massive fire risk.
Security Plans and Approved Routes
The world changed after September 11, 2001, and hazmat security became a top priority. If you're hauling certain high-risk materials, like a large shipment of explosives or radioactive substances, you'll need a written security plan. This plan details the specific procedures for preventing theft and keeping the cargo secure from anyone who shouldn't have access to it.
On top of that, many states and cities have designated routes for hazmat trucks. You might be restricted from using certain tunnels or required to bypass densely populated areas. It's your responsibility to know and follow these routes. For new drivers, learning these advanced rules is a core part of the Entry-Level Driver Training (ELDT) mandate. You can learn more about how ELDT prepares new drivers for the real-world demands of the job.
Your Step-by-Step Guide to Getting Endorsed
Getting your Hazardous Materials (H) endorsement isn't just about passing a test. It’s a full-blown qualification process that proves you have both the knowledge and the trustworthiness to handle some of the most sensitive cargo on the road. Think of it as a roadmap with a few key checkpoints you'll need to clear.
Before you even crack open a study guide, you have to meet the basic requirements. For starters, you must be at least 21 years old to haul Hazmat across state lines—no exceptions. You also need a current Commercial Driver’s License (CDL) or a Commercial Learner’s Permit (CLP) from your home state. If you check those boxes, you're ready to hit the books.
Passing the Hazmat Knowledge Test
This is where the rubber meets the road, academically speaking. The written exam is designed to make sure you know your stuff, and it's no walk in the park.
You can expect around 30 multiple-choice questions covering everything from placards and loading rules to what to do when things go wrong. To pass, you'll need to score an 80% or higher, which means getting at least 24 of those questions right.
Here's how to tackle it:
- Live in your state's CDL manual. The Hazmat section should become your best friend.
- Take as many practice tests as you can. They’re great for finding out what you don't know before the real test does.
- Don't just memorize the rules. Try to understand the logic behind them—it makes the information stick.
When you're ready, schedule the test at your local DMV. You'll probably have to pass a quick vision test while you're there, too.
The Hazmat endorsement process involves more than just acing a knowledge exam. A critical part is the mandatory background check and fingerprinting conducted by the Transportation Security Administration (TSA), a security measure that ensures only qualified individuals transport these sensitive materials.
Navigating the TSA Security Threat Assessment
Once you’ve passed the written test, your next stop is the TSA Security Threat Assessment. This is a serious background check to confirm you don’t pose a security risk. It’s a straightforward process, but you need to be meticulous with the details.
First, you'll fill out an online application and pay the fee, which usually runs around $90. As part of that, you'll schedule an appointment at an official center to get your fingerprints taken. This isn't optional—your application won't move forward until your prints are in the system.
The TSA then does a deep dive into your background, checking criminal records and immigration status. Certain felonies, like those related to terrorism or espionage, will permanently disqualify you. Other offenses might lead to a temporary ban. While some minor details can vary by state, the federal rules are the same everywhere. You can learn more about the initial steps of getting your commercial license by reviewing our information on the CDL permit process.
Plan on the whole security check taking anywhere from 30 to 60 days. After you get the all-clear from the TSA, you can head back to the DMV to finally get that hard-earned "H" endorsement added to your CDL.
Handling On-the-Road Emergencies
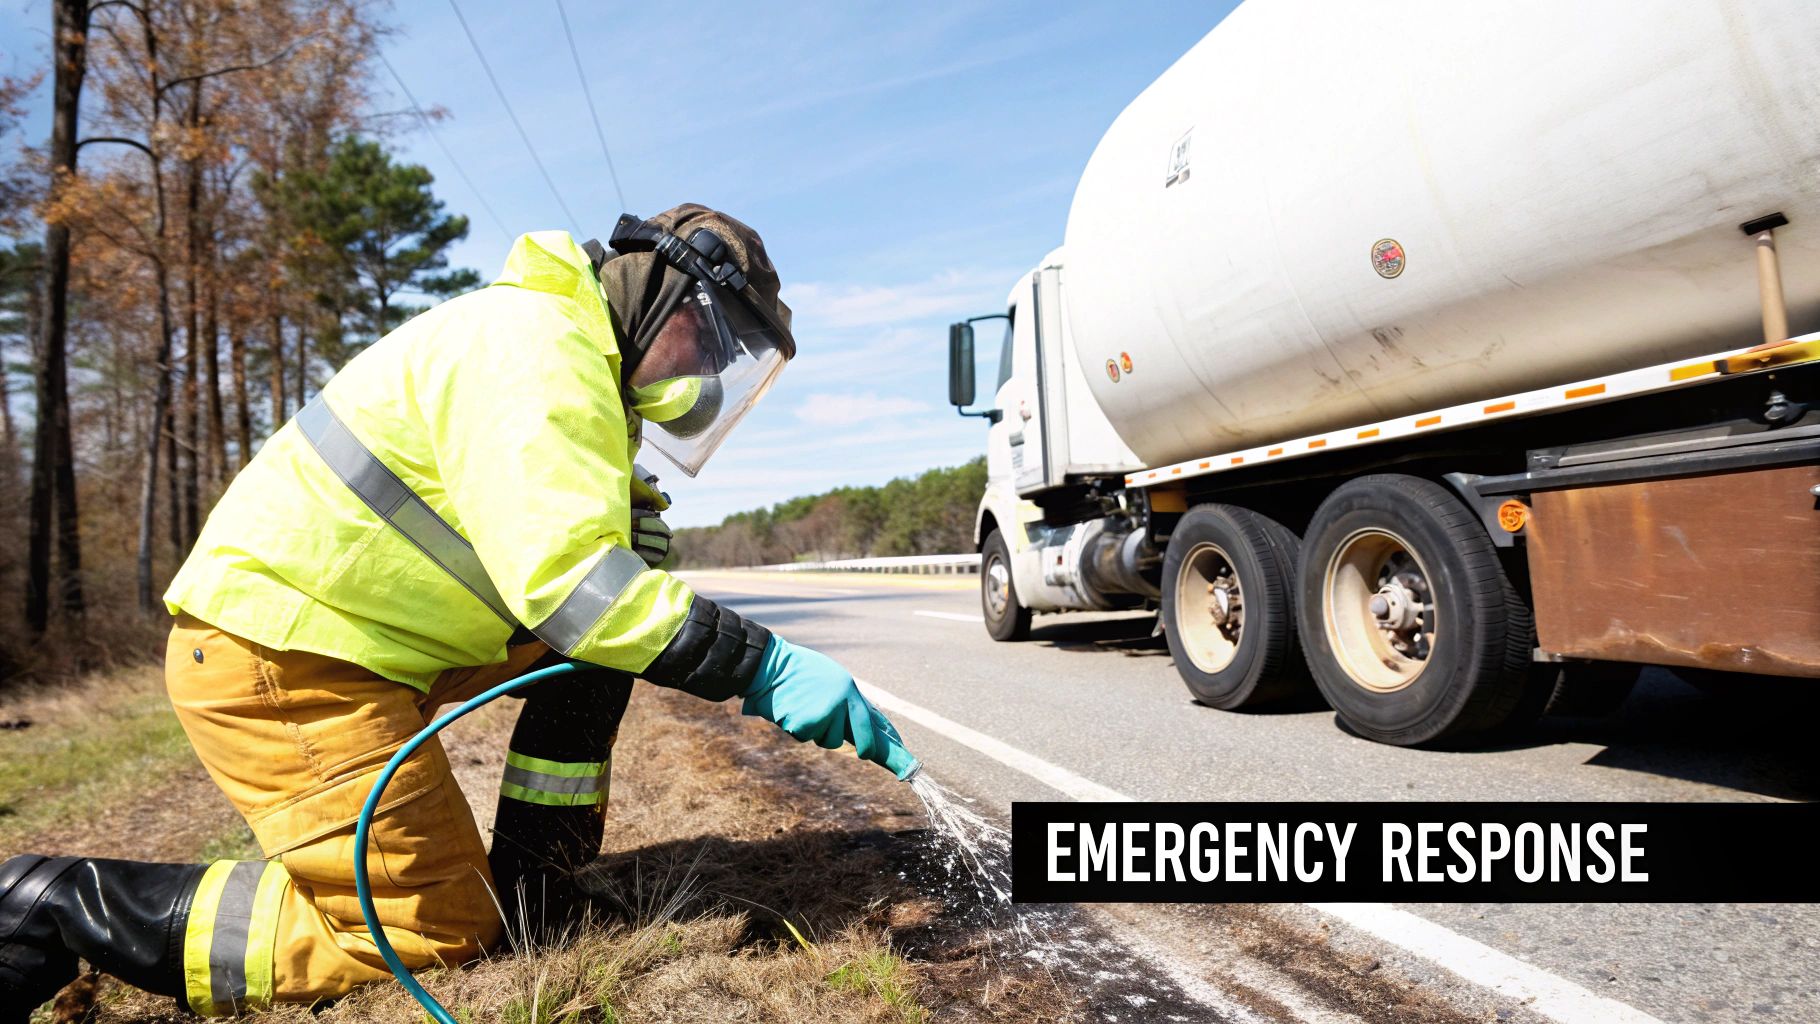
When you're hauling hazardous materials, things can go from routine to critical in a heartbeat. Knowing how to respond in an emergency isn't just good practice—it’s your absolute responsibility. Your actions can mean the difference between a minor hiccup and a full-blown disaster.
Your best defense against a crisis on the road starts before you even turn the key. A meticulous pre-trip inspection is a must for any commercial driver, but with a Hazmat load, you have to be even more vigilant. You’re not just checking tires and lights; you’re hunting for potential leaks, signs of container damage, or anything that could spark a fire. Spotting a problem in the yard is always better than discovering it at 65 mph. We cover this in depth in our guide on the pre-trip inspection.
Your First Moves in a Crisis
If the worst happens—a leak, spill, or fire—your immediate actions are everything. The first step is always the same: park the vehicle in a safe location. Get as far away from people, buildings, and potential ignition sources as you can.
Pull over, kill the engine, and get your hazard lights flashing. This is your first signal to everyone else on the road that there's a problem.
With the vehicle secured, your safety comes first. Assess the situation from a safe distance, making sure you stay upwind. And remember, never try to fight a tire fire on a placarded vehicle yourself. The intense heat can trigger an explosion. Your job is to get away and call for help immediately.
In a Hazmat emergency, your role is clear: protect yourself, secure the area, and notify the authorities. You are not a firefighter or a cleanup specialist. Your duty is to give first responders the critical information they need to take over.
Using the Emergency Response Guidebook
That little orange book in your cab, the Emergency Response Guidebook (ERG), is your most powerful tool in an emergency. It’s required for a reason. The ERG gives you a fast, reliable way to identify the material you're carrying and understand its specific dangers.
Here’s how to put it to work when seconds count:
- Identify the Material: Grab your shipping papers or look at the orange panel on the placard to find the four-digit UN/NA identification number.
- Look Up the Number: Flip to the yellow-bordered pages in the ERG and find that number. It will point you to a three-digit guide number.
- Find the Guide: Go to the orange-bordered pages and find the guide that matches your number. This is where you'll find the crucial info: potential hazards, public safety actions like evacuation distances, and what emergency responders need to do.
Getting comfortable with the ERG isn't optional. When stress is high and chaos is building, being able to flip to the right page without hesitation gives you and the first responders the life-saving intel needed to control the scene.
Common Questions About the Hazmat Endorsement
As you start digging into the study materials for your hazardous materials endorsement, you’re bound to have some questions. It's totally normal. Let's walk through some of the most common ones that come up for drivers, so you can walk into your test feeling prepared and confident.
First thing's first: how long is this thing good for? A Hazmat endorsement is typically valid for five years. This lines up with your TSA security threat assessment, which also expires after five years. When it's time to renew, you're basically starting from scratch—you’ll need to submit a new application, get fingerprinted, and go through the whole background check process again.
Navigating the Test and Background Check
So, what are the toughest parts of the Hazmat test? Ask almost any driver, and they'll tell you it's the placarding and cargo segregation rules. You really have to buckle down and memorize the specifics.
Things like the 1,001-pound rule and the segregation table (which tells you what you absolutely cannot load together) are notoriously tricky. My best advice? Make flashcards. Quiz yourself. Drill these sections until they become second nature.
Another big concern for a lot of folks is the background check. Can a past criminal record stop you from getting endorsed? It really depends on the offense. The TSA is looking for specific disqualifying crimes. Some, like terrorism or murder, are permanent disqualifiers. Others might just be a temporary ban. Your best bet is to always check the official TSA list to see where you stand.
The Hazmat test isn't just a memory game. It’s about applying safety principles in the real world. If you understand why you can't load certain materials together, it's a lot easier to remember the rule when you're under pressure.
Studying for the Hazmat test feels a lot like studying for your other CDL exams. The same habits that got you through the initial knowledge test will serve you well here. For a refresher on good study strategies, check out our guide on the CDL general knowledge test.
Renewal and Career Questions
Okay, so how do you keep track of your renewal date? Your CDL will have the expiration date printed right on it. But here's a pro tip: start the renewal process a few months early. This gives you plenty of time to get everything done without having a gap where you can't haul Hazmat loads.
The last question is the big one: is getting the endorsement really worth all this trouble? Without a doubt, yes. Drivers with an H endorsement are always in demand and can earn a lot more money. It shows you're a skilled, trustworthy professional who can be counted on to handle sensitive cargo, which opens the door to better-paying jobs and more opportunities.
Ready to take the next step in your trucking career? Patriot CDL offers expert, hands-on training to help you get your CDL and endorsements quickly. https://patriotcdl.com