Earning your hazmat endorsement isn't just about passing a test; it's a commitment to safety and a serious step up in your trucking career. Think of this guide as your roadmap, breaking down everything you need to know, from the first steps to proven study tips, so you can walk into that exam with confidence.
Starting Your Journey to a Hazmat Endorsement
Getting your hazmat endorsement is a multi-stage process. Before you even crack open a study guide, you have to get a few key things in order. These prerequisites are non-negotiable and form the foundation for this specialized skill.
First things first, you need a valid Commercial Driver’s License (CDL) from your state. The hazmat endorsement is exactly that—an endorsement added to your existing license. You also have to be at least 21 years old. No exceptions.
The TSA Security Threat Assessment
Once you have your CDL, your next major hurdle is the Transportation Security Administration (TSA) Security Threat Assessment. This isn't just a simple background check; it’s a deep dive to ensure that only the most responsible and trustworthy drivers are cleared to haul potentially dangerous materials.
The whole process is pretty straightforward, but you need to follow it to the letter:
- Submit Your Application: You’ll kick things off by filling out an online application. Be thorough and accurate with your personal info.
- Get Fingerprinted: You'll need to schedule an appointment at an authorized center to get your fingerprints taken electronically.
- The Review: The TSA takes it from there, running a full review of your criminal history against a list of federally disqualifying offenses.
The Hazmat endorsement process is serious business, designed to keep the public safe. It includes a mandatory TSA background check with fingerprinting that can take anywhere from 60 days to six months, depending on your history and if they need more info from you.
Navigating the Timeline and Other Requirements
That timeline for the TSA background check is the biggest variable here. It’s not a quick turnaround. Plan on it taking 60 days to six months, so start the process well before you actually want to be hauling hazmat loads. If the TSA needs more documentation, the clock can slow down even more.
Besides the federal stuff, you'll also need to pass a vision test—standard practice for any commercial driver. While you’re in that waiting period for your TSA clearance, don't just sit around! Use that time wisely. Start hitting the books for the knowledge exam and get your CDL permit application ducks in a row. Our guide on how to get a CDL permit can walk you through all those steps.
This way, the moment your security clearance comes through, you're ready to roll.
Understanding the Nine Classes of Hazardous Materials
Getting a handle on the nine classes of hazardous materials is the absolute core of preparing for your hazmat endorsement. Think of these classes as a universal language for danger on the road. Each one tells a quick story about the cargo's specific risks, so you know exactly how to handle it with the respect it deserves.
Instead of just memorizing a long list, let's connect the dots with some real-world thinking. Take Class 1 Explosives, for example. This is anything that can release a massive amount of energy in a flash—dynamite, ammunition, even some fireworks. On the other hand, Class 8 Corrosives are substances that can literally "eat away" at things, from steel drums to human skin. We're talking about powerful acids and bases here.
When you think this way, the abstract rules suddenly click into place. It’s the difference between seeing a "Class 2" placard and truly understanding that you’re hauling a gas under pressure that could explode or suffocate someone if it leaks.
The First Five: Explosives, Gases, and Flammables
The nine classes are organized logically based on their biggest, most immediate danger. This helps you anticipate the risks before you even look at the shipping papers. Some materials catch fire easily, others are toxic if you breathe them in, and some can go haywire if they get wet.
Let's start with the first five classes, which mostly deal with fire and explosion hazards:
- Class 1 Explosives: These are defined by their potential to detonate or burn incredibly fast. This class is broken down even further into six divisions based on how severe the explosion would be.
- Class 2 Gases: This group covers gases that are compressed, turned into a liquid, or dissolved under pressure. They can be flammable, non-flammable, or toxic, and each type requires a different handling strategy.
- Class 3 Flammable Liquids: This one's straightforward—liquids that ignite easily, like gasoline and ethanol. A key danger here is that their vapors are often heavier than air and can creep along the ground to find an ignition source.
- Class 4 Flammable Solids: These aren't liquids, but they are just as combustible. This class includes materials that can burst into flames on their own (spontaneously combustible) or become a fire hazard when wet.
- Class 5 Oxidizers & Organic Peroxides: These substances don't just burn; they produce oxygen, which makes other things burn much, much hotter. An oxidizer can turn a small spark into a raging inferno.
Getting these first five classes down gives you a solid foundation. Federal rules are incredibly strict about training for a reason—every driver has to be ready for these risks. The image below shows you the training and renewal timelines you'll need to keep in mind.
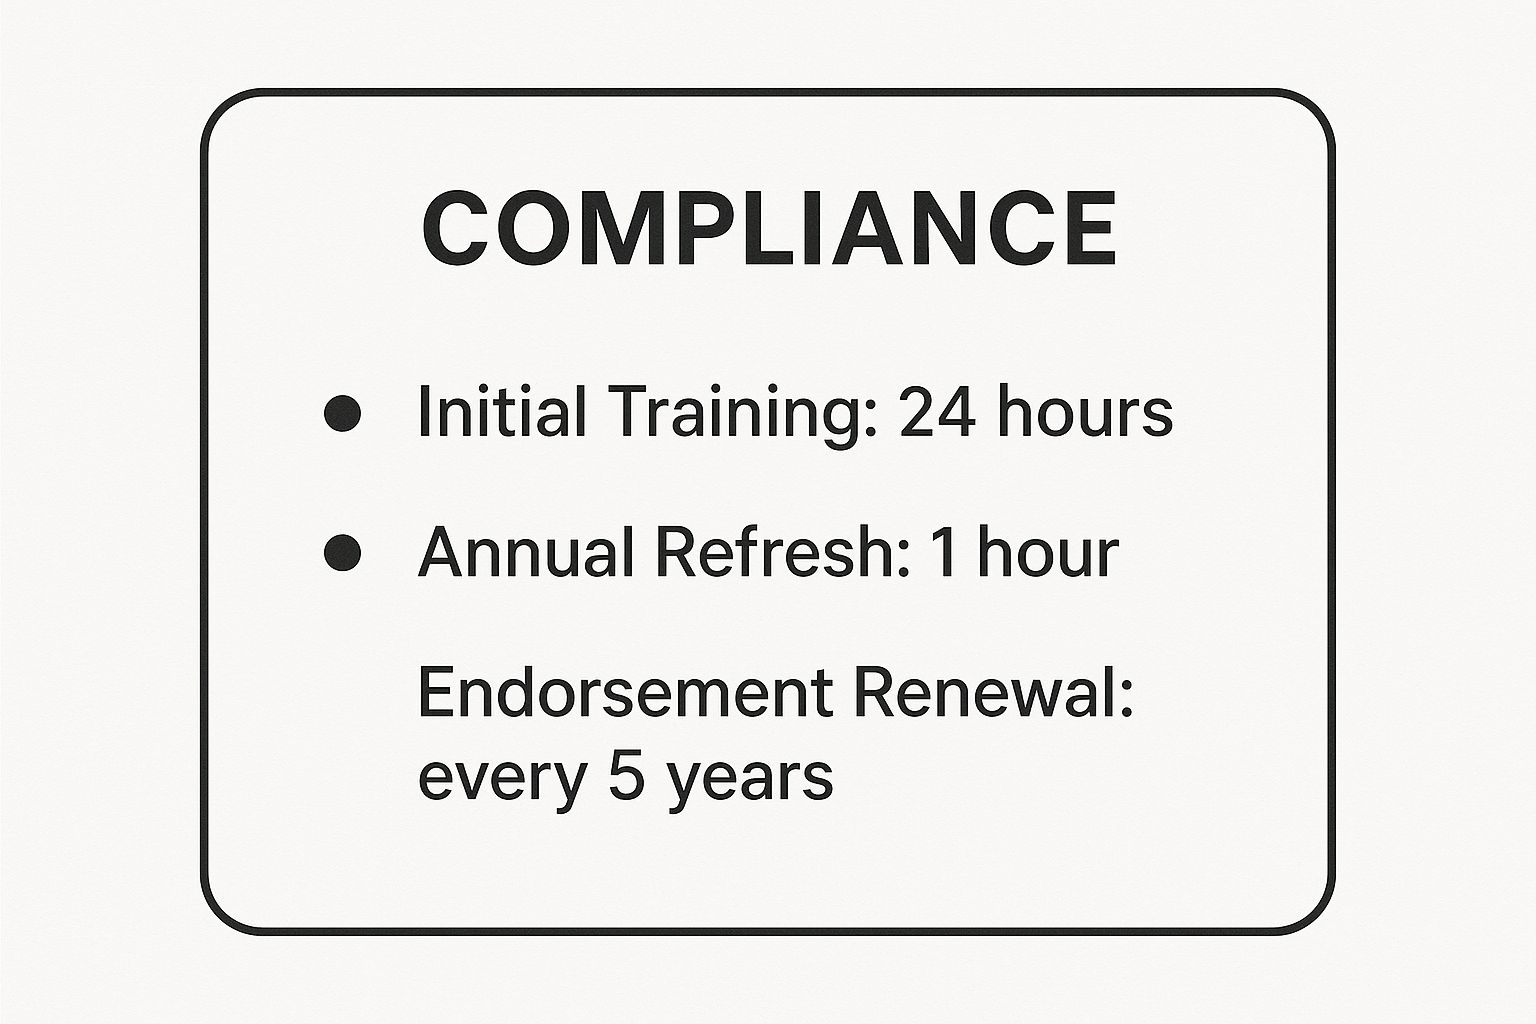
As you can see, safety isn't a one-time thing. It’s an ongoing commitment, from your initial training to the regular refreshers needed to keep your endorsement active.
The Final Four: Poisons, Radioactives, and More
The remaining classes cover dangers that are often silent and invisible but just as deadly. These materials pose serious threats to human health and the environment that go far beyond a simple fire or explosion. Completing the right training, like the programs required under the Entry-Level Driver Training (ELDT) framework, is essential to make sure you're prepared to manage these unique hazards.
Here are the final classes you’ll need to master for the exam:
- Class 6 Toxic & Infectious Substances: This includes anything that's poisonous if swallowed, inhaled, or even just touches your skin. It also covers infectious materials like medical waste.
- Class 7 Radioactive Materials: These materials give off ionizing radiation. Hauling them requires specialized knowledge of shielding, containment, and exactly how to limit exposure.
- Class 8 Corrosive Materials: As we touched on earlier, these are the "eaters." They cause severe chemical burns to living tissue and can destroy other cargo or even the truck itself.
- Class 9 Miscellaneous Hazardous Materials: This is the catch-all category. It’s for materials that are dangerous during transport but don't neatly fit into any of the other eight classes. Common examples include lithium batteries and dry ice.
To help you keep these straight, here’s a simple table that breaks down all nine classes at a glance.
Quick Reference Guide to the 9 Hazmat Classes
This table gives you a clear, concise summary of each hazardous material class, its common name, and the main danger it presents on the road.
| Class Number | Class Name | Primary Hazard Example |
|---|---|---|
| Class 1 | Explosives | Detonation or rapid combustion (e.g., Dynamite) |
| Class 2 | Gases | Pressure hazard, flammability, or toxicity (e.g., Propane) |
| Class 3 | Flammable Liquids | Easy ignition of vapors (e.g., Gasoline) |
| Class 4 | Flammable Solids | Spontaneous combustion or dangerous when wet (e.g., Sodium) |
| Class 5 | Oxidizers & Organic Peroxides | Intensifies fire or causes combustion (e.g., Hydrogen Peroxide) |
| Class 6 | Toxic & Infectious Substances | Poisonous or can cause disease (e.g., Medical Waste) |
| Class 7 | Radioactive Materials | Emits radiation (e.g., Uranium) |
| Class 8 | Corrosive Materials | Destroys living tissue or materials (e.g., Sulfuric Acid) |
| Class 9 | Miscellaneous Hazardous Materials | A unique hazard not covered by other classes (e.g., Lithium Batteries) |
Having this basic breakdown memorized is a huge step toward passing your test and, more importantly, being a safe and competent driver.
By learning the why behind each classification, you're not just preparing for the test—you're building the real-world judgment needed to be a safe, reliable, and professional hazmat driver. True mastery comes from understanding the risks, not just naming them.
How to Master Hazmat Placards and Labels
Think of hazmat placards as the universal language of highway safety. They aren’t just signs; they're critical warnings that tell a story about your cargo's risks in a split second. For first responders, other drivers, and especially for you, being fluent in this language is non-negotiable. It's a skill that will get you through the exam and, more importantly, keep you safe on the road.
Let's break down the system of colors, symbols, and numbers you'll find on these diamond-shaped signs. Each piece gives you a clue about the potential danger inside your trailer. Once you master them, you'll develop an instant recognition that could make all the difference when things go wrong.
The Anatomy of a Hazmat Placard
Every placard is designed for one thing: quick, clear communication, even from a distance. The whole system is built to be simple, packing a ton of information into a clean design. Getting these core components down is the first step to becoming a pro.
Here are the key elements you need to burn into your memory:
- Color: The background color is your first hint. Red screams flammability, orange warns of an explosive hazard, yellow signals an oxidizer, and green tells you it's a non-flammable gas.
- Symbol (Pictogram): At the top, a simple graphic shows the primary danger. You’ll see a flame for fire risk, a skull and crossbones for poison, or a test tube spilling on a hand for corrosive materials. It’s visual shorthand.
- Class Number: Tucked in the bottom corner, this number matches one of the nine hazmat classes. A "3" means you’re dealing with a flammable liquid. An "8" means it's a corrosive.
Put it all together, and you have a powerful warning system that works at a glance. A red placard with a flame symbol and the number "3" tells everyone "flammable liquid" without them having to read a single word.
When you see a placard, you're not just looking at a sign; you're reading a safety summary. The goal is to process this information instantly, understand the potential danger, and adjust your actions accordingly.
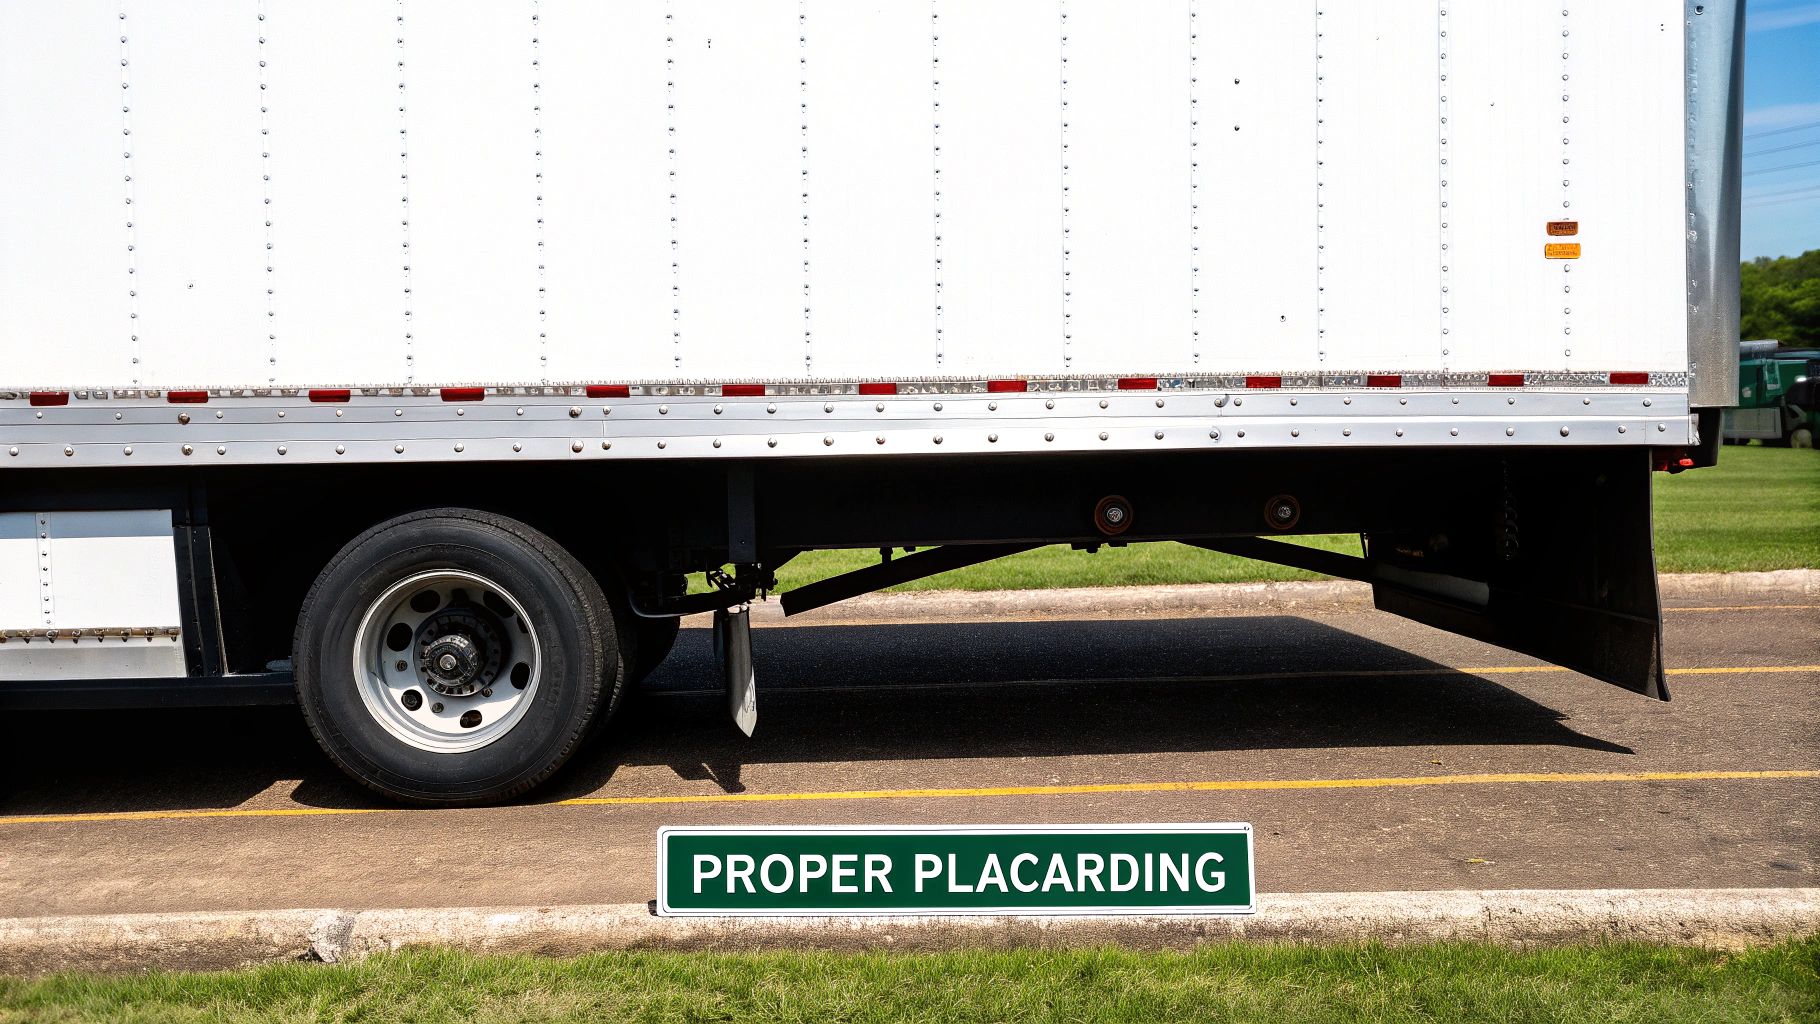
Key Placarding Rules and Requirements
Knowing what the placards mean is only half the job. You also have to know when and where to use them. The Federal Motor Carrier Safety Administration (FMCSA) has very strict rules about this, and you can bet you’ll see them on your endorsement test.
The most important rule to remember is the 1,001-pound threshold. Placarding is required on all four sides of your vehicle when the total gross weight of most hazardous materials hits 1,001 pounds or more. For some of the really nasty stuff (like high explosives or poison gas), you have to placard for any amount. The placards must be visible from the front, back, and both sides—no exceptions.
Before you even turn the key, making sure your truck is properly placarded is a fundamental part of your routine. It’s just as important as checking your tires or brakes. In fact, you can find a complete checklist of everything you should cover in our guide to the CDL pre-trip inspection.
Understanding Labels vs. Placards
This is a common point of confusion, but the test will absolutely expect you to know the difference between labels and placards. They look similar and serve a similar purpose, but they aren't the same.
Here's the easiest way to remember it: Labels go on packages, and placards go on vehicles.
- Labels: These are smaller, diamond-shaped stickers that go directly on the individual boxes, drums, or containers of the hazardous material. They identify the specific hazard of what's inside that package.
- Placards: These are the bigger, tougher versions you put on the outside of your truck or trailer. They communicate the potential hazards of the entire shipment to the public and emergency personnel.
Getting this right is crucial. The shipper is responsible for correctly labeling every single package. As the driver, your job is to make sure the right placards are on your vehicle based on the load you're hauling. A mistake here isn't just a failed test question; it's a serious violation on the road.
Navigating Key Regulations and Driver Responsibilities
Getting your hazmat endorsement is more than just passing a test; it's about understanding the immense responsibility you take on. These aren't just abstract rules—they're the safeguards that protect you, the public, and the environment. The Federal Motor Carrier Safety Administration (FMCSA) writes the playbook, and as a professional driver, it’s your job to know it inside and out and apply it every single day.
Let's break down some of the core duties you'll be tested on. We'll cover everything from the crucial role of shipping papers to the strict protocols for parking your rig, giving you the practical know-how to handle your cargo safely and legally.
The Importance of Shipping Papers
Think of your shipping papers as your cargo's passport and emergency contact list all rolled into one. They tell the whole story: what you're hauling, what makes it dangerous, and who needs to be called if something goes wrong. These documents must always be within arm's reach while you're at the wheel. If you step out of the cab, they have to be left somewhere obvious, like the driver's seat, so first responders can find them immediately.
Here’s what this means for you in the real world:
- Verifying Accuracy: Before that truck moves, it's on you to confirm that the shipping papers perfectly match the placards on your trailer and the actual freight inside. If something doesn't add up, you don't roll.
- Proper Placement: The rules are specific. When you're driving, keep the papers in a door pouch or on your seat. This isn't just for convenience; it's a critical safety measure.
- Emergency Response Information: Every set of papers must list a 24-hour emergency contact number. This is non-negotiable. It’s the lifeline that connects emergency crews with the experts who know exactly how to handle your specific cargo.
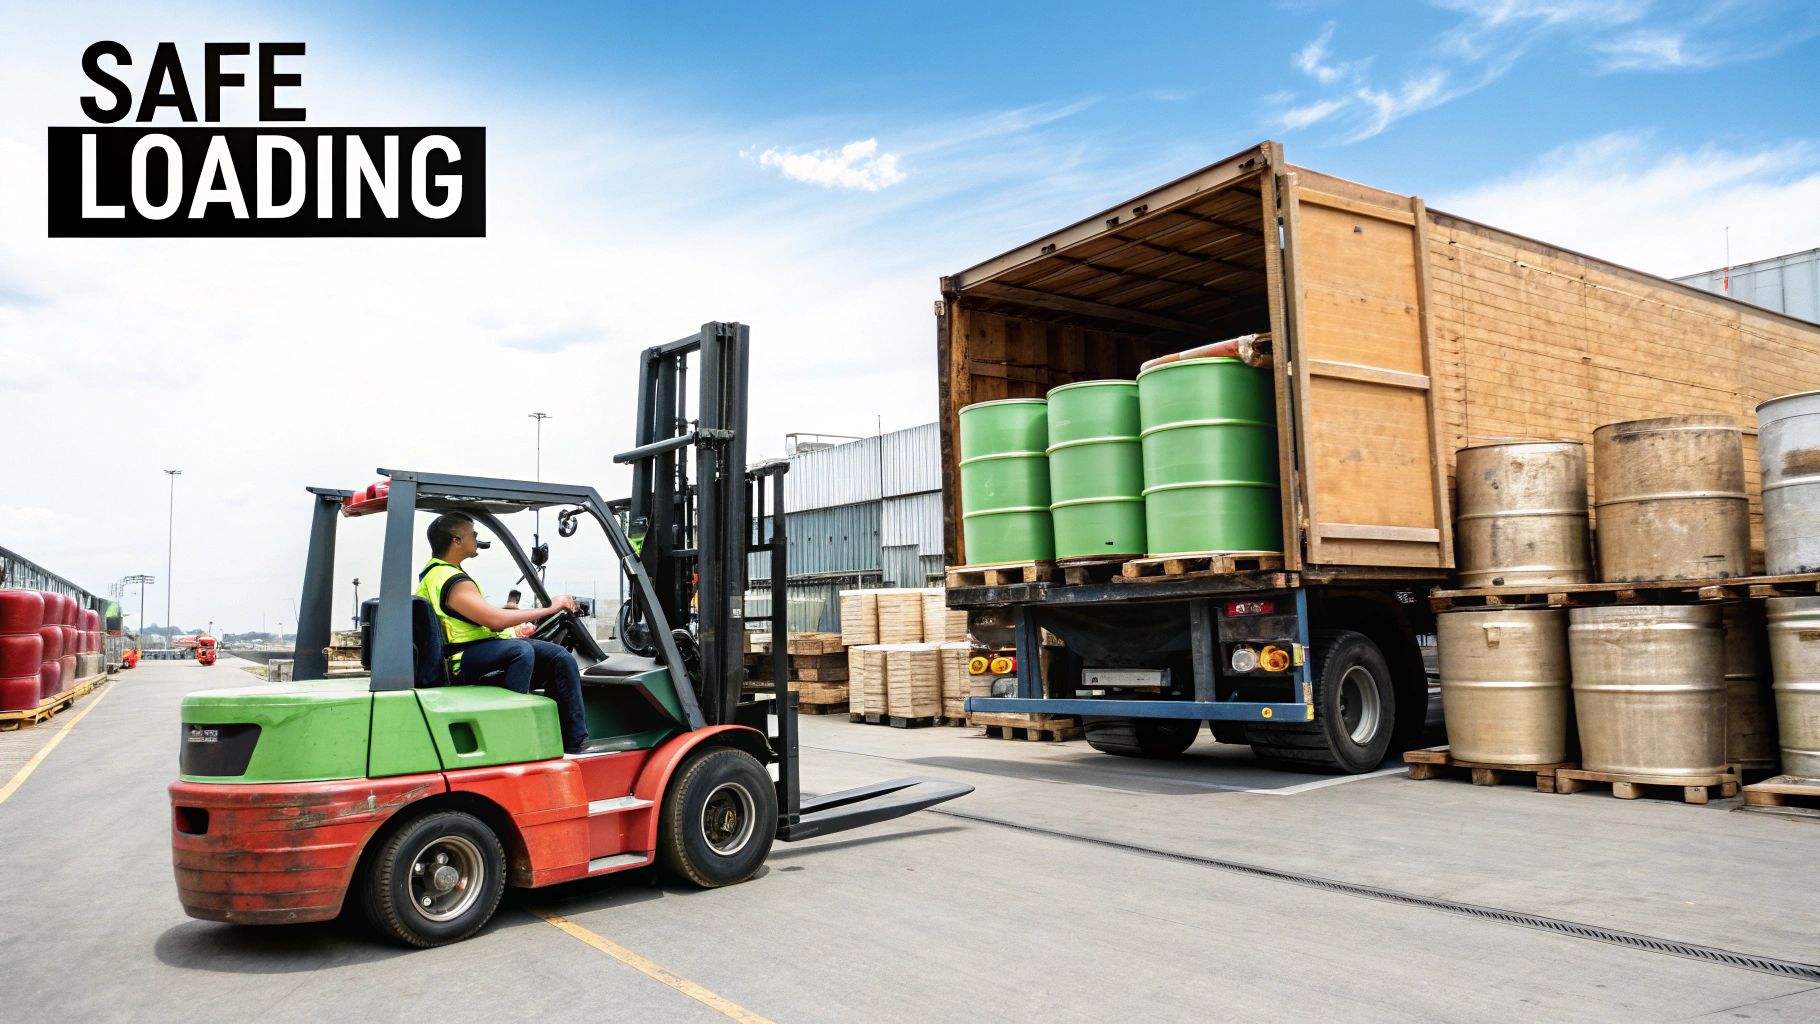
Loading, Unloading, and Cargo Segregation
Loading and unloading hazmat isn’t a task you can do on autopilot. You are the final checkpoint. You have to make sure the vehicle is sound—no leaks, no damage—before a single pallet is loaded. For many materials, especially things like flammable liquids or explosives, you are required to be there and personally supervise the entire process.
Just as critical is cargo segregation. You can’t just stack different hazmat classes side-by-side and hope for the best. It's like working in a chemistry lab; you have to know which chemicals can't touch. The Segregation Table for Hazardous Materials is your definitive guide for preventing a dangerous reaction on your trailer.
A classic test question will ask what can and cannot be loaded together. For instance, you must never transport cyanides (Class 6) with acids (Class 8). If those two mix, they can create a deadly poisonous gas.
Strict Rules for Parking and Routing
Your responsibilities don't end once the doors are shut and you're on the highway. Parking a placarded truck comes with its own set of strict rules. You can't just pull over anywhere. For example, parking within 300 feet of an open fire is strictly forbidden. You also can't park within five feet of the traveled part of a road, unless it's absolutely necessary for your work.
If you have to leave the vehicle, it must be "attended" at all times unless you're parked in a designated safe haven. This isn't about theft; it's about constant, vigilant oversight of dangerous materials. For a deeper look at the general qualifications you need to even get to this point, you can read our guide on CDL requirements.
On top of that, not every road is open to you. States and cities can designate specific hazmat routes to keep trucks away from sensitive areas like tunnels, old bridges, or crowded city centers. It is your professional duty to plan your route accordingly. The FMCSA keeps a close watch on this, using its Compliance, Safety, Accountability (CSA) program to monitor carriers with hazmat permits and ensure they consistently meet the highest safety standards.
What to Do When Things Go Wrong: Emergencies and Security on the Road
Let's be honest: your real job as a hazmat driver begins when something unexpected happens. Anyone can steer a truck down an empty highway, but your expertise truly shines in a crisis. Knowing what’s in the hazmat cdl study guide is step one, but putting that knowledge into practice under pressure is what makes you a professional.
When an incident pops off, those first few seconds are everything. You have to size up the danger, protect yourself and the public, and get the right information to the first responders. This isn't about scoring points on a test; it's about being the steady hand everyone needs when the situation gets serious.
The First Moves in a Hazmat Spill or Leak
If you spot a leak or a spill, your training needs to kick in instantly. The mission is simple: contain the problem and keep it from escalating. There's no time for panic. A cool head and a clear plan are your most valuable assets.
Here’s the three-step drill you need to have down cold:
- Size It Up: From a safe distance, figure out what you’re dealing with. Use your shipping papers and placards to identify the material. Look for immediate threats—is there fire, are there fumes, could this thing blow? Your safety is priority one. Never, ever rush into a hot zone.
- Lock It Down: Get people away from the area. Your job is to set up a safety zone and make sure no one wanders into danger. Warn others without starting a panic.
- Make the Call: Get on the horn to your dispatcher and call 911. Give them the material’s name, its ID number, and exactly what’s happening. The clearer your information, the better the pros can help.
Your Best Friend in a Crisis: The Emergency Response Guidebook (ERG)
Think of the Emergency Response Guidebook (ERG) as your co-pilot in a crisis. It's designed to give you and the first responders the critical info needed in the first 30 minutes of a hazmat emergency. Being able to flip through it fast is a non-negotiable skill.
The ERG is color-coded so you can find what you need without wasting a second. You can look up a material by its four-digit UN/NA ID number (the one on the placard and shipping papers) or by its name. It will point you to a specific guide page that spells out the health risks, fire or explosion hazards, and what you need to do to protect people.
The ERG is the single most important tool you have in an emergency. It tells you how far to back people away and gives evacuation recommendations to keep the public safe until the hazmat team arrives. Mastering this little orange book is a must.
Handling Security Threats and Preventing Theft
It’s not just about accidental spills. You’re also on the front line against security threats like cargo theft or even terrorism. Some hazardous materials are high-value targets, which means your vigilance is a matter of national security.
This is all about situational awareness. You need to be tuned in to what’s happening around you, especially when you’re stopped. You have to recognize the signs of trouble and know the security plan for the load you’re hauling.
Here are the key security rules to live by:
- Keep Your Head on a Swivel: Always be aware of your surroundings. Pay attention to cars that seem to be following you or people watching your truck at a rest stop.
- Keep It Locked Up: Always lock your rig and make sure your cargo is secure. Never, ever talk about your route or what you’re hauling with strangers.
- Park Smart: When you have to stop, find a secure, well-lit spot. Never leave a placarded truck unattended unless you're in a designated safe haven.
- Trust Your Gut: If something feels off, it probably is. Report anything suspicious to your dispatcher and the police right away.
Making these emergency and security procedures a natural part of your routine is what separates the pros from the amateurs. You’re not just preparing to pass an exam—you’re preparing to handle the huge responsibility of moving hazardous materials safely across the country.
Proven Strategies to Pass Your Hazmat Exam
Knowing the material is one thing, but actually passing the test is a whole different ball game. Think of this section as your personal game plan for turning all that hard-earned knowledge into a passing score. Success on exam day isn't just about memorizing facts; it's about smart, targeted preparation.
We're going to dive into some proven techniques for making sure the complex stuff—like all those placard details and regulatory rules—really sticks. Most importantly, I'll show you how to use practice tests to find and fix your weak spots before you ever walk into the testing center.
Master the Material with Smart Study Tactics
Just reading the handbook from front to back probably isn't going to cut it. To really lock this information in, you need to get your hands dirty and interact with the material.
Try these tried-and-true memorization techniques:
- Create Flashcards: This might sound old-school, but it works. Put a placard symbol, hazmat class, or a specific rule on one side of a card and the definition on the back. The physical act of writing it out helps burn it into your memory.
- Use Mnemonic Devices: Come up with a funny acronym or a silly sentence to remember things like the nine hazmat classes. The weirder it is, the more likely you are to remember it during the test.
- Teach Someone Else: Grab a friend or family member and try to explain a tough topic, like the rules for segregating cargo. If you can explain it clearly to someone who knows nothing about it, you've officially mastered it.
Passing this exam is about more than just spitting back facts. It's about being able to apply them confidently when the pressure is on. Smart study strategies are what build that confidence.
Leverage Practice Tests to Your Advantage
Practice tests are, without a doubt, your most powerful tool. They do more than just quiz you; they get you comfortable with the real test format, the types of questions you'll see, and the pressure of the clock. Think of them as a diagnostic tool for your brain.
After you take a practice test, go through every single question you got wrong. Don't just glance at the right answer and move on. Figure out why you chose the wrong one and what makes the correct one right. This simple habit turns every mistake into a powerful learning moment, shoring up your weakest areas. This strategy works for every commercial driving exam, not just hazmat. For a great starting point on the basics, check out our guide on the CDL general knowledge test.
What to Expect on Test Day
A lot of test-day anxiety disappears when you know exactly what you're walking into. The hazmat endorsement test is typically made up of multiple-choice questions that cover everything from placards to emergency response. You can bet you'll see scenario-based questions that force you to apply the rules to a real-world situation.
Here’s a solid game plan: Go through and answer all the questions you know immediately. Then, go back to the ones that made you pause. Read every question carefully, and watch out for words like "always," "never," or "except." A single word can flip the whole meaning of a question. With these skills in your back pocket, you can walk in prepared and walk out with your new endorsement.
Common Questions About the Hazmat Endorsement
As you get closer to test day, you're bound to have a few nagging questions. It’s completely normal. Let's walk through some of the most common things drivers ask about the hazmat endorsement so you can walk into the DMV feeling confident.
How Long Is the Endorsement Good For?
Think of your hazmat endorsement as having a five-year lifespan. This isn't an arbitrary number—it’s directly tied to your TSA security threat assessment. When that five years is up, you’ll need to renew everything from the ground up to prove you're still current on all the latest rules and security measures.
The renewal process is essentially a repeat of your initial application. You'll need to:
- Pass the hazmat knowledge test all over again.
- Go through a fresh TSA background check, which includes getting fingerprinted.
A word of advice from the road: don't wait until the last minute. The background check can sometimes take a while, and the last thing you want is for your endorsement to expire while you're stuck in bureaucratic limbo.
What Happens If I Fail the Test?
Failing the test can feel like a major setback, but it’s not the end of your journey. You can absolutely retake it. The specific rules—like how long you have to wait or how many tries you get—are set by each state, so you'll want to check with your local DMV to get their exact policy.
Look at a failed test as a learning opportunity. Your score report is basically a personalized roadmap, showing you exactly which sections of your hazmat cdl study guide need more of your attention before you give it another shot.
Are There Automatic Disqualifications?
Yes, there are. The TSA has a very specific list of criminal offenses that will automatically disqualify you from getting a hazmat endorsement. These are broken down into two main types.
First, there are permanent disqualifiers. These are for extremely serious crimes like espionage or terrorism, and they are a lifetime ban. Then there are interim disqualifiers, which cover certain felony convictions within the last seven years or being under indictment for a disqualifying crime. It's really important to check the official list on the TSA website before you even start the application process to make sure you're in the clear.
Ready to stop studying and start driving? Patriot CDL provides the expert, hands-on training you need to pass your exams and launch a successful trucking career. Visit us at https://patriotcdl.com to get started.