Earning your Commercial Driver's License all comes down to the final challenge: the road test. To pass, you've got to prove you've mastered three critical skills: a thorough pre-trip inspection, precise backing maneuvers, and safe driving out on the open road. The secret isn't just knowing what to do; it's about channeling that nervous energy into focus and executing each step with confidence.
Your Roadmap to a First-Time Pass
Getting that CDL in your hand is a game-changer for your career, but the road test itself can feel incredibly intimidating. This guide is built to cut through that anxiety. We're going to break down the entire process into practical, manageable steps, drawing from real-world training experience. Think of this as your roadmap to a first-time pass, turning a stressful exam into a series of tasks you know you can handle.
Before you even dream of hopping in the cab on test day, you have to get your paperwork in order. This means passing all your written exams to get your Commercial Learner's Permit (CLP) and making sure you have a valid DOT medical card. These aren't just suggestions; they're non-negotiable prerequisites. To make absolutely sure you haven't missed anything, double-check the full list of https://patriotcdl.com/cdl-requirements/.
The practical exam is really built on three main pillars:
- The Pre-Trip Inspection: Believe it or not, this is where most people fail—often before the engine even turns over. Acing this shows the examiner you’re a professional who takes safety seriously.
- Backing Maneuvers: This is all about vehicle control. Examiners are watching closely to see if you can handle that rig in tight quarters, especially during maneuvers like the alley dock.
- On-Road Driving: Here’s where you prove you can handle real-world traffic. This part covers everything from navigating intersections and making safe turns to managing your speed and keeping a safe following distance.
The CDL road test is all about demonstrating your competence and safety-first mindset. To help you visualize what the examiners are looking for, here's a quick breakdown of the core components.
CDL Road Test Focus Areas
| Test Component | What Examiners Look For | Key to Success |
|---|---|---|
| Pre-Trip Inspection | Your ability to systematically check key vehicle components and explain why you're checking them. They want to see a memorized, confident routine. | Develop a script and practice it until it's second nature. Follow the same exact path around the truck every single time. |
| Backing Skills | Precision, control, and awareness. Can you maneuver without hitting cones, stopping too many times (pull-ups), or getting out to look too often? | Repetition is everything. Practice the specific maneuvers (alley dock, straight-line back, etc.) until you can do them without overthinking. |
| On-Road Driving | Safe decision-making in live traffic. This includes proper turns (watching your tail swing), lane changes, speed management, and handling intersections. | Narrate your drive out loud. Saying "Checking my mirrors" or "Watching for pedestrians" shows the examiner your thought process and keeps you focused. |
Understanding these focus areas helps you train with purpose, concentrating on the skills that truly matter on test day.
Beyond just passing the test, a successful career in trucking demands a deep commitment to safety. This includes knowing your equipment inside and out, from the engine to your personal protective gear. For a deeper dive into what you might need on the job, you can find great information on general safety supplies.
Think of this guide as your personal coaching session. Each section is designed to build the confidence and skills you need not just to pass the test, but to operate as a safe, competent professional from day one. By highlighting common, avoidable mistakes, we’ll help you sidestep the pitfalls that trip up even well-prepared drivers.
Don’t Fail Before You Even Start the Engine: The Pre-Trip Inspection
The pre-trip inspection is more than just a formality; it's the very first part of your CDL exam, and frankly, it's where most people fail. Many new drivers focus all their energy on the driving maneuvers, but the reality is your test begins the second you walk up to that truck. This is your first and best chance to show the examiner you're a professional who takes safety seriously.
The numbers don't lie. Depending on the state, first-time failure rates for the CDL exam can be brutal, often climbing above 50–80%. And where do most of these failures happen? Right here, during the pre-trip. An analysis from New Jersey, often quoted by examiners, found that a jaw-dropping 80% of applicants fail their first attempt statewide. The reason is simple: the inspection has a massive number of points you can lose, and you're under the clock to identify and explain every critical part.
If You Don't Say It, You Didn't Check It
Here’s the single most important rule for the pre-trip: you have to talk the examiner through everything you're doing. They can't read your mind, so if you just point at a part, you get zero credit. You have to verbalize every single step, clearly and with confidence.
Think of yourself as a tour guide for your truck. As you touch a component, name it, explain what you're checking for, and say why it's a safety issue if it's broken. This simple act proves you actually know what you're looking at and builds the examiner's trust in you right from the start.
Pro Tip: Don't just list off parts. Use the "touch, say, explain" method. Instead of just pointing and saying "alternator," you should touch it and say, "My alternator is properly mounted and secure, all the wires are connected and not frayed, and the belt is not cracked or worn and has proper tension."
Follow a Path, Every Single Time
Walking around the truck randomly is a guaranteed way to forget something important. You’ll look flustered and disorganized. The key is to have a system—a consistent, repeatable routine that you follow the exact same way every time you practice.
Most pros follow a logical path around the vehicle. A rock-solid sequence looks something like this:
- Under the Hood: Pop the hood and start there. Go through all your fluids—oil, coolant, power steering—and then inspect every belt and hose for cracks or leaks. Check that everything is securely mounted.
- Driver's Side First: Start at the front driver's side and work your way back. Hit the steering system, suspension, tires, rims, and brakes on every axle.
- The Coupling System (Class A): This is a non-negotiable, critical checkpoint. You must thoroughly inspect the fifth wheel, apron, kingpin, and all your air and electrical lines.
- Finish the Loop: Keep that flow going. Continue around the back of the trailer and then up the passenger's side, checking every component with the same detail you did on the driver's side.
If you need a detailed checklist to nail down your routine, our complete guide to the pre-trip inspection breaks down every single component.
Master the In-Cab and Air Brake Test
Once you're done outside, the inspection moves into the cab. This part is just as critical, and there are several "instant fail" items you can't afford to miss.
Your in-cab check has to cover all the safety equipment: fire extinguisher, spare fuses, and reflective triangles. You'll need to confirm the windshield and mirrors are clean and undamaged, and then test your heater/defroster, wipers, and horn. It's also useful to know how to handle minor issues; for example, knowing how to replace a damaged side mirror demonstrates practical, real-world knowledge that keeps a truck safe and legal.
The grand finale inside the cab is the three-part air brake test. For many, this is the most nerve-wracking part of the entire pre-trip. It has to be performed perfectly and in the correct order. You must show the examiner you can check for air leaks, test the low-air warning system, and confirm the spring brakes pop out as they should.
The three phases you have to nail are:
- Applied Leakage Test: Applying the brake and checking that you don't lose too much air pressure.
- Low Air Warning Test: Fanning the brakes to confirm the warning buzzer and light come on before pressure gets too low.
- Spring Brake Test: Continuing to fan the brakes to confirm the parking brake valve pops out, engaging the spring brakes.
Practice this sequence until you can do it in your sleep. Nailing the air brake test shows the examiner you’re a competent, well-trained driver and sets a positive tone for the rest of your exam.
Execute Flawless Backing Maneuvers
Let's be honest: backing a 53-foot trailer into a tight spot is where the rubber really meets the road during your CDL test. This is the moment that separates the pros from the rookies. It's not about speed—it's about precision, patience, and proving you can control that rig with finesse.
Every backing maneuver you're asked to perform is designed to mimic a real-world scenario you'll face every single day, whether you're at a shipper's dock, a crowded truck stop, or a customer's lot. The examiner is watching to see if you understand how that trailer pivots and responds to even the slightest turn of the wheel. Remember, small, confident adjustments beat big, panicked corrections every time.
Nail the Three Core Maneuvers
Your skills test will throw a few different backing challenges at you. While the exact setup can differ from state to state, it all boils down to three fundamental movements. Each one is a unique test of your control.
- Straight-Line Backing: Sounds easy, right? But keeping that trailer perfectly straight for 100 feet without drifting is a true test of subtle steering.
- Offset Backing: This one has you moving the entire rig into an adjacent lane, either left or right, while keeping everything parallel. Think of it as a lane change in reverse.
- Alley Dock: This is the one that gives most students heartburn. You’ll typically start at a 90-degree angle to a marked "dock" and have to maneuver the trailer cleanly into the space.
Here’s a piece of advice I give every student: the setup is 90% of the battle. If you start from a bad position, you're fighting an uphill battle the whole way. Take that extra moment to get aligned before you even think about putting it in reverse.
The secret to good backing isn't just watching your mirrors. It's about anticipating where the trailer is headed and making tiny corrections before it gets off track. If you find yourself cranking the steering wheel more than a quarter turn, you're probably overcorrecting.
Backing successfully is all about mastering the fundamentals. Here's a quick look at the core maneuvers and what you need to focus on for each.
| Maneuver | Primary Goal | Pro Tip for Success |
|---|---|---|
| Straight-Line Backing | Maintain a perfectly straight path for about 100 feet without crossing boundary lines. | Focus on the "tandem slide"—the very back of your trailer. Make tiny steering adjustments to keep it centered in your mirrors. |
| Offset Backing | Move the entire rig laterally into an adjacent lane, keeping the tractor and trailer parallel. | Start your turn early but gently. Once the trailer starts to enter the new lane, immediately begin to follow it with the tractor to straighten out. |
| Alley Dock (90-Degree) | Back the trailer into a space perpendicular to your starting position, like a loading dock. | Get your trailer's tandems past the opening of the "dock" before starting your turn. This creates the pivot point you need for a sharp, clean entry. |
Mastering these isn't about memorizing steps; it's about developing a feel for the truck and trailer and how they move as one unit.
Using Your Mirrors and Reference Points
During the backing test, your mirrors are everything. You need to be in a constant state of scanning—left mirror, right mirror, back and forth. Never fixate on just one. This constant movement gives you the complete picture of your trailer's relationship to the lines and cones around you.
Here’s a trick that helps countless new drivers: the bottom of the steering wheel is your best friend. Whichever way you push the bottom of the wheel, that's the direction the rear of your trailer will go. Trailer drifting right? Push the bottom of the wheel to the left. It’s a simple mental shortcut that cuts through the confusion when the pressure is on.
To really dial in your precision, start identifying reference points. This could be a specific rivet on the trailer, the edge of a mudflap, or the landing gear. Learn to align those points with the cones or painted lines on the ground. It gives you a clear visual cue for when to turn, when to straighten out, and when to stop. Practice is the only way to get this down, which is why finding a safe, open lot to hone these skills is so important.
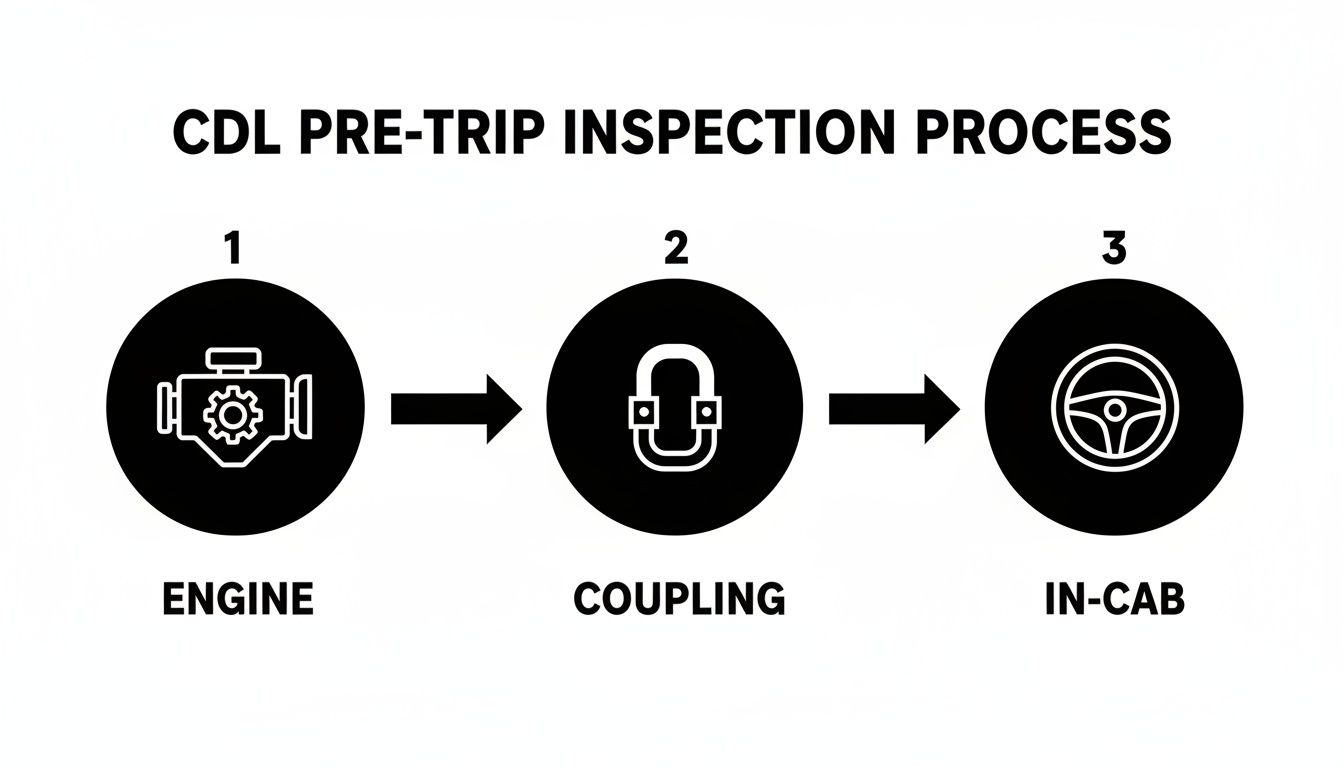
Just as backing has its techniques, the pre-trip inspection has a logical flow. Following a sequence like the one above—Engine, Coupling, then In-Cab—ensures you're thorough and don't miss a thing.
Embrace the G.O.A.L. Strategy
Examiners want to see safe, professional habits, and nothing says "professional" like G.O.A.L.—Get Out And Look. If you’re ever unsure about your position or think you're getting too close to a cone, stop the truck. Put it in neutral, set the brakes, and hop out for a quick look.
You’re allowed a certain number of free pull-ups and G.O.A.L. checks without losing points. Using one is always, always better than hitting a cone or crossing a boundary, which could be an automatic fail. A quick look confirms your spacing, calms your nerves, and lets you plan your next move with confidence. It proves to the examiner that you put safety above ego, and that’s exactly the kind of driver they want to pass.
Navigate the On-Road Driving Test with Confidence
Alright, you’ve aced the backing maneuvers. Now comes the real deal: the on-road driving portion of your CDL test. This is where you prove you can handle a big rig in the unpredictable world of public roads and traffic.
The examiner isn’t looking for a speed demon. They want to see a calm, professional driver who is constantly scanning, anticipating what’s next, and maintaining absolute control of their vehicle. Think of them as your first dispatcher—they want to know you’re safe.
Your every move, from handling a simple turn to managing your space at an intersection, is being watched. How you manage your speed and following distance, in particular, speaks volumes about your professionalism. Nail these, and you're well on your way.

Mastering Turns and Lane Changes
Turning a semi isn't like turning a car, and your examiner knows it. They’ll be watching closely to see how you manage off-tracking and tail swing.
- Wide Right Turns: The classic rookie mistake is hopping a curb—that's an automatic fail in most places. To avoid it, you need to pull straight into the intersection just enough for your trailer tires to clear the corner. Your right-side mirror is your best friend here; keep your eyes on it throughout the entire turn.
- Left Turns: For left turns, the goal is to stay in your lane and not cut into anyone else's space. You need to pull into the correct lane (usually the far-left one) and finish the turn in the corresponding lane on the new street. No drifting.
Changing lanes has to be a smooth, deliberate process. Show the examiner you’re in control by checking your mirrors, signaling well in advance, and holding your speed as you move over. Any sudden jerks or forgotten signals are easy ways to lose points.
Navigating Intersections and Special Crossings
Intersections are danger zones, and they demand 100% of your attention. Examiners expect to see your head on a swivel. Look left, right, then left again before you even think about pulling out from a stop. Don’t forget to check your mirrors constantly to track what’s happening behind and beside you.
Certain crossings have their own set of rules:
- Railroad Crossings: You have to know the procedure for your vehicle class. For most big trucks, this means slowing way down, looking and listening for trains, and making absolutely sure you have enough room on the other side to clear the tracks completely before you start across.
- Bridges and Overpasses: Keep an eye out for posted height and weight limits. It’s a great idea to verbalize what you see. Saying something like, "Okay, clearance is 14'6", my truck is 13'6", we're good," shows the examiner you’re not just driving—you’re thinking.
Pro Tip: The examiner wants to see a defensive driver, not a reactive one. Look way down the road. Anticipate that light changing, spot the slowing traffic ahead, and start adjusting your speed and position early.
Maintaining Speed and Safe Following Distance
Managing your speed isn't about driving slow; it's about driving the right speed for the conditions. Never, ever go over the posted limit. But crawling along when traffic is flowing normally can also be marked as a mistake.
A safe following distance is non-negotiable. This is one of the biggest things they watch for.
The rule of thumb is to maintain at least one second of following distance for every 10 feet of your vehicle's length. If you’re going over 40 mph, add another second. And if the weather is bad? Double it. If you're tailgating, the examiner will notice immediately. It’s a massive red flag.
These critical habits are built through repetition. A solid CDL training program will drill these skills into you until they become pure muscle memory.
Remember, where you take your test matters. Some states are notoriously tougher than others. Industry data often points to Washington, Massachusetts, and Illinois as some of the most challenging states, with Washington frequently topping the list. Why? Examiners there score drivers across 19 different maneuver elements, including tricky skills like hill parking and reverse-around-corner that trip up many new drivers.
Common Mistakes That Lead to Failure
Knowing where other drivers go wrong is one of the smartest ways to prepare for your own test. I've seen plenty of skilled drivers fail their CDL road test, and it's rarely because they don't know how to handle a truck. It’s almost always due to simple, preventable mistakes that either rack up too many points or trigger an automatic failure.
Let's get one thing straight: the test isn't just about avoiding a catastrophe. While hitting a curb or blowing through a stop sign are obvious deal-breakers, it's often the slow drip of small errors that sinks an otherwise decent run. Getting a handle on these common slip-ups before you're in the hot seat is half the battle.
Small Errors That Add Up Fast
These are the silent test-killers. Examiners are watching for patterns, and these little infractions scream "inexperienced" or "unsafe" even if you don't do anything drastically wrong.
- Forgetting Your Mirrors: Your head needs to be on a swivel, constantly. If you aren't checking your mirrors every 5-8 seconds, the examiner will assume you're clueless about the massive vehicle you're piloting. They can't read your mind, so make your head turns obvious.
- Coasting with the Clutch In: Never, ever coast. Riding the clutch or shifting into neutral while rolling is a huge red flag. It tells the examiner you don't understand how to maintain control of the rig, as you're giving up your ability to accelerate away from trouble.
- Poor Speed Control: This goes both ways. Speeding is an obvious no-no, but driving excessively slow and holding up traffic is also a problem. You need to demonstrate you can safely keep pace with the flow of traffic.
- Sloppy Lane Positioning: Hugging the shoulder line, drifting over the center, or cutting corners too tight—these are easy points to lose. You have to prove you know exactly where your tractor and trailer are at all times. Use your mirrors to stay perfectly centered.
Here’s a pro tip that works wonders: talk your way through the test. By verbalizing what you're doing—"Checking my right mirror, clear to merge," or "I see that stale green light, I'm preparing to stop"—you're giving the examiner a live feed of your decision-making process. It proves you're not just reacting; you're thinking like a professional driver.
The Automatic "Test Over" Mistakes
Then there are the big ones. These aren't just point deductions; they are critical safety violations that will end your test immediately. There is absolutely zero wiggle room here, so burn these into your brain as things you will not do.
Your day will be over in an instant if you:
- Make Contact: This means hitting anything—a curb, a cone during your skills test, a sign post, anything.
- Break a Traffic Law: Running a stop sign (even a rolling stop), speeding, or making a turn from the wrong lane are all immediate fails.
- Cause an Accident: It doesn’t matter how minor. If you cause a collision and it’s deemed your fault, you're done.
- Force the Examiner to Intervene: If the examiner has to grab the wheel or yell "Stop!" to prevent a dangerous situation, that's it. Test over.
In the end, your mission is to show the examiner you're a safe, defensive, and constantly aware driver. Knowing how to pass the cdl road test is just as much about diligently avoiding these mistakes as it is about nailing a perfect 90-degree alley dock. Focus on being smooth, deliberate, and aware, and you'll come across as the professional you're training to be.
What to Do If You Need to Retest
Failing your CDL road test stings, there’s no way around it. But trust me, it’s not the end of the road. Plenty of seasoned drivers didn't pass on their first try. The key is to see this as a diagnostic test, not a defeat. The examiner just handed you a personalized list of exactly what you need to master.
Before you even leave the testing site, talk to your examiner. Don't just settle for a vague "you failed the backing." Ask for the specifics. Did you take too many pull-ups on the alley dock? Did a tire kiss a cone on the offset back? Maybe you hesitated too long at an intersection or missed a mirror check during a turn. This feedback is pure gold—it's your roadmap for the next attempt.
Most states make you wait a few days before you can try again, so put that time to good use. Don't just keep practicing the things you're already comfortable with. Instead, dedicate 80% of your practice time to fixing what went wrong. If the in-cab air brake test got you flustered, go through the entire sequence until it becomes second nature.
Turning Feedback into Action
Your next shot at the test needs to be strategic. It's not just about doing it again; it's about doing it right. Figure out why you made the mistakes. Was it nerves? A gap in your knowledge? Or just a bad habit you didn't realize you had? Getting to the root cause is the only way to fix it for good.
- Skill-Based Slips: If you struggled with a specific maneuver, like making a tight right turn without climbing the curb, get back to an empty lot. Set up some cones and run that scenario over and over until it feels smooth and automatic.
- Knowledge Gaps: Fumbled a section of the pre-trip inspection? It's time to hit your study materials hard. Recite your script out loud, explaining what you're checking and why, until you sound like you know the truck inside and out.
- Test-Day Nerves: Sometimes, the pressure is the real problem. You know the material, but you freeze up. Ask an instructor or even a friend to run mock tests with you. Getting used to someone watching and evaluating you can make a huge difference on the actual test day.
Think of a failed test as the most expensive—and valuable—lesson you'll get. It gave you a perfect blueprint of your weaknesses. Focus your energy there, and you won't just be ready to retake the test. You'll be ready to pass it.
Know the Retest Rules
Passing quickly means knowing the local retesting rules. Most states allow you to take the exam up to three times on one application, and the first retest might not even have an extra fee. But there are always waiting periods. You might have to wait a few days after your first attempt, but that can jump to weeks after a second or third.
Fail too many times, and you could be looking at new application fees or even starting the permit process from scratch. A first-time pass can have you on the road in as little as four to six weeks. Multiple retests, on the other hand, can set your career back by months.
Got Questions About the CDL Road Test? We've Got Answers.
Even after weeks of practice, a few nagging questions always seem to pop up as test day gets closer. It’s completely normal. Let’s clear the air and tackle some of the most common things drivers wonder about before the big day.
How Long Does the CDL Road Test Take?
Plan on being at the testing center for a good while. Most tests run anywhere from 90 minutes to two hours from start to finish.
This isn't just driving time. That block includes the full pre-trip inspection, all the backing skills tests, and the actual on-road driving portion. The pre-trip inspection itself can easily eat up 30-45 minutes, so don't expect to be in and out quickly.
What Is an Automatic Failure on the CDL Test?
Some mistakes are so serious they'll end your test on the spot. These are the absolute deal-breakers, the critical errors that result in an immediate fail. There's no room for error here.
- Striking an object: Hitting a cone, a barrel, or clipping a curb is an instant fail.
- Breaking a traffic law: Running a stop sign, speeding, or failing to yield are non-negotiable.
- Causing an accident: If you’re involved in any kind of collision that’s deemed your fault, the test is over.
- Examiner intervention: This is a big one. If the examiner has to grab the wheel or yell "STOP!" to prevent a dangerous situation, you're done.
Can I Use My Own Truck for the Test?
Yes, you absolutely can bring your own truck. However, it’s not as simple as just showing up. The truck you bring must match the class of license you're testing for. So, if you're going for your Class A, you need to test in a Class A vehicle.
On top of that, the examiner will give your truck a quick safety check before anything starts. It needs to be properly registered, insured, and in safe, road-worthy condition.
A piece of advice I give every student: practice in the exact truck you plan to test in. Every rig has its own quirks—a different turning radius, unique blind spots, and specific reference points. Knowing your equipment inside and out is a massive advantage.
Of course, before you can even worry about the road test, you have to nail the written exams. If you haven't already, make sure to review a solid guide on the CDL general knowledge test to ensure you've got that foundational knowledge locked down.
Ready to stop worrying and start driving? At Patriot CDL, our expert instructors provide the hands-on training you need to master the pre-trip inspection, backing maneuvers, and on-road skills with confidence. Visit us at https://patriotcdl.com to learn about our accelerated programs.