


A commercial truck can look ready from twenty feet away and still give an important warning at ground level or under the hood. A fresh spot, a reservoir below its marked range, or a wet hose connection can be the first clue that a system needs attention. A CDL student's goal is to inspect repeatably, describe observations accurately, and stop the departure process when the vehicle's condition is uncertain—not diagnose or repair the truck.
This guide follows the Pennsylvania Commercial Driver's Manual approach: look under the vehicle, inspect critical fluid levels with the engine off, and check hoses and lines for condition and leaks. Because safe ranges and checking methods are vehicle-specific, the operator's manual, labels, fleet procedure, and qualified maintenance personnel control those details.
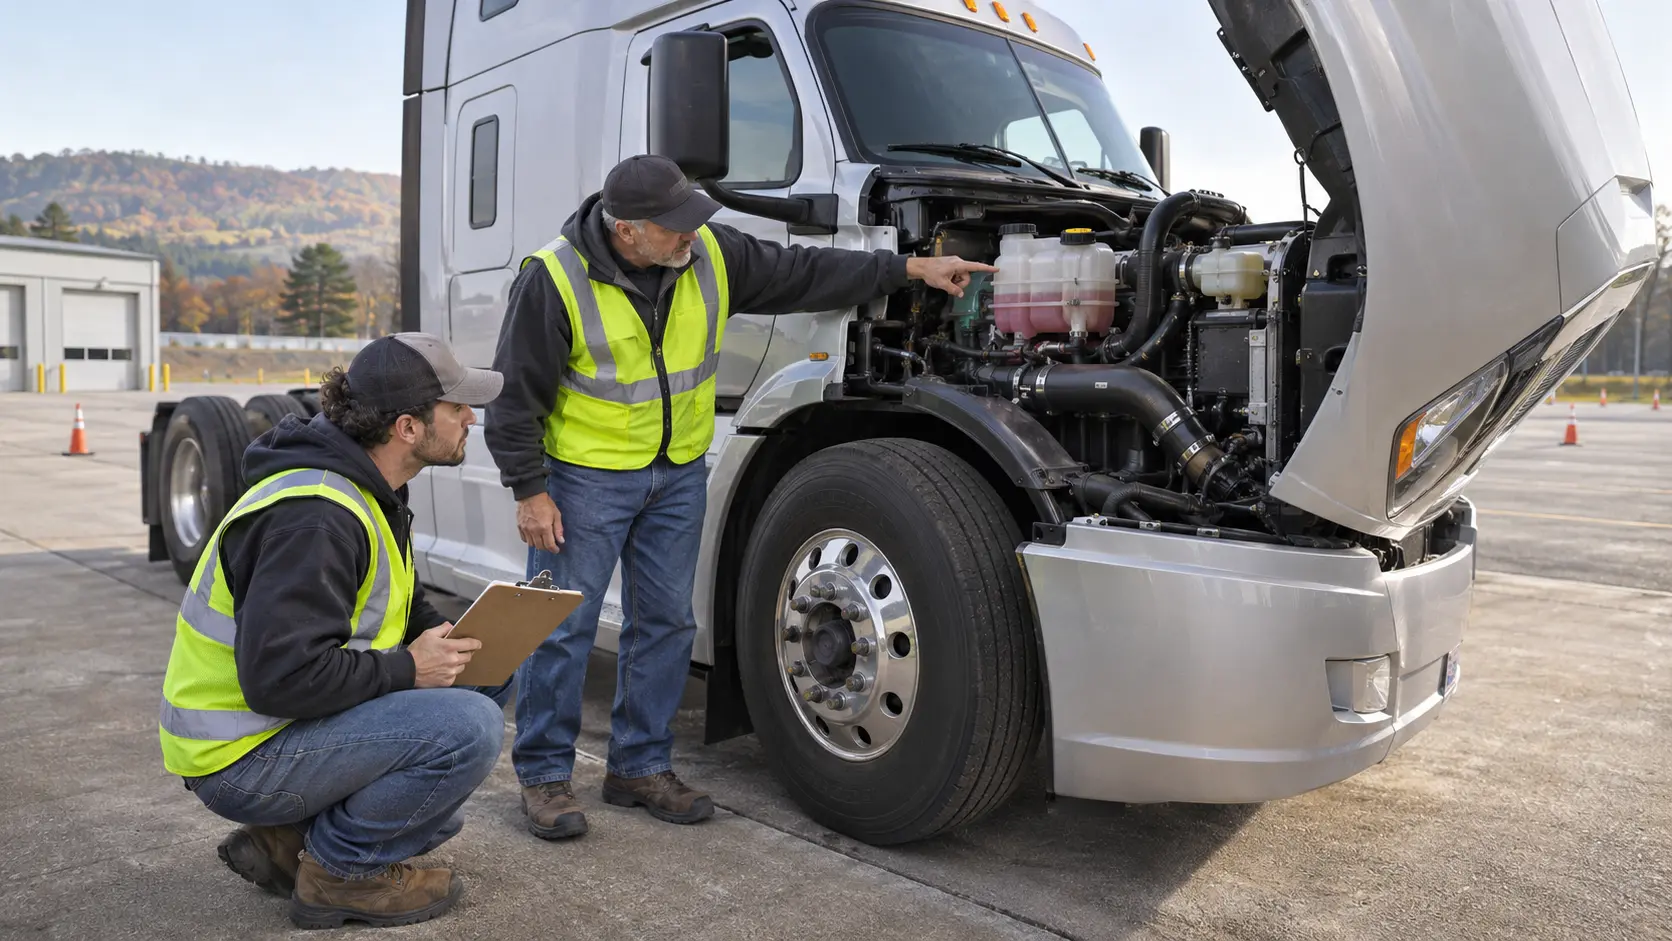
What this inspection is designed to accomplish
A fluid inspection answers two questions. Is the level shown by the correct dipstick, reservoir, or sight glass within the range specified for this vehicle and its present conditions? Is fluid or air escaping from a component, hose, line, fitting, tank, or housing? A level check and a leak scan are complementary; either one alone can miss an emerging problem.
The Federal Motor Carrier Safety Regulations place the departure decision in a broader safety context. Under , before driving, a driver must be satisfied that the motor vehicle is in safe operating condition and must review the last driver vehicle inspection report when the rule requires it. That federal duty does not turn a new driver into a mechanic. It does mean that an unexplained leak or an out-of-range level should not be dismissed just because the truck still starts.
Observation, identification, and diagnosis are not the same
A driver can report facts such as location, color, odor noticed without deliberately inhaling fumes, amount, whether a surface is wet or actively dripping, and whether the spot changes during the inspection. Identifying the exact failed seal or internal component is maintenance work. Use careful language: “amber fluid is actively dripping below the right side of the engine” is more useful than “the rear main seal is bad” when that cause has not been confirmed.
Rules, test expectations, and vehicle-specific instructions
PennDOT's current modernized vehicle-inspection material lists engine oil, coolant, power-steering fluid, and brake fluid for hydraulic-brake vehicles as critical fluid levels. It directs the applicant to identify the relevant dipstick or sight glass and to explain that the level should be between the applicable add and full marks. The same material tells applicants to look for puddles, dripping fluid around and under the engine and transmission, and leaks or damage at hoses and air lines. PennDOT also states a simple but essential caution: never remove a radiator cap when the engine is hot.
Those are inspection expectations, not permission to invent one universal procedure. Some engines require an oil check after a specified drain-back time. Some automatic transmissions are checked warm and running; others use electronic level checks or different conditions. Reservoir markings may be labeled “cold,” “hot,” “min,” “max,” “add,” or “full.” A student should learn the exact truck used in training and confirm the method with the operator's manual or instructor before touching a cap or pulling a dipstick.
Specific federal rules can apply to the system being inspected
For example, requires brake tubing and hose connections for air, vacuum, or hydraulic brake systems to be installed so the attachment is free of leaks and conditions that could harm brake performance. Fuel tanks are subject to construction and performance requirements in . These provisions reinforce why a driver should treat brake or fuel leakage as a safety matter, but they do not provide a do-it-yourself roadside repair procedure.
Set up the vehicle before opening the hood
Begin before touching the truck. Park on a firm, reasonably level surface in an authorized inspection area. Apply the parking brakes, place the transmission in neutral or park as appropriate, and follow the vehicle or employer procedure for wheel chocks. Shut the engine down for engine-off checks, take the key as required, and allow hot components to cool. If the vehicle uses a tilting cab, raised hood, or access panel, secure it according to the manufacturer's procedure and keep loose objects from falling into the compartment.
Approach slowly and preserve the evidence
As you walk toward the vehicle, look underneath before walking through a spot. Note the location of any puddle relative to the engine, transmission, axles, fuel tanks, and trailer. Do not immediately wipe a wet component or move the truck over the stain. The pattern may help a qualified technician understand where the leak begins. At the same time, remember that a puddle's position is only a clue: airflow, gravity, crossmembers, shields, and hoses can carry fluid away from its source.
Wear appropriate protective equipment and keep hands, clothing, jewelry, and tools away from fans, belts, pulleys, hot exhaust parts, and electrical terminals. Do not crawl under an unsupported vehicle; a pre-trip view is not a maintenance inspection.
Inspect each critical fluid level correctly
Engine oil
Identify the engine-oil dipstick or approved electronic level display. If a dipstick is used, follow the vehicle procedure for engine temperature and drain-back time. Remove it safely, wipe it with a clean lint-free material, fully reseat it, remove it again, and read the level against the marked range when that is the manufacturer's method. Confirm that the reading is within the applicable safe range. Also inspect the dipstick tube, filler cap area, oil pan area visible from above and below, filter housing, and nearby hoses or fittings for wetness or active leakage.
Do not add an unverified oil or assume that overfill is harmless. Record the result and use the approved service path if the level is outside the specified range.
Cooling system
Inspect the translucent surge tank, sight glass, or other approved level indicator identified for the vehicle. Compare the level with the correct hot or cold marks. Look at the reservoir, cap area, radiator and heater hoses that are safely visible, clamps, radiator area, and water-pump region for dried residue, staining, wetness, swelling, abrasion, or drips. Coolant can leave a colored or chalky trail after the liquid portion evaporates, so a dry stain still deserves attention.
Never remove a radiator or pressurized coolant cap while the engine is hot. Pressurized hot coolant can cause severe burns. If the correct level cannot be confirmed without opening a hot system, stop and wait for the approved condition or ask qualified personnel to inspect it. “I could not safely verify the level” is a responsible report, not a failed guess.
Power-steering fluid
If the vehicle has a hydraulic power-steering reservoir, identify the specified dipstick, sight glass, or reservoir markings and check it under the required conditions. Inspect the reservoir mounting, cap, pump area, visible hoses, and fittings for damage or wetness. Hoses should not be cut, abraded, bulging, pinched, or rubbing against hot or moving parts. Do not identify a fluid by color alone.
Hydraulic brake fluid
Brake-fluid level belongs in this routine only when the vehicle uses a hydraulic brake system and has an accessible reservoir intended for operator inspection. Identify the reservoir and verify the level by the specified indicator without introducing dirt. A vehicle with full air brakes does not use a hydraulic master-cylinder reservoir for the service brakes. Students should name the system actually installed rather than recite a component their test vehicle does not have.
Any suspected brake-fluid leak, damaged brake hose, or unexplained loss calls for prompt reporting and a departure hold until an authorized person determines the vehicle is safe. For air-brake vehicles, fluid inspection does not replace the full air-brake checks. Review a separate air-brake test memory routine for pressure buildup, warning devices, leakage-rate tests, and brake application steps.
Washer fluid, transmission fluid, and other reservoirs
PennDOT's general inspection method includes windshield-washer fluid and notes that automatic-transmission fluid may require the engine to be running. Treat those items according to the vehicle-specific instructions. Washer fluid supports clear visibility, but the cap should still be secured and the reservoir free of leaks. Transmission checks vary widely; never start the engine or place the transmission in a gear merely because a generic checklist says “check fluid.” Use the actual procedure and a safe, controlled location.
Other trucks may have clutch, auxiliary hydraulic, diesel exhaust fluid, hub, or lift-system reservoirs. Include them when the operator's materials or fleet checklist assigns them to the driver; do not open sealed systems or improvise a fill.
Use a ground-to-source leak scan
Start at the ground
Scan from the front of the vehicle toward the rear and from side to side. Look for puddles, drops, sprayed patterns, and damp tracks. Water from air-conditioning condensation may be normal under some conditions, but do not label a clear puddle “just water” without confirming its location and the vehicle's operation. Fuel, coolant, oil, steering fluid, hydraulic fluid, battery electrolyte, and washer fluid each create different hazards, and appearance alone may not identify them reliably.
Trace upward without touching an unknown substance
Use a light from a safe position and follow wetness upward. The highest fresh wet point often gives a better clue than the lowest drip point, but guards and airflow can interrupt the trail. Inspect connections, hose ends, clamps, tank seams, caps, drain plugs, filter housings, and the underside of components that are safely visible. Avoid skin contact, do not taste or deliberately smell fluids, and keep ignition sources away from a suspected fuel leak.
Separate active leaks from residue, then report both
An active leak forms a drop, runs, sprays, or enlarges a wet area. Seepage may leave a damp film, while old residue may be dry or dusty. Describe what is present and whether it changes. A previous repair can leave residue, so the last inspection report and a current visual check work together.
Match the observation to the right action
| Observation | What to verify | Safe next action |
|---|---|---|
| No puddle; all required levels within the vehicle's marked range | Caps secured, hoses sound, no fresh wetness, check conditions correct | Record or verbalize the result and continue the inspection |
| Level appears low but no visible leak | Correct reservoir, surface level, engine temperature, dipstick seating, and check procedure | Do not guess or substitute fluid; report and obtain authorized guidance before departure |
| Dried residue or damp film with no forming drop | Location, extent, prior report, and whether the area changes during the check | Document and refer through the fleet's defect process; do not erase the evidence first |
| Active drip, growing puddle, spray pattern, or wet brake component | Safe location and observable facts only; avoid contact and ignition sources | Hold the vehicle, warn appropriate personnel, and request qualified inspection |
| Suspected fuel leak or strong fuel evidence | Tank, cap, visible lines, and spill area from a safe distance | Keep ignition sources away, do not operate the vehicle, and follow emergency/fleet procedure |
| Hot cooling system with level not safely visible | Whether a sight glass or cold-level indicator can be read without opening the system | Do not remove the cap; wait for the approved condition or refer to maintenance |
| Unknown liquid | Location, amount, color, consistency, and whether it is changing—without touching it | Treat it as unresolved, mark the location, and ask qualified personnel to identify it |
The table does not replace the carrier's program or a mechanic's determination. Safety-critical uncertainty calls for stopping and reporting, not an improvised repair.
Worked training scenario: a low reservoir and an old stain
During a supervised morning pre-trip, Maya approaches a parked tractor on level pavement. The parking brakes are applied, the transmission is in neutral, and the engine has been off overnight. She sees a small dark stain on the pavement behind the right-front wheel, but the stain is dry and dusty. She notes its location before opening the hood.
Using the truck's labeled service points and her instructor's procedure, Maya checks the engine-oil dipstick. The level is within the marked range. The coolant level is visible between the cold marks, and the cap remains closed. At the power-steering reservoir, the level appears just below the lower cold mark. A hose below the reservoir has an oily film, but no drop forms while she watches.
Maya does not conclude that the hose caused the pavement stain, and she does not add a bottle of unknown fluid. She reports: “Power-steering fluid appears below the lower cold mark with the vehicle level and the engine cold. There is an oily film on the lower hose near the reservoir, no active drop observed, and an older dry stain on the pavement behind the right-front wheel.” She compares the last inspection report with her instructor and places the departure on hold for maintenance review.
A technician later confirms the correct fluid and inspection method, identifies a loose fitting, performs the authorized repair, cleans the area, fills the system correctly, and documents the work. Maya repeats the visual check after the repair and confirms only what she can observe. The lesson is not “tighten the fitting.” The lesson is that a structured observation preserved useful evidence, avoided contamination, and put the safety decision in the right hands.
Build a repeatable CDL explanation
A strong test explanation links the item, condition, and safety purpose. Instead of saying only “oil is good,” point to the correct indicator and explain: “I would check the engine-oil level under the manufacturer's required conditions and verify it is within the marked safe range. I would also inspect the dipstick tube, filler area, and visible engine surfaces for leaks.” That wording demonstrates a method without claiming a reading you have not taken.
Use the same five-part sequence
- Identify: name the fluid, reservoir, dipstick, sight glass, hose, or line actually installed.
- Set the condition: state whether the engine must be off, cold, level, or checked under another approved condition.
- Read: compare the indicator with the vehicle's applicable marks or specification.
- Scan: inspect the container, cap, hoses, fittings, nearby components, and ground for evidence of leakage or damage.
- Act: continue only when the result is acceptable; otherwise report and hold the vehicle for an authorized decision.
Practice this sequence alongside related systems instead of treating it as isolated memorization. The battery and electrical inspection plan helps with safe under-hood boundaries, while the fuel and exhaust inspection plan develops the tank, line, mounting, and heat-source checks that matter when fuel evidence is present.
Practical fluid-and-leak checklist
- Park in an authorized, firm, reasonably level inspection area.
- Apply the parking brakes, set the transmission appropriately, and follow the chocking procedure.
- Look beneath the vehicle for puddles, drops, stains, and spray patterns before moving it.
- Review the last inspection report when required and compare unresolved items with current observations.
- Secure the hood, cab, or access panel using the vehicle procedure.
- Keep clear of hot, moving, electrical, and pressurized hazards.
- Check engine oil using the correct temperature and drain-back conditions.
- Check coolant through the approved reservoir or sight indicator; never open a hot pressurized cap.
- Check power-steering fluid if the vehicle has a driver-serviceable hydraulic reservoir.
- Check brake fluid only on a hydraulic-brake system with an applicable reservoir.
- Check washer, transmission, and auxiliary fluids only by their specific approved procedures.
- Inspect reservoirs, caps, hoses, fittings, tanks, and visible component surfaces for damage and wetness.
- Describe an unknown fluid by observable facts; do not touch, taste, or deliberately inhale it.
- Do not crawl under an unsupported vehicle or reach near fans, belts, pulleys, or hot exhaust parts.
- Do not add an unverified product, overfill a reservoir, or make an unauthorized repair.
- Report out-of-range levels, active leaks, wet brake parts, suspected fuel leaks, or unresolved uncertainty.
- After authorized service, repeat the relevant inspection and confirm the documentation.
Common mistakes that weaken the inspection
Reciting one generic “full” rule. Temperature, engine state, vehicle level, and markings matter. Use the correct range for the actual vehicle.
Opening a hot cooling system. The desire to prove a level never outranks the burn hazard. Use the visible indicator or wait for the approved condition.
Calling every clear puddle condensation. Location and operating conditions may support that conclusion, but an unidentified liquid remains unresolved until it is properly confirmed.
Jumping from a drip point to a failed part. Fluid travels. Report the observed location and trail; leave diagnosis to qualified personnel.
Adding fluid before finding out why it is low. Topping off can hide ongoing loss, use the wrong product, contaminate a system, or create an overfill. Follow the authorized process.
Forgetting the handoff. A verbal comment can disappear at shift change. Use the required inspection-report process and review repairs. The post-trip inspection and DVIR handoff plan explains how clear observations support the next driver and maintenance team.
Frequently asked questions
Can a CDL student add fluid when a reservoir looks low?
Only when an instructor, carrier procedure, or other authorized process directs it and the correct fluid, level, and method are confirmed. A student should first verify the checking conditions, report the reading, and look for leakage. Guessing at a product or filling past the specified mark can create another problem.
How can I tell whether a puddle under a truck is water or a vehicle fluid?
Use location, recent vehicle operation, appearance, and the approved inspection process, but do not rely on color alone or touch an unknown substance. Air-conditioning condensation may be normal, yet an unresolved puddle should be reported and identified by qualified personnel before the vehicle departs when safety is uncertain.
Should I remove the radiator cap to verify coolant level during a pre-trip?
Never remove a radiator or pressurized coolant cap when the engine is hot. Use the vehicle's reservoir, sight glass, or other approved indicator. If the level cannot be verified safely, wait for the specified condition or have qualified personnel inspect it.
Does checking fluid levels replace looking for leaks?
No. A level may still be within range while an active leak has just begun, and a low level may exist without a visible ground spot. A complete routine checks the correct level indicator and scans the ground, reservoir, caps, hoses, fittings, and safely visible components.
Official sources and next step
Use these official sources with the current operator's manual and your employer's procedures. Requirements and vehicle configurations can change, and an instructor or qualified technician should resolve any conflict or uncertainty.
Want to practice a calm, repeatable commercial-vehicle inspection with an instructor? Contact Patriot CDL at or visit us at 7800 Bristol Pike, Levittown, PA 19057.